Hoofdstuk 71Alle modifiers, per categorie, elk met parameters en een voorbeeld
Modify · Generate · Deform · Physics — alle 57 mesh-modifiers stuk voor stuk
Het zwaartepunt van Deel F: elke modifier die op een meshobject kan staan, gegroepeerd in de vier categorieën die Blender zelf gebruikt, met per modifier een praktijkalinea en de volledige instellingentabel uit de inventaris.
 RECCONCEPT00:00:00:00schoolium
Vier categorieën, één werkwijze
Blender groepeert zijn modifiers zelf in vier categorieën, zichtbaar in het Add Modifier-menu: Modify (herschrijft data zonder de vorm zelf te veranderen — normals, UV's, gewichten), Generate (voegt of verwijdert geometrie), Deform (verplaatst bestaande vertices) en Physics (simulaties). Dit hoofdstuk volgt diezelfde vier, in die volgorde, en behandelt alle 57 mesh-modifiers stuk voor stuk. De 26 Grease-Pencil-eigen modifiers (met een eigen Generate/Deform/Color-indeling) staan in hoofdstuk 76.
Elke modifier krijgt hier een korte alinea over wat hij doet en waarvoor je hem in de praktijk grijpt, gevolgd door zijn volledige instellingentabel rechtstreeks uit Blender 5.1 uitgelezen — nooit met de hand overgetypt.
 RECBLENDER 5.1 · F71-MODIFIER-TAB00:00:00:001920×1080
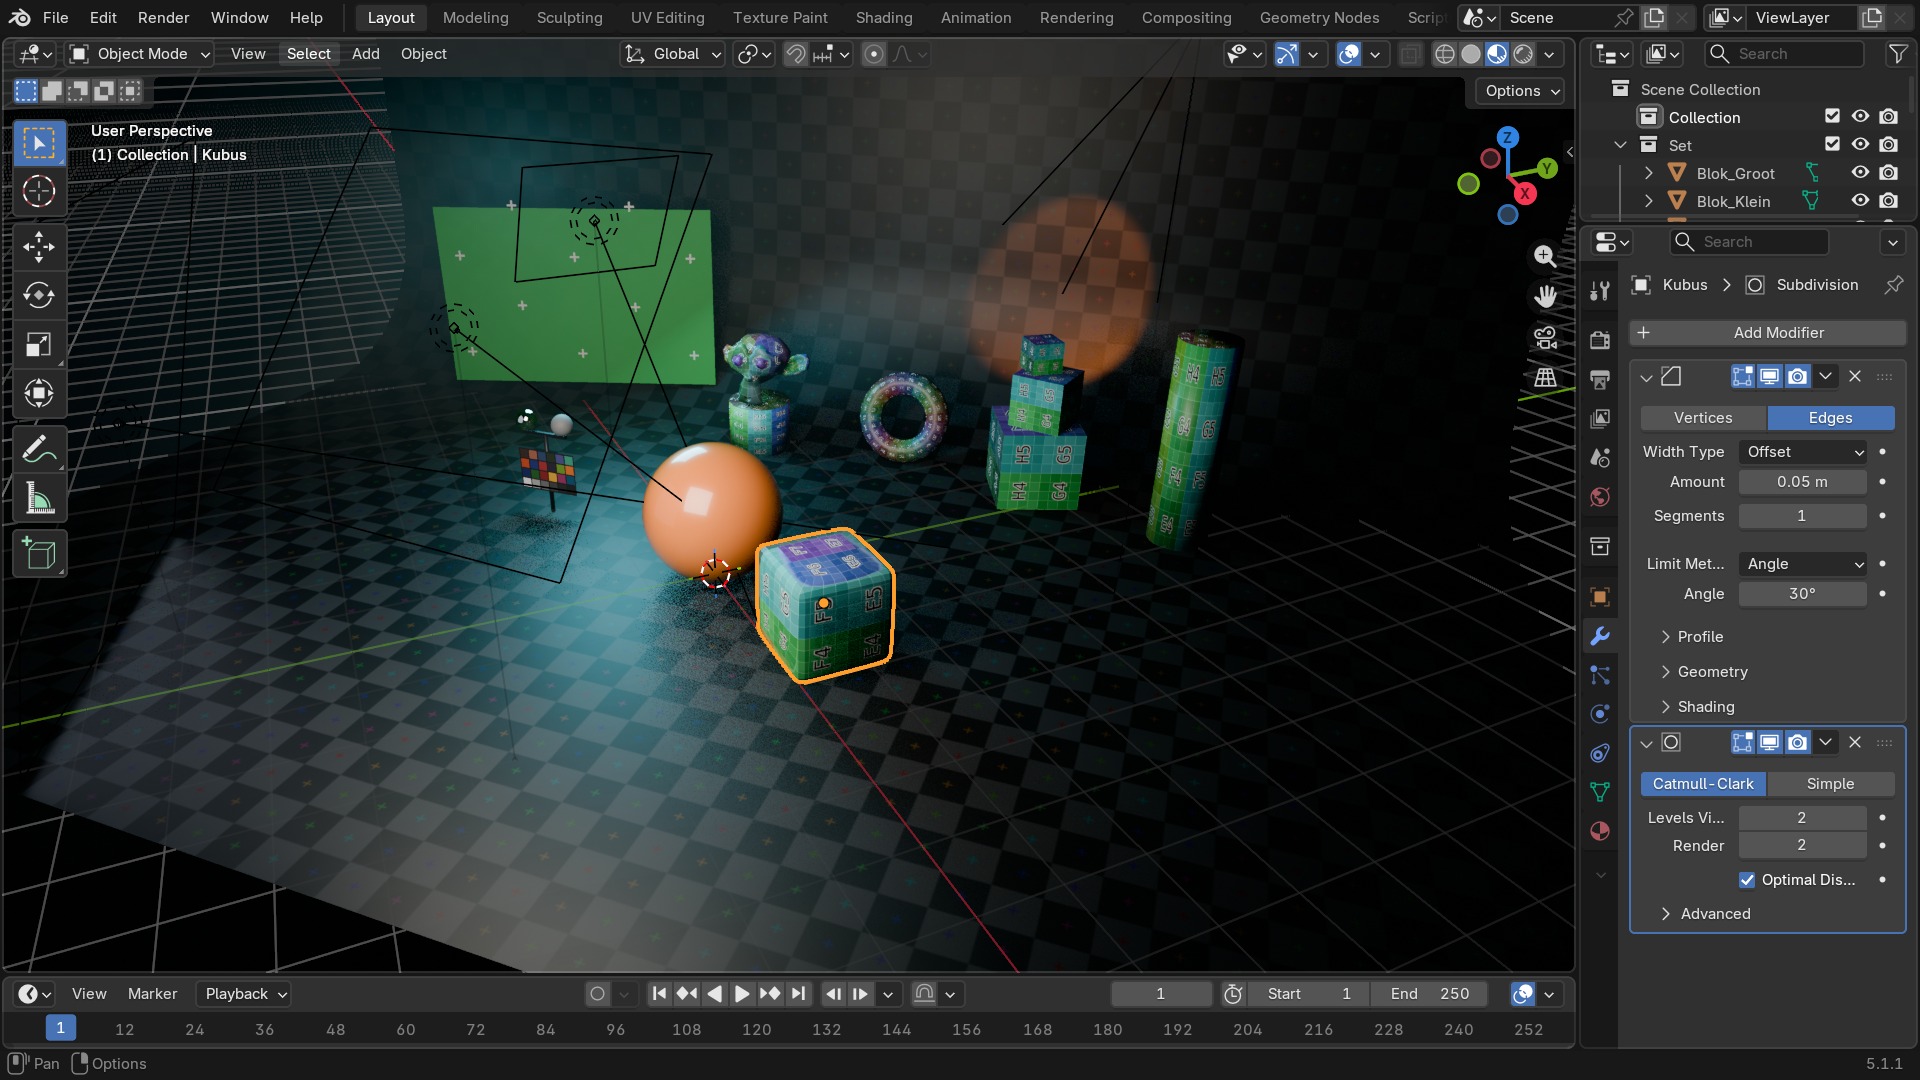
De Modifier Properties-tab
- 1Add Modifier
Het menu met Modify/Generate/Deform/Physics als kopjes.
- 2Stack-volgorde
Van boven naar onder is ook de rekenvolgorde: de eerste modifier werkt op het ruwe mesh, elke volgende op het resultaat van de vorige.
- 3Realtime / Render / Edit Mode / On Cage
Vier oogjes per modifier die apart bepalen wanneer hij zichtbaar is.
- 4Apply
Zet het resultaat definitief vast in de meshdata en verwijdert de modifier uit de stack.
Modify — data herschrijven zonder de vorm te breken
De tien Modify-modifiers raken nooit de posities van vertices zelf aan: ze herschrijven normals, UV's, vertex-kleuren of vertex-gewichten. Je gebruikt ze om data van elders over te nemen (Data Transfer, caches) of om bestaande data fijn te regelen (de Vertex Weight-familie) voor je verder gaat met Generate- of Deform-modifiers die wél de vorm veranderen.
 RECRENDER · EEVEE00:00:00:001280×720
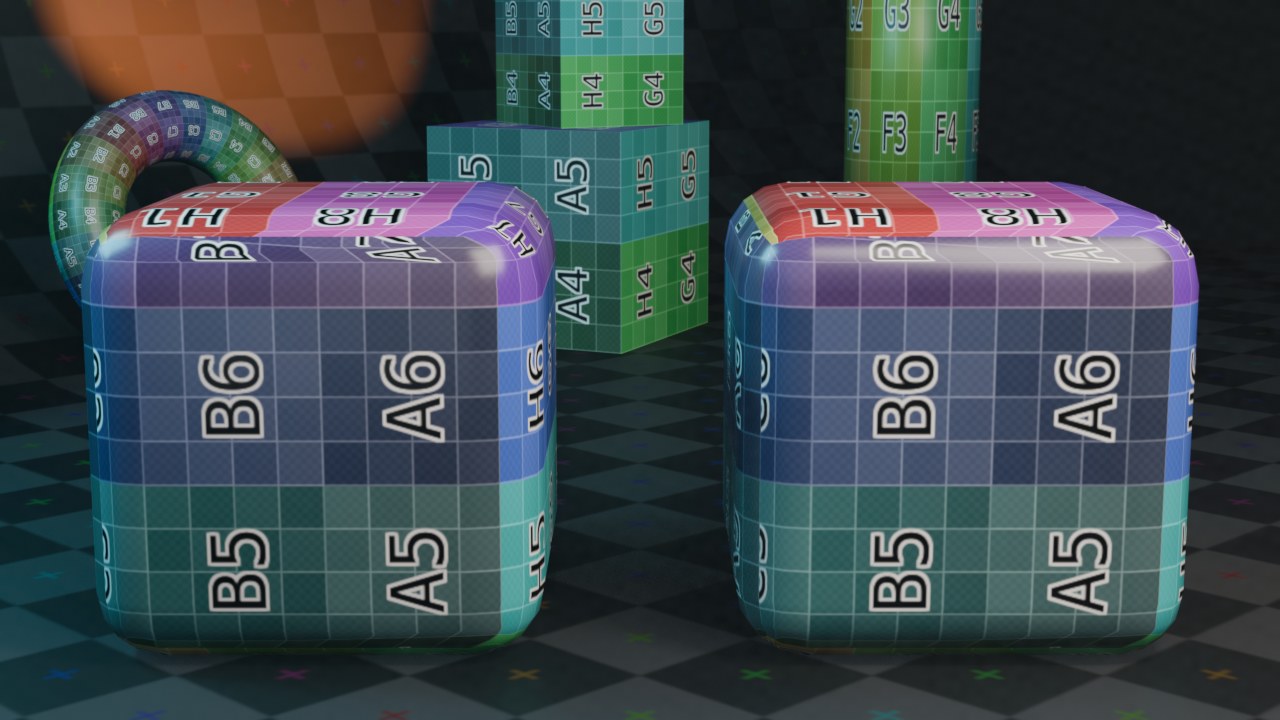
Data Transfer · Mesh Cache · Mesh Sequence Cache
Data Transfer — Kopieert data van een ander mesh naar dit mesh: vertex groups, UV-coordinaten, vertex colors, normals of materiaalindexen. Onmisbaar als je een low-poly en een high-poly versie van hetzelfde model hebt en de low-poly de gewichten of normals van de high-poly moet overnemen, of als een geanimeerd mesh de topologie van een ander mesh moet volgen zonder de vorm over te nemen.
Wat gaat er mis — Werkt alleen goed als de twee meshes ruimtelijk overlappen; staat de mapping (Nearest Face, Projected Edge...) verkeerd, dan komt de data van de verkeerde kant van het mesh terecht.
| Instelling | Type | Standaard | Bereik | Wat hij doet (tooltip uit Blender) |
|---|---|---|---|---|
| Apply on Spline | BOOLEAN | uit | – | Apply this and all preceding deformation modifiers on splines' points rather than on filled curve/surface |
| Execution Time | FLOAT | 0 | -10000 – 10000 | Time in seconds that the modifier took to evaluate. This is only set on evaluated objects. If multiple modifiers run in parallel, execution time is not a reliable metric. |
| Persistent UID | INT | 0 | -10000 – 10000 | Uniquely identifies the modifier within the modifier stack that it is part of |
| Source Object | POINTER | – | – | Object to transfer data from |
| Object Transform | BOOLEAN | aan | – | Evaluate source and destination meshes in global space |
| Vertex Data | BOOLEAN | uit | – | Enable vertex data transfer |
| Edge Data | BOOLEAN | uit | – | Enable edge data transfer |
| Face Corner Data | BOOLEAN | uit | – | Enable face corner data transfer |
| Face Data | BOOLEAN | uit | – | Enable face data transfer |
| Vertex Data Types | ENUM | Vertex Groups, Bevel Weight, Colors | Which vertex data layers to transfer | |
| Edge Data Types | ENUM | Sharp, UV Seam, Crease, Bevel Weight, Freestyle | Which edge data layers to transfer | |
| Face Corner Data Types | ENUM | Custom Normals, Colors, UVs | Which face corner data layers to transfer | |
| Poly Data Types | ENUM | Smooth, Freestyle Mark | Which face data layers to transfer | |
| Vertex Mapping | ENUM | NEAREST | Topology, Nearest Vertex, Nearest Edge Vertex, Nearest Edge Interpolated, Nearest Face Vertex, Nearest Face Interpolated, Projected Face Interpolated | Method used to map source vertices to destination ones |
| Edge Mapping | ENUM | NEAREST | Topology, Nearest Vertices, Nearest Edge, Nearest Face Edge, Projected Edge Interpolated | Method used to map source edges to destination ones |
| Face Corner Mapping | ENUM | NEAREST_POLYNOR | Topology, Nearest Corner and Best Matching Normal, Nearest Corner and Best Matching Face Normal, Nearest Corner of Nearest Face, Nearest Face Interpolated, Projected Face Interpolated | Method used to map source faces' corners to destination ones |
| Face Mapping | ENUM | NEAREST | Topology, Nearest Face, Best Normal-Matching, Projected Face Interpolated | Method used to map source faces to destination ones |
| Only Neighbor Geometry | BOOLEAN | uit | – | Source elements must be closer than given distance from destination one |
| Max Distance | FLOAT | 1 | 0 – 100 | Maximum allowed distance between source and destination element, for non-topology mappings |
| Ray Radius | FLOAT | 0 | 0 – 10 | 'Width' of rays (especially useful when raycasting against vertices or edges) |
| Islands Precision | FLOAT | 0 | 0 – 1 | Factor controlling precision of islands handling (typically, 0.1 should be enough, higher values can make things really slow) |
| Source Layers Selection | ENUM | ALL | Active Layer, All Layers, Selected Pose Bones, Deform Pose Bones | Which layers to transfer, in case of multi-layers types |
| Source Layers Selection | ENUM | ALL | Active Layer, All Layers, Selected Pose Bones, Deform Pose Bones | Which layers to transfer, in case of multi-layers types |
| Source Layers Selection | ENUM | ALL | Active Layer, All Layers, Selected Pose Bones, Deform Pose Bones | Which layers to transfer, in case of multi-layers types |
| Source Layers Selection | ENUM | ALL | Active Layer, All Layers, Selected Pose Bones, Deform Pose Bones | Which layers to transfer, in case of multi-layers types |
| Destination Layers Matching | ENUM | NAME | Active Layer, By Name, By Order | How to match source and destination layers |
| Destination Layers Matching | ENUM | NAME | Active Layer, By Name, By Order | How to match source and destination layers |
| Destination Layers Matching | ENUM | NAME | Active Layer, By Name, By Order | How to match source and destination layers |
| Destination Layers Matching | ENUM | NAME | Active Layer, By Name, By Order | How to match source and destination layers |
| Mix Mode | ENUM | REPLACE | Replace, Above Threshold, Below Threshold, Mix, Add, Subtract, Multiply | How to affect destination elements with source values |
| Mix Factor | FLOAT | 0 | 0 – 1 | Factor to use when applying data to destination (exact behavior depends on mix mode, multiplied with weights from vertex group when defined) |
| Vertex Group | STRING | – | – | Vertex group name for selecting the affected areas |
| Invert | BOOLEAN | uit | – | Invert vertex group influence |
Mesh Cache — Speelt een reeks meshvormen af uit een extern bestand (MDD of PC2), geexporteerd vanuit een andere 3D-toepassing. De vertexvolgorde moet exact overeenkomen met het huidige mesh, anders vervormt het resultaat tot onherkenbaars.
| Instelling | Type | Standaard | Bereik | Wat hij doet (tooltip uit Blender) |
|---|---|---|---|---|
| Apply on Spline | BOOLEAN | uit | – | Apply this and all preceding deformation modifiers on splines' points rather than on filled curve/surface |
| Execution Time | FLOAT | 0 | -10000 – 10000 | Time in seconds that the modifier took to evaluate. This is only set on evaluated objects. If multiple modifiers run in parallel, execution time is not a reliable metric. |
| Persistent UID | INT | 0 | -10000 – 10000 | Uniquely identifies the modifier within the modifier stack that it is part of |
| Format | ENUM | MDD | MDD, PC2 | |
| Interpolation | ENUM | LINEAR | None, Linear | |
| Time Mode | ENUM | FRAME | Frame, Time, Factor | Method to control playback time |
| Play Mode | ENUM | SCENE | Scene, Custom | |
| Deform Mode | ENUM | OVERWRITE | Overwrite, Integrate | |
| File Path | STRING | – | – | Path to external displacements file |
| Influence | FLOAT | 1 | 0 – 1 | Influence of the deformation |
| Vertex Group | STRING | – | – | Name of the Vertex Group which determines the influence of the modifier per point |
| Invert | BOOLEAN | uit | – | Invert vertex group influence |
| Forward | ENUM | POS_Y | +X, +Y, +Z, -X, -Y, -Z | |
| Up | ENUM | POS_Z | +X, +Y, +Z, -X, -Y, -Z | |
| Flip Axis | BOOLEAN | uit | – | |
| Frame Start | FLOAT | 0 | -1048574 – 1048574 | Add this to the start frame |
| Frame Scale | FLOAT | 1 | 0 – 100 | Evaluation time in seconds |
| Evaluation Frame | FLOAT | 0 | 0 – 1048574 | The frame to evaluate (starting at 0) |
| Evaluation Time | FLOAT | 0 | 0 – onbegrensd | Evaluation time in seconds |
| Evaluation Factor | FLOAT | 0 | 0 – 1 | Evaluation time in seconds |
Mesh Sequence Cache — Leest een Alembic- of USD-cache in: een reeks meshframes uit een simulatie of een andere applicatie, zonder dat Blender zelf iets berekent. Gebruikt om zware simulaties uit Houdini of een ander pakket in te laden voor rendering.
| Instelling | Type | Standaard | Bereik | Wat hij doet (tooltip uit Blender) |
|---|---|---|---|---|
| Apply on Spline | BOOLEAN | uit | – | Apply this and all preceding deformation modifiers on splines' points rather than on filled curve/surface |
| Execution Time | FLOAT | 0 | -10000 – 10000 | Time in seconds that the modifier took to evaluate. This is only set on evaluated objects. If multiple modifiers run in parallel, execution time is not a reliable metric. |
| Persistent UID | INT | 0 | -10000 – 10000 | Uniquely identifies the modifier within the modifier stack that it is part of |
| Cache File | POINTER | – | – | |
| Object Path | STRING | – | – | Path to the object in the Alembic archive used to lookup geometric data |
| Read Data | ENUM | Vertex, Faces, UV, Color, Attributes | Data to read from the cache | |
| Vertex Interpolation | BOOLEAN | aan | – | Allow interpolation of vertex positions |
| Velocity Scale | FLOAT | 1 | 0 – onbegrensd | Multiplier used to control the magnitude of the velocity vectors for time effects |
Normal Edit · UV Project · UV Warp
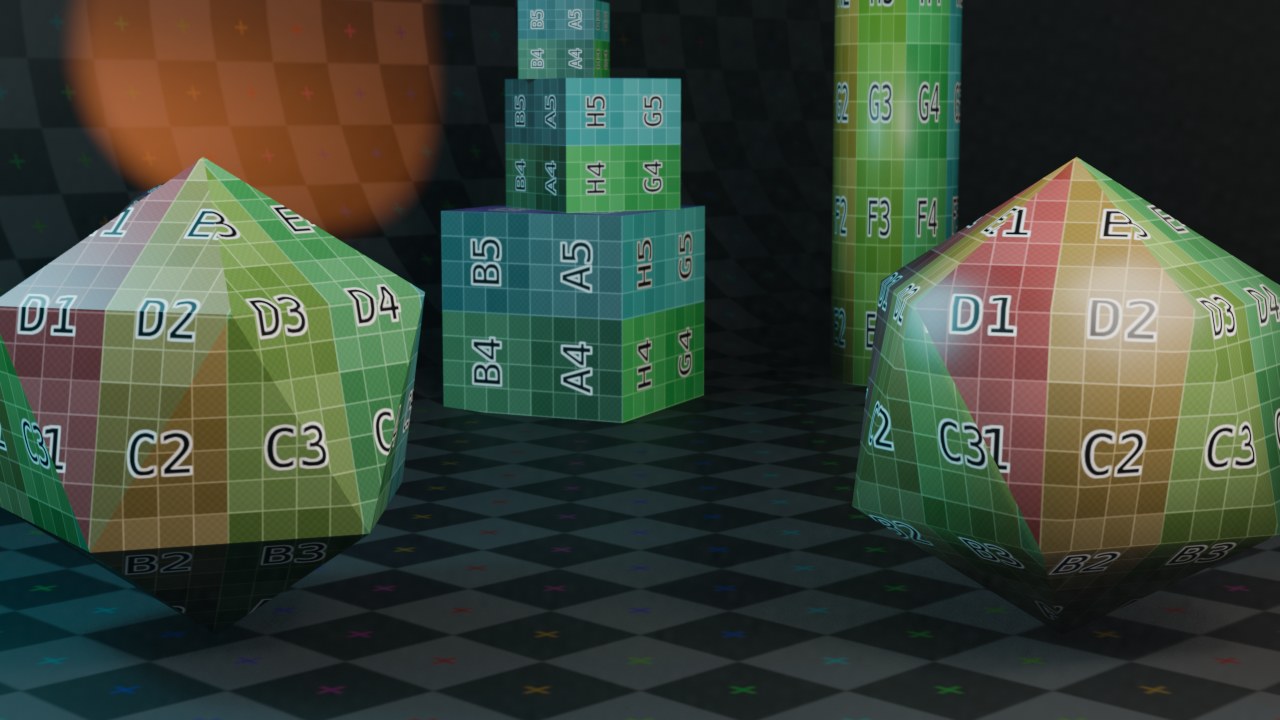
Render: Normal Edit.
 RECRENDER · EEVEE00:00:00:001280×720
Normal Edit — Buigt de shading-normals van het mesh naar een doel toe (bijvoorbeeld recht naar buiten vanaf een centrum, of naar een ander object), zonder de geometrie zelf te wijzigen. Klassiek bij lage-poly rotsen of bladeren die toch een ronde, gladde shading nodig hebben.
| Instelling | Type | Standaard | Bereik | Wat hij doet (tooltip uit Blender) |
|---|---|---|---|---|
| Apply on Spline | BOOLEAN | uit | – | Apply this and all preceding deformation modifiers on splines' points rather than on filled curve/surface |
| Execution Time | FLOAT | 0 | -10000 – 10000 | Time in seconds that the modifier took to evaluate. This is only set on evaluated objects. If multiple modifiers run in parallel, execution time is not a reliable metric. |
| Persistent UID | INT | 0 | -10000 – 10000 | Uniquely identifies the modifier within the modifier stack that it is part of |
| Mode | ENUM | RADIAL | Radial, Directional | How to affect (generate) normals |
| Offset | FLOAT | 0 | -100 – 100 | Offset from object's center |
| Mix Mode | ENUM | COPY | Copy, Add, Subtract, Multiply | How to mix generated normals with existing ones |
| Mix Factor | FLOAT | 1 | 0 – 1 | How much of generated normals to mix with existing ones |
| Max Angle | FLOAT | 3.142 | 0 – 3.1416 | Maximum angle between old and new normals |
| Lock Polygon Normals | BOOLEAN | uit | – | Do not flip polygons when their normals are not consistent with their newly computed custom vertex normals |
| Vertex Group | STRING | – | – | Vertex group name for selecting/weighting the affected areas |
| Invert | BOOLEAN | uit | – | Invert vertex group influence |
| Target | POINTER | – | – | Target object used to affect normals |
| Parallel Normals | BOOLEAN | aan | – | Use same direction for all normals, from origin to target's center (Directional mode only) |
UV Project — Projecteert UV-coordinaten vanuit een of meerdere virtuele camera's op het mesh, zoals een dia op een scherm. Handig voor decals en voor snelle planaire UV's op architecturale vormen.
| Instelling | Type | Standaard | Bereik | Wat hij doet (tooltip uit Blender) |
|---|---|---|---|---|
| Apply on Spline | BOOLEAN | uit | – | Apply this and all preceding deformation modifiers on splines' points rather than on filled curve/surface |
| Execution Time | FLOAT | 0 | -10000 – 10000 | Time in seconds that the modifier took to evaluate. This is only set on evaluated objects. If multiple modifiers run in parallel, execution time is not a reliable metric. |
| Persistent UID | INT | 0 | -10000 – 10000 | Uniquely identifies the modifier within the modifier stack that it is part of |
| UV Map | STRING | – | – | UV map name |
| Number of Projectors | INT | 1 | 1 – 10 | Number of projectors to use |
| Projectors | COLLECTION | – | – | |
| Aspect X | FLOAT | 1 | 1 – 1000 | Horizontal aspect ratio (only used for camera projectors) |
| Aspect Y | FLOAT | 1 | 1 – 1000 | Vertical aspect ratio (only used for camera projectors) |
| Scale X | FLOAT | 1 | 0 – 1000 | Horizontal scale (only used for camera projectors) |
| Scale Y | FLOAT | 1 | 0 – 1000 | Vertical scale (only used for camera projectors) |
UV Warp — Vervormt een bestaande UV-map live via twee Empty-objecten: het verschil tussen hun transform wordt op de UV's toegepast. Gebruikt voor geanimeerde UV-effecten, zoals scrollende textuur, zonder de UV-data zelf te bewerken.
| Instelling | Type | Standaard | Bereik | Wat hij doet (tooltip uit Blender) |
|---|---|---|---|---|
| Apply on Spline | BOOLEAN | uit | – | Apply this and all preceding deformation modifiers on splines' points rather than on filled curve/surface |
| Execution Time | FLOAT | 0 | -10000 – 10000 | Time in seconds that the modifier took to evaluate. This is only set on evaluated objects. If multiple modifiers run in parallel, execution time is not a reliable metric. |
| Persistent UID | INT | 0 | -10000 – 10000 | Uniquely identifies the modifier within the modifier stack that it is part of |
| U-Axis | ENUM | X | X, Y, Z | Pole axis for rotation |
| V-Axis | ENUM | Y | X, Y, Z | Pole axis for rotation |
| UV Center | FLOAT | 0 | -10000 – 10000 | Center point for rotate/scale |
| Offset | FLOAT | 0 | -10000 – 10000 | 2D Offset for the warp |
| Scale | FLOAT | 0 | -10000 – 10000 | 2D Scale for the warp |
| Rotation | FLOAT | 0 | -10000 – 10000 | 2D Rotation for the warp |
| Object From | POINTER | – | – | Object defining offset |
| Bone From | STRING | – | – | Bone defining offset |
| Object To | POINTER | – | – | Object defining offset |
| Bone To | STRING | – | – | Bone defining offset |
| Vertex Group | STRING | – | – | Vertex group name |
| Invert | BOOLEAN | uit | – | Invert vertex group influence |
| UV Map | STRING | – | – | UV map name |
De modifier-stack in de praktijk
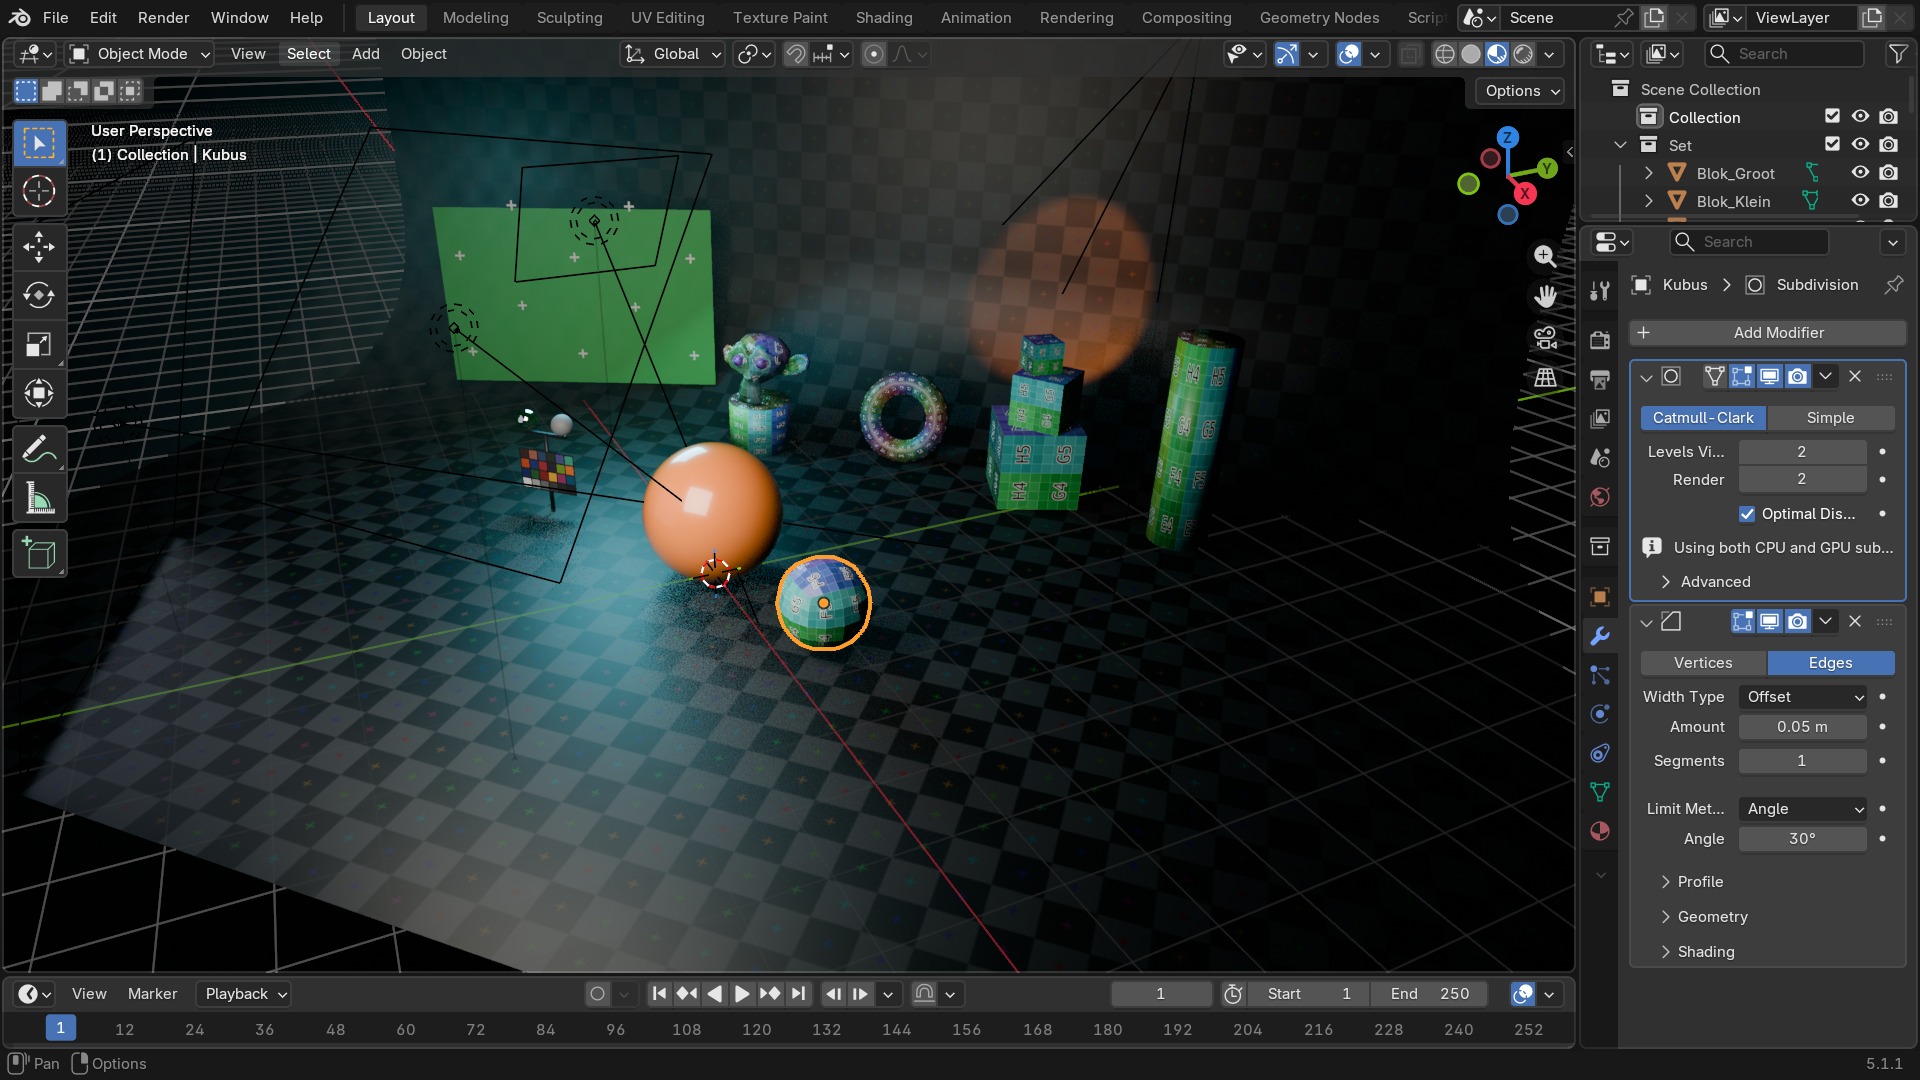
- 1Add Modifier
Opent het menu met de vier categorieën Modify/Generate/Deform/Physics.
- 2Sleepgreep
De stippen-icoon rechts in de header van elke modifier: hiermee versleep je de volgorde in de stack.
- 3On Cage / Edit Mode / Realtime / Render
De vier oogjes bepalen in welke context de modifier zichtbaar is.
- 4Apply / Copy / Toggle Collapse
Het dropdown-menu per modifier: definitief vastzetten, dupliceren, of het paneel inklappen.
Vertex Weight Edit · Vertex Weight Mix · Vertex Weight Proximity
Vertex Weight Edit — Herschaalt of remapt de gewichten van een vertex group via een curve, en kan optioneel gewichten onder een drempel uit de group verwijderen. Fijnregeling van gewichten die uit Weight Paint net niet goed genoeg kwamen.
| Instelling | Type | Standaard | Bereik | Wat hij doet (tooltip uit Blender) |
|---|---|---|---|---|
| Apply on Spline | BOOLEAN | uit | – | Apply this and all preceding deformation modifiers on splines' points rather than on filled curve/surface |
| Execution Time | FLOAT | 0 | -10000 – 10000 | Time in seconds that the modifier took to evaluate. This is only set on evaluated objects. If multiple modifiers run in parallel, execution time is not a reliable metric. |
| Persistent UID | INT | 0 | -10000 – 10000 | Uniquely identifies the modifier within the modifier stack that it is part of |
| Vertex Group | STRING | – | – | Vertex group name |
| Falloff Type | ENUM | LINEAR | Linear, Custom Curve, Sharp, Smooth, Root, Sphere, Random, Median Step | How weights are mapped to their new values |
| Invert Falloff | BOOLEAN | uit | – | Invert the resulting falloff weight |
| Normalize Weights | BOOLEAN | uit | – | Normalize the resulting weights (otherwise they are only clamped within 0.0 to 1.0 range) |
| Mapping Curve | POINTER | – | – | Custom mapping curve |
| Group Add | BOOLEAN | uit | – | Add vertices with weight over threshold to vgroup |
| Group Remove | BOOLEAN | uit | – | Remove vertices with weight below threshold from vgroup |
| Default Weight | FLOAT | 0 | 0 – 1 | Default weight a vertex will have if it is not in the vgroup |
| Add Threshold | FLOAT | 0.01 | 0 – 1 | Lower (inclusive) bound for a vertex's weight to be added to the vgroup |
| Remove Threshold | FLOAT | 0.01 | 0 – 1 | Upper (inclusive) bound for a vertex's weight to be removed from the vgroup |
| Influence | FLOAT | 1 | 0 – 1 | Global influence of current modifications on vgroup |
| Mask Vertex Group | STRING | – | – | Masking vertex group name |
| Invert | BOOLEAN | uit | – | Invert vertex group mask influence |
| Masking Tex | POINTER | – | – | Masking texture |
| Use Channel | ENUM | INT | Intensity, Red, Green, Blue, Hue, Saturation, Value, Alpha | Which texture channel to use for masking |
| Texture Coordinates | ENUM | LOCAL | Local, Global, Object, UV | Which texture coordinates to use for mapping |
| UV Map | STRING | – | – | UV map name |
| Texture Coordinate Object | POINTER | – | – | Which object to take texture coordinates from |
| Texture Coordinate Bone | STRING | – | – | Which bone to take texture coordinates from |
Vertex Weight Mix — Mengt twee vertex groups met elkaar (Add, Subtract, Multiply, Difference...) tot een derde group. Zo bouw je complexe maskers op uit eenvoudige onderdelen, bijvoorbeeld romp min mouwen als basis voor een kledingsimulatie.
| Instelling | Type | Standaard | Bereik | Wat hij doet (tooltip uit Blender) |
|---|---|---|---|---|
| Apply on Spline | BOOLEAN | uit | – | Apply this and all preceding deformation modifiers on splines' points rather than on filled curve/surface |
| Execution Time | FLOAT | 0 | -10000 – 10000 | Time in seconds that the modifier took to evaluate. This is only set on evaluated objects. If multiple modifiers run in parallel, execution time is not a reliable metric. |
| Persistent UID | INT | 0 | -10000 – 10000 | Uniquely identifies the modifier within the modifier stack that it is part of |
| Vertex Group A | STRING | – | – | First vertex group name |
| Vertex Group B | STRING | – | – | Second vertex group name |
| Invert Weights A | BOOLEAN | uit | – | Invert the influence of vertex group A |
| Invert Weights B | BOOLEAN | uit | – | Invert the influence of vertex group B |
| Default Weight A | FLOAT | 0 | 0 – 1 | Default weight a vertex will have if it is not in the first A vgroup |
| Default Weight B | FLOAT | 0 | 0 – 1 | Default weight a vertex will have if it is not in the second B vgroup |
| Mix Mode | ENUM | SET | Replace, Add, Subtract, Multiply, Divide, Difference, Average, Minimum, Maximum | How weights from vgroup B affect weights of vgroup A |
| Vertex Set | ENUM | AND | All, VGroup A, VGroup B, VGroup A or B, VGroup A and B | Which vertices should be affected |
| Normalize Weights | BOOLEAN | uit | – | Normalize the resulting weights (otherwise they are only clamped within 0.0 to 1.0 range) |
| Influence | FLOAT | 1 | 0 – 1 | Global influence of current modifications on vgroup |
| Mask Vertex Group | STRING | – | – | Masking vertex group name |
| Invert | BOOLEAN | uit | – | Invert vertex group mask influence |
| Masking Tex | POINTER | – | – | Masking texture |
| Use Channel | ENUM | INT | Intensity, Red, Green, Blue, Hue, Saturation, Value, Alpha | Which texture channel to use for masking |
| Texture Coordinates | ENUM | LOCAL | Local, Global, Object, UV | Which texture coordinates to use for mapping |
| UV Map | STRING | – | – | UV map name |
| Texture Coordinate Object | POINTER | – | – | Which object to take texture coordinates from |
| Texture Coordinate Bone | STRING | – | – | Which bone to take texture coordinates from |
Vertex Weight Proximity — Vult een vertex group met gewichten op basis van de afstand tot een ander object: hoe dichter bij het doel, hoe hoger het gewicht. Automatisch een group genereren voor Shrinkwrap-overgangen of voor een Cast-modifier die alleen bij een bepaald object mag inwerken.
| Instelling | Type | Standaard | Bereik | Wat hij doet (tooltip uit Blender) |
|---|---|---|---|---|
| Apply on Spline | BOOLEAN | uit | – | Apply this and all preceding deformation modifiers on splines' points rather than on filled curve/surface |
| Execution Time | FLOAT | 0 | -10000 – 10000 | Time in seconds that the modifier took to evaluate. This is only set on evaluated objects. If multiple modifiers run in parallel, execution time is not a reliable metric. |
| Persistent UID | INT | 0 | -10000 – 10000 | Uniquely identifies the modifier within the modifier stack that it is part of |
| Vertex Group | STRING | – | – | Vertex group name |
| Proximity Mode | ENUM | GEOMETRY | Object, Geometry | Which distances to target object to use |
| Proximity Geometry | ENUM | Vertex, Edge, Face | Use the shortest computed distance to target object's geometry as weight | |
| Target Object | POINTER | – | – | Object to calculate vertices distances from |
| Lowest | FLOAT | 0 | 0 – 1000 | Distance mapping to weight 0.0 |
| Highest | FLOAT | 1 | 0 – 1000 | Distance mapping to weight 1.0 |
| Falloff Type | ENUM | LINEAR | Linear, Custom Curve, Sharp, Smooth, Root, Sphere, Random, Median Step | How weights are mapped to their new values |
| Invert Falloff | BOOLEAN | uit | – | Invert the resulting falloff weight |
| Normalize Weights | BOOLEAN | uit | – | Normalize the resulting weights (otherwise they are only clamped within 0.0 to 1.0 range) |
| Mapping Curve | POINTER | – | – | Custom mapping curve |
| Influence | FLOAT | 1 | 0 – 1 | Global influence of current modifications on vgroup |
| Mask Vertex Group | STRING | – | – | Masking vertex group name |
| Invert | BOOLEAN | uit | – | Invert vertex group mask influence |
| Masking Tex | POINTER | – | – | Masking texture |
| Use Channel | ENUM | INT | Intensity, Red, Green, Blue, Hue, Saturation, Value, Alpha | Which texture channel to use for masking |
| Texture Coordinates | ENUM | LOCAL | Local, Global, Object, UV | Which texture coordinates to use for mapping |
| UV Map | STRING | – | – | UV map name |
| Texture Coordinate Object | POINTER | – | – | Which object to take texture coordinates from |
| Texture Coordinate Bone | STRING | – | – | Which bone to take texture coordinates from |
Weighted Normal
Render: Weighted Normal.
RECRENDER · EEVEE00:00:00:001280×720Weighted Normal — Herberekent de gladde normals op basis van de hoek en oppervlakte van elke face in plaats van gewoon te middelen. Geeft veel schonere shading op harde randen dan Auto Smooth alleen, vooral op hard-surface modellen met wisselende face-groottes.
| Instelling | Type | Standaard | Bereik | Wat hij doet (tooltip uit Blender) |
|---|---|---|---|---|
| Apply on Spline | BOOLEAN | uit | – | Apply this and all preceding deformation modifiers on splines' points rather than on filled curve/surface |
| Execution Time | FLOAT | 0 | -10000 – 10000 | Time in seconds that the modifier took to evaluate. This is only set on evaluated objects. If multiple modifiers run in parallel, execution time is not a reliable metric. |
| Persistent UID | INT | 0 | -10000 – 10000 | Uniquely identifies the modifier within the modifier stack that it is part of |
| Weight | INT | 50 | 1 – 100 | Corrective factor applied to faces' weights, 50 is neutral, lower values increase weight of weak faces, higher values increase weight of strong faces |
| Weighting Mode | ENUM | FACE_AREA | Face Area, Corner Angle, Face Area & Angle | Weighted vertex normal mode to use |
| Threshold | FLOAT | 0.01 | 0 – 10 | Threshold value for different weights to be considered equal |
| Keep Sharp | BOOLEAN | uit | – | Keep sharp edges as computed for default custom normals, instead of setting a single weighted normal for each vertex |
| Vertex Group | STRING | – | – | Vertex group name for modifying the selected areas |
| Invert | BOOLEAN | uit | – | Invert vertex group influence |
| Face Influence | BOOLEAN | uit | – | Use influence of face for weighting |
Renders: de zichtbare Modify-modifiers
De overige acht Modify-modifiers herschrijven enkel data (UV's, gewichten, caches) die zonder een uitgebreide eigen opzet niet in een render te vangen is .
RECRENDER · EEVEE00:00:00:001280×720RECRENDER · EEVEE00:00:00:001280×720Generate — geometrie toevoegen en wegnemen
De twintig Generate-modifiers zijn de grootste categorie en de werkpaarden van hard-surface-modelleren: Array en Screw voor herhaling, Bevel en Solidify voor dikte en afronding, Boolean voor samengestelde vormen, Subdivision Surface en Remesh voor gladde organische oppervlakken. Ze staan hieronder alfabetisch per groep van drie, telkens met hun eigen alinea en volledige tabel.
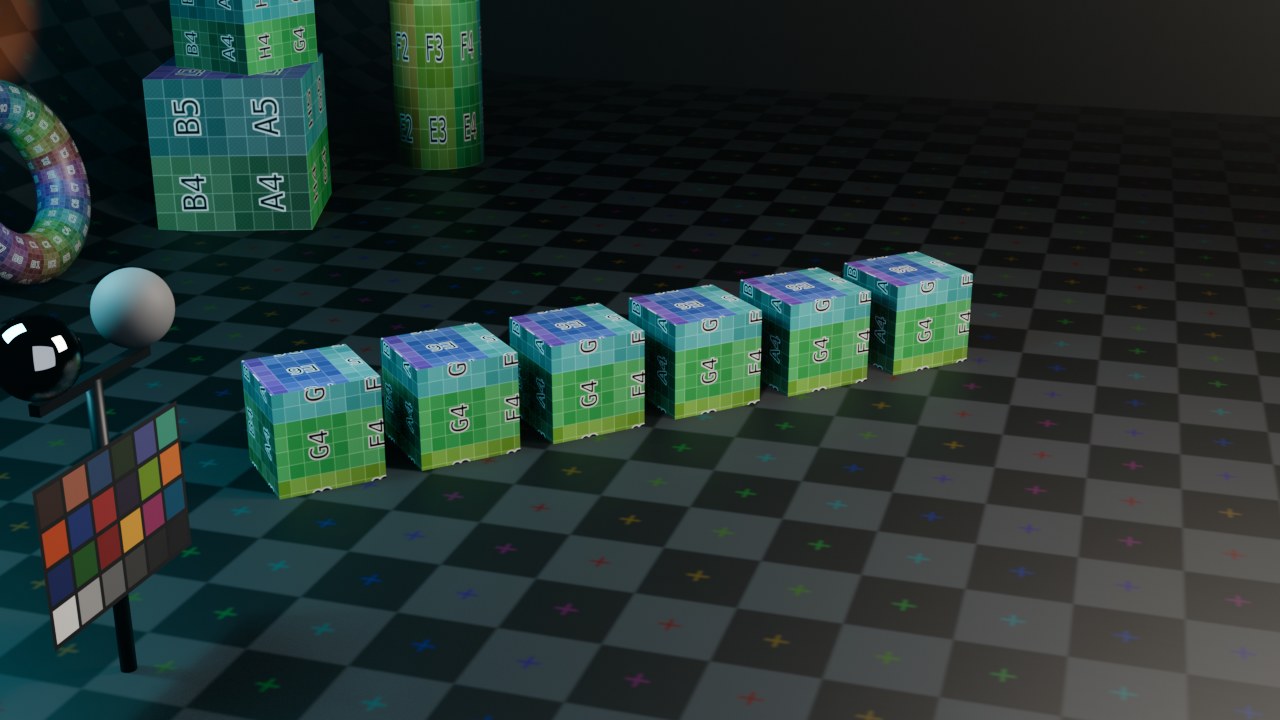 RECRENDER · EEVEE00:00:00:001280×720
Array · Bevel · Boolean
Render: Array.
RECRENDER · EEVEE00:00:00:001280×720Array — Herhaalt het mesh een aantal keer volgens een offset: een vaste afstand, een relatieve afstand ten opzichte van de bounding box, of de transform van een los offsetobject. De klassieke manier om hekken, trappen, ramen in een gevel of een ketting van schakels op te bouwen zonder alles apart te modelleren.
Wat gaat er mis — Een fout die iedereen ooit maakt: het Object Offset-object staat nog op de originele positie in plaats van op de gewenste afstand-per-kopie, waardoor alle kopieen op elkaar gestapeld blijven staan. Merge gebruikt de afstand tussen vertices om naden dicht te trekken; te klein ingesteld en de naad blijft zichtbaar, te groot en hij vreet geometrie weg.
| Instelling | Type | Standaard | Bereik | Wat hij doet (tooltip uit Blender) |
|---|---|---|---|---|
| Apply on Spline | BOOLEAN | uit | – | Apply this and all preceding deformation modifiers on splines' points rather than on filled curve/surface |
| Execution Time | FLOAT | 0 | -10000 – 10000 | Time in seconds that the modifier took to evaluate. This is only set on evaluated objects. If multiple modifiers run in parallel, execution time is not a reliable metric. |
| Persistent UID | INT | 0 | -10000 – 10000 | Uniquely identifies the modifier within the modifier stack that it is part of |
| Fit Type | ENUM | FIXED_COUNT | Fixed Count, Fit Length, Fit Curve | Array length calculation method |
| Count | INT | 2 | 1 – 1000 | Number of duplicates to make |
| Length | FLOAT | 0 | 0 – 10000 | Length to fit array within |
| Curve | POINTER | – | – | Curve object to fit array length to |
| Constant Offset | BOOLEAN | uit | – | Add a constant offset |
| Constant Offset Displacement | FLOAT | 0 | – | Value for the distance between arrayed items |
| Relative Offset | BOOLEAN | aan | – | Add an offset relative to the object's bounding box |
| Relative Offset Displacement | FLOAT | 0 | -10000 – 10000 | The size of the geometry will determine the distance between arrayed items |
| Merge Vertices | BOOLEAN | uit | – | Merge vertices in adjacent duplicates |
| Merge End Vertices | BOOLEAN | uit | – | Merge vertices in first and last duplicates |
| Merge Distance | FLOAT | 0.01 | 0 – 1 | Limit below which to merge vertices |
| Object Offset | BOOLEAN | uit | – | Add another object's transformation to the total offset |
| Object Offset | POINTER | – | – | Use the location and rotation of another object to determine the distance and rotational change between arrayed items |
| Start Cap | POINTER | – | – | Mesh object to use as a start cap |
| End Cap | POINTER | – | – | Mesh object to use as an end cap |
| U Offset | FLOAT | 0 | -1 – 1 | Amount to offset array UVs on the U axis |
| V Offset | FLOAT | 0 | -1 – 1 | Amount to offset array UVs on the V axis |
Bevel — Rondt of schuint randen en hoeken af door er nieuwe geometrie voor in de plaats te zetten. Onmisbaar voor bijna elk hard-surface-object: in de echte wereld heeft vrijwel niets een messcherpe rand, en een klein bevel is precies wat licht nodig heeft om er fatsoenlijk op te reflecteren.
Wat gaat er mis — Bevel op basis van Weight of Angle werkt alleen als de juiste randen ook echt als sharp gemarkeerd zijn (Edge Bevel Weight of de hoekdrempel); vergeet je dat, dan bevelt hij alles of niets. Bij een te hoog Amount ten opzichte van de omliggende face gaat de vorm zelf-overlappend en klapt de shading om.
| Instelling | Type | Standaard | Bereik | Wat hij doet (tooltip uit Blender) |
|---|---|---|---|---|
| Apply on Spline | BOOLEAN | uit | – | Apply this and all preceding deformation modifiers on splines' points rather than on filled curve/surface |
| Execution Time | FLOAT | 0 | -10000 – 10000 | Time in seconds that the modifier took to evaluate. This is only set on evaluated objects. If multiple modifiers run in parallel, execution time is not a reliable metric. |
| Persistent UID | INT | 0 | -10000 – 10000 | Uniquely identifies the modifier within the modifier stack that it is part of |
| Width | FLOAT | 0.1 | 0 – 100 | Bevel amount |
| Width Percent | FLOAT | 0.1 | 0 – 100 | Bevel amount for percentage method |
| Segments | INT | 1 | 1 – 100 | Number of segments for round edges/verts |
| Affect | ENUM | EDGES | Vertices, Edges | Affect edges or vertices |
| Limit Method | ENUM | ANGLE | None, Angle, Weight, Vertex Group | |
| Edge Weight | STRING | – | – | Attribute name for edge weight |
| Vertex Weight | STRING | – | – | Attribute name for vertex weight |
| Angle | FLOAT | 0.524 | 0 – 3.1416 | Angle above which to bevel edges |
| Vertex Group | STRING | – | – | Vertex group name |
| Invert | BOOLEAN | uit | – | Invert vertex group influence |
| Clamp Overlap | BOOLEAN | aan | – | Clamp the width to avoid overlap |
| Width Type | ENUM | OFFSET | Offset, Width, Depth, Percent, Absolute | What distance Width measures |
| Profile Type | ENUM | SUPERELLIPSE | Superellipse, Custom | The type of shape used to rebuild a beveled section |
| Profile | FLOAT | 0.5 | 0 – 1 | The profile shape (0.5 = round) |
| Material Index | INT | -1 | -1 – 32767 | Material index of generated faces, -1 for automatic |
| Loop Slide | BOOLEAN | aan | – | Prefer sliding along edges to having even widths |
| Mark Seams | BOOLEAN | uit | – | Mark Seams along beveled edges |
| Mark Sharp | BOOLEAN | uit | – | Mark beveled edges as sharp |
| Harden Normals | BOOLEAN | uit | – | Match normals of new faces to adjacent faces |
| Face Strength | ENUM | FSTR_NONE | None, New, Affected, All | Whether to set face strength, and which faces to set it on |
| Outer Miter | ENUM | MITER_SHARP | Sharp, Patch, Arc | Pattern to use for outside of miters |
| Inner Miter | ENUM | MITER_SHARP | Sharp, Arc | Pattern to use for inside of miters |
| Spread | FLOAT | 0.1 | 0 – 100 | Spread distance for inner miter arcs |
| Custom Profile Path | POINTER | – | – | The path for the custom profile |
| Vertex Mesh Method | ENUM | ADJ | Grid Fill, Cutoff | The method to use to create the mesh at intersections |
Boolean — Combineert twee meshes met een booleaanse bewerking: Union (samenvoegen), Difference (uitsnijden) of Intersect (alleen het gemeenschappelijke volume). De manier om gaten, inkepingen of samengestelde vormen te maken zonder handmatig te modelleren.
Wat gaat er mis — Boolean loopt vast op n-gons, niet-manifold geometrie en meshes met zelf-overlappende delen; het resultaat krijgt dan gaten, dubbele faces of Blender voert de berekening stilletjes fout uit. Werk waar mogelijk met driehoeken of vierhoeken op het snijvlak, en gebruik de Exact-oplosmethode in plaats van Fast zodra het misgaat.
| Instelling | Type | Standaard | Bereik | Wat hij doet (tooltip uit Blender) |
|---|---|---|---|---|
| Apply on Spline | BOOLEAN | uit | – | Apply this and all preceding deformation modifiers on splines' points rather than on filled curve/surface |
| Execution Time | FLOAT | 0 | -10000 – 10000 | Time in seconds that the modifier took to evaluate. This is only set on evaluated objects. If multiple modifiers run in parallel, execution time is not a reliable metric. |
| Persistent UID | INT | 0 | -10000 – 10000 | Uniquely identifies the modifier within the modifier stack that it is part of |
| Object | POINTER | – | – | Mesh object to use for Boolean operation |
| Collection | POINTER | – | – | Use mesh objects in this collection for Boolean operation |
| Operation | ENUM | DIFFERENCE | Intersect, Union, Difference | |
| Operand Type | ENUM | OBJECT | Object, Collection | |
| Overlap Threshold | FLOAT | 0 | 0 – 1 | Threshold for checking overlapping geometry |
| Solver | ENUM | EXACT | Float, Exact, Manifold | Method for calculating booleans |
| Self Intersection | BOOLEAN | uit | – | Allow self-intersection in operands |
| Hole Tolerant | BOOLEAN | uit | – | Better results when there are holes (slower) |
| Material Mode | ENUM | INDEX | Index Based, Transfer | Method for setting materials on the new faces |
| Debug | ENUM | Separate, No Dissolve, No Connect Regions | Debugging options, only when started with '-d' |
Build · Decimate · Edge Split
Render: Build.
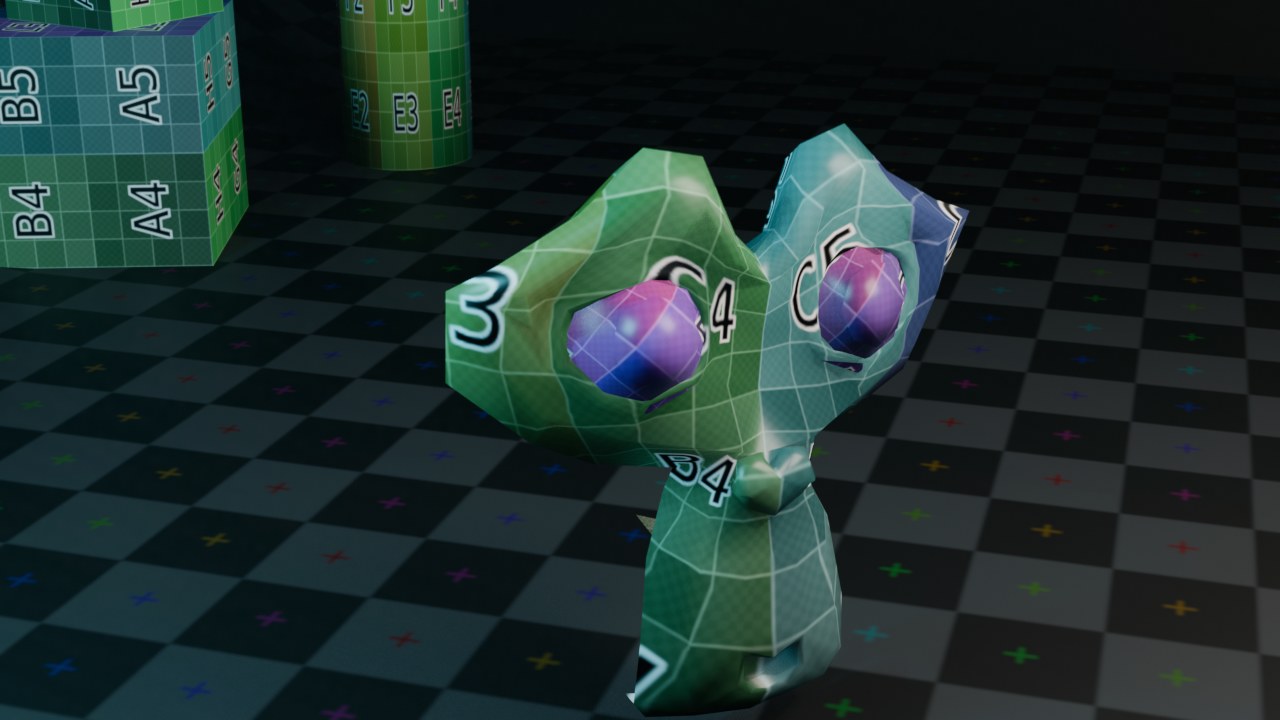 RECRENDER · EEVEE00:00:00:001280×720
Build — Laat het mesh face voor face verschijnen (of verdwijnen) over een ingestelde tijdspanne, in willekeurige of vaste volgorde. Gebruikt voor constructie-animaties: een gebouw dat zichzelf opbouwt, of het omgekeerde voor destructie.
| Instelling | Type | Standaard | Bereik | Wat hij doet (tooltip uit Blender) |
|---|---|---|---|---|
| Apply on Spline | BOOLEAN | uit | – | Apply this and all preceding deformation modifiers on splines' points rather than on filled curve/surface |
| Execution Time | FLOAT | 0 | -10000 – 10000 | Time in seconds that the modifier took to evaluate. This is only set on evaluated objects. If multiple modifiers run in parallel, execution time is not a reliable metric. |
| Persistent UID | INT | 0 | -10000 – 10000 | Uniquely identifies the modifier within the modifier stack that it is part of |
| Start Frame | FLOAT | 1 | -1048574 – 1048574 | Start frame of the effect |
| Length | FLOAT | 100 | 1 – 1048574 | Total time the build effect requires |
| Reversed | BOOLEAN | uit | – | Deconstruct the mesh instead of building it |
| Randomize | BOOLEAN | uit | – | Randomize the faces or edges during build |
| Seed | INT | 0 | 1 – 1048574 | Seed for random if used |
Decimate — Vermindert het aantal polygonen: Collapse (edge collapse op basis van een ratio), Un-Subdivide (keert een Subdivision-achtige opbouw terug) of Planar (verwijdert vertices op vlakke stukken). Gebruikt om een sculpt- of scanmesh geschikt te maken voor realtime of voor een lagere LOD.
Wat gaat er mis — Decimate houdt geen rekening met UV-naden of scherpe randen tenzij je dat expliciet aanvinkt; zonder die vlaggen verdwijnen precies de randen die je had willen behouden.
| Instelling | Type | Standaard | Bereik | Wat hij doet (tooltip uit Blender) |
|---|---|---|---|---|
| Apply on Spline | BOOLEAN | uit | – | Apply this and all preceding deformation modifiers on splines' points rather than on filled curve/surface |
| Execution Time | FLOAT | 0 | -10000 – 10000 | Time in seconds that the modifier took to evaluate. This is only set on evaluated objects. If multiple modifiers run in parallel, execution time is not a reliable metric. |
| Persistent UID | INT | 0 | -10000 – 10000 | Uniquely identifies the modifier within the modifier stack that it is part of |
| Mode | ENUM | COLLAPSE | Collapse, Un-Subdivide, Planar | |
| Ratio | FLOAT | 1 | 0 – 1 | Ratio of triangles to reduce to (collapse only) |
| Iterations | INT | 0 | 0 – 100 | Number of times reduce the geometry (unsubdivide only) |
| Angle Limit | FLOAT | 0.087 | 0 – 3.1416 | Only dissolve angles below this (planar only) |
| Vertex Group | STRING | – | – | Vertex group name (collapse only) |
| Invert | BOOLEAN | uit | – | Invert vertex group influence (collapse only) |
| Triangulate | BOOLEAN | uit | – | Keep triangulated faces resulting from decimation (collapse only) |
| Symmetry | BOOLEAN | uit | – | Maintain symmetry on an axis |
| Axis | ENUM | X | X, Y, Z | Axis of symmetry |
| Factor | FLOAT | 1 | 0 – 10 | Vertex group strength |
| All Boundaries | BOOLEAN | uit | – | Dissolve all vertices in between face boundaries (planar only) |
| Delimit | ENUM | Normal, Material, Seam, Sharp, UVs | Limit merging geometry | |
| Face Count | INT | 0 | -10000 – 10000 | The current number of faces in the decimated mesh |
Edge Split — Splitst het mesh langs randen die scherper zijn dan een hoekdrempel, of langs expliciet gemarkeerde sharp-randen, zodat daar een harde schaduwrand ontstaat in plaats van een vloeiende overgang. Het klassieke duo met Auto Smooth voor hard-surface modellen.
| Instelling | Type | Standaard | Bereik | Wat hij doet (tooltip uit Blender) |
|---|---|---|---|---|
| Apply on Spline | BOOLEAN | uit | – | Apply this and all preceding deformation modifiers on splines' points rather than on filled curve/surface |
| Execution Time | FLOAT | 0 | -10000 – 10000 | Time in seconds that the modifier took to evaluate. This is only set on evaluated objects. If multiple modifiers run in parallel, execution time is not a reliable metric. |
| Persistent UID | INT | 0 | -10000 – 10000 | Uniquely identifies the modifier within the modifier stack that it is part of |
| Split Angle | FLOAT | 0.524 | 0 – 3.1416 | Angle above which to split edges |
| Use Edge Angle | BOOLEAN | aan | – | Split edges with high angle between faces |
| Use Sharp Edges | BOOLEAN | aan | – | Split edges that are marked as sharp |
Wat gaat er mis — Generate-modifiers
De Generate-categorie voegt geometrie tóe, en dat is precies waar het vaakst misgaat: te veel Array-kopieën zonder Merge geven duizenden dubbele vertices, Boolean op niet-manifold input geeft gaten, en Subdivision Surface bovenop slordige topologie geeft bobbels die pas zichtbaar worden met de modifier aan. De gemene deler: bekijk het resultaat terwijl je de basisgeometrie nog bewerkt, niet pas nadat je de hele modelleersessie hebt afgerond.
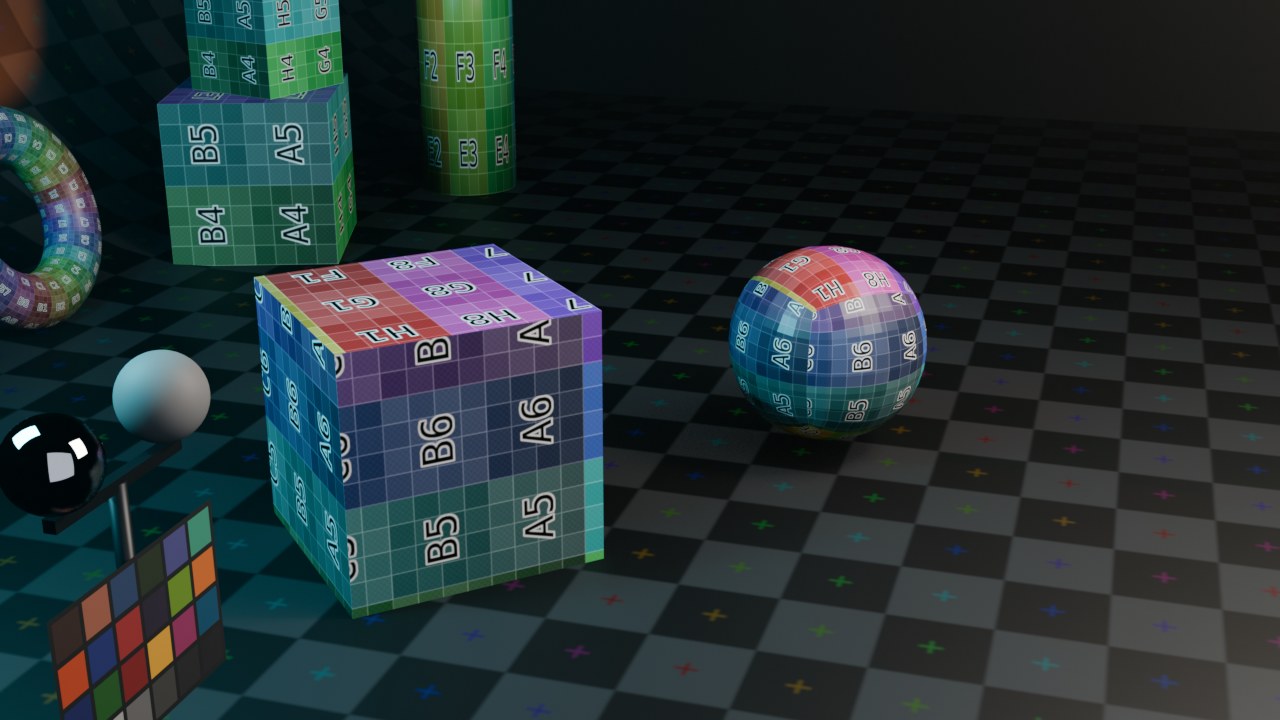 RECRENDER · EEVEE00:00:00:001280×720
Geometry Nodes · Mask · Mesh to Volume
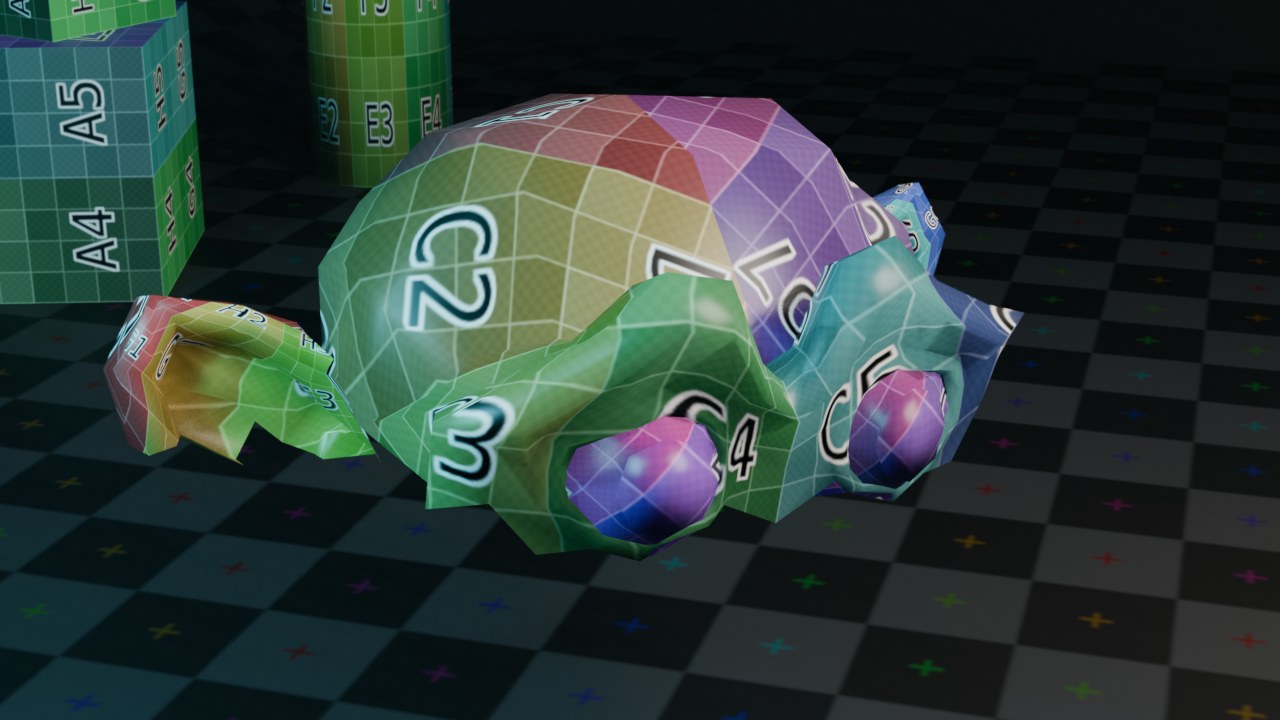
Render: Mask.
 RECRENDER · EEVEE00:00:00:001280×720
Geometry Nodes — Geeft het object een Geometry Nodes-netwerk: een eigen visuele programmeertaal die geometrie leest, genereert en herschrijft. Dit hoofdstuk behandelt hem alleen als modifier-slot in de stack; de node-editor zelf komt uitgebreid aan bod in Deel I.
| Instelling | Type | Standaard | Bereik | Wat hij doet (tooltip uit Blender) |
|---|---|---|---|---|
| Apply on Spline | BOOLEAN | uit | – | Apply this and all preceding deformation modifiers on splines' points rather than on filled curve/surface |
| Execution Time | FLOAT | 0 | -10000 – 10000 | Time in seconds that the modifier took to evaluate. This is only set on evaluated objects. If multiple modifiers run in parallel, execution time is not a reliable metric. |
| Persistent UID | INT | 0 | -10000 – 10000 | Uniquely identifies the modifier within the modifier stack that it is part of |
| Node Group | POINTER | – | – | Node group that controls what this modifier does |
| Simulation Bake Directory | STRING | – | – | Location on disk where the bake data is stored |
| Bake Target | ENUM | PACKED | Packed, Disk | Where to store the baked data |
| bakes | COLLECTION | – | – | |
| panels | COLLECTION | – | – | |
| Show Node Group | BOOLEAN | uit | – | |
| Show Manage Panel | BOOLEAN | uit | – | |
| node_warnings | COLLECTION | – | – | |
| open_output_attributes_panel | BOOLEAN | uit | – | |
| open_manage_panel | BOOLEAN | uit | – | |
| open_bake_panel | BOOLEAN | uit | – | |
| open_named_attributes_panel | BOOLEAN | uit | – | |
| open_bake_data_blocks_panel | BOOLEAN | uit | – | |
| open_warnings_panel | BOOLEAN | uit | – |
Mask — Verbergt delen van het mesh op basis van een vertex group of een bone-selectie, zonder de onderliggende geometrie te verwijderen. Gebruikt om bijvoorbeeld alleen de handen van een personage zichtbaar te maken voor een close-up, of om een deel van een rig-mesh uit te sluiten van rendering.
| Instelling | Type | Standaard | Bereik | Wat hij doet (tooltip uit Blender) |
|---|---|---|---|---|
| Apply on Spline | BOOLEAN | uit | – | Apply this and all preceding deformation modifiers on splines' points rather than on filled curve/surface |
| Execution Time | FLOAT | 0 | -10000 – 10000 | Time in seconds that the modifier took to evaluate. This is only set on evaluated objects. If multiple modifiers run in parallel, execution time is not a reliable metric. |
| Persistent UID | INT | 0 | -10000 – 10000 | Uniquely identifies the modifier within the modifier stack that it is part of |
| Mode | ENUM | VERTEX_GROUP | Vertex Group, Armature | |
| Armature | POINTER | – | – | Armature to use as source of bones to mask |
| Vertex Group | STRING | – | – | Vertex group name |
| Invert | BOOLEAN | uit | – | Use vertices that are not part of region defined |
| Smooth | BOOLEAN | uit | – | Use vertex group weights to cut faces at the weight contour |
| Threshold | FLOAT | 0 | 0 – 1 | Weights over this threshold remain |
Mesh to Volume — Zet een gesloten mesh om in een volume-datablock (een voxel-representatie), als basis voor bijvoorbeeld een Volume Displace of om het daarna opnieuw te remeshen tot een organische, gladde vorm.
| Instelling | Type | Standaard | Bereik | Wat hij doet (tooltip uit Blender) |
|---|---|---|---|---|
| Apply on Spline | BOOLEAN | uit | – | Apply this and all preceding deformation modifiers on splines' points rather than on filled curve/surface |
| Execution Time | FLOAT | 0 | -10000 – 10000 | Time in seconds that the modifier took to evaluate. This is only set on evaluated objects. If multiple modifiers run in parallel, execution time is not a reliable metric. |
| Persistent UID | INT | 0 | -10000 – 10000 | Uniquely identifies the modifier within the modifier stack that it is part of |
| Object | POINTER | – | – | Object |
| Resolution Mode | ENUM | VOXEL_AMOUNT | Voxel Amount, Voxel Size | Mode for how the desired voxel size is specified |
| Voxel Size | FLOAT | 0 | 0 – onbegrensd | Smaller values result in a higher resolution output |
| Voxel Amount | INT | 0 | 0 – onbegrensd | Approximate number of voxels along one axis |
| Interior Band Width | FLOAT | 0 | 0 – onbegrensd | Width of the gradient inside of the mesh |
| Density | FLOAT | 0 | 0 – onbegrensd | Density of the new volume |
Mirror · Multiresolution · Remesh
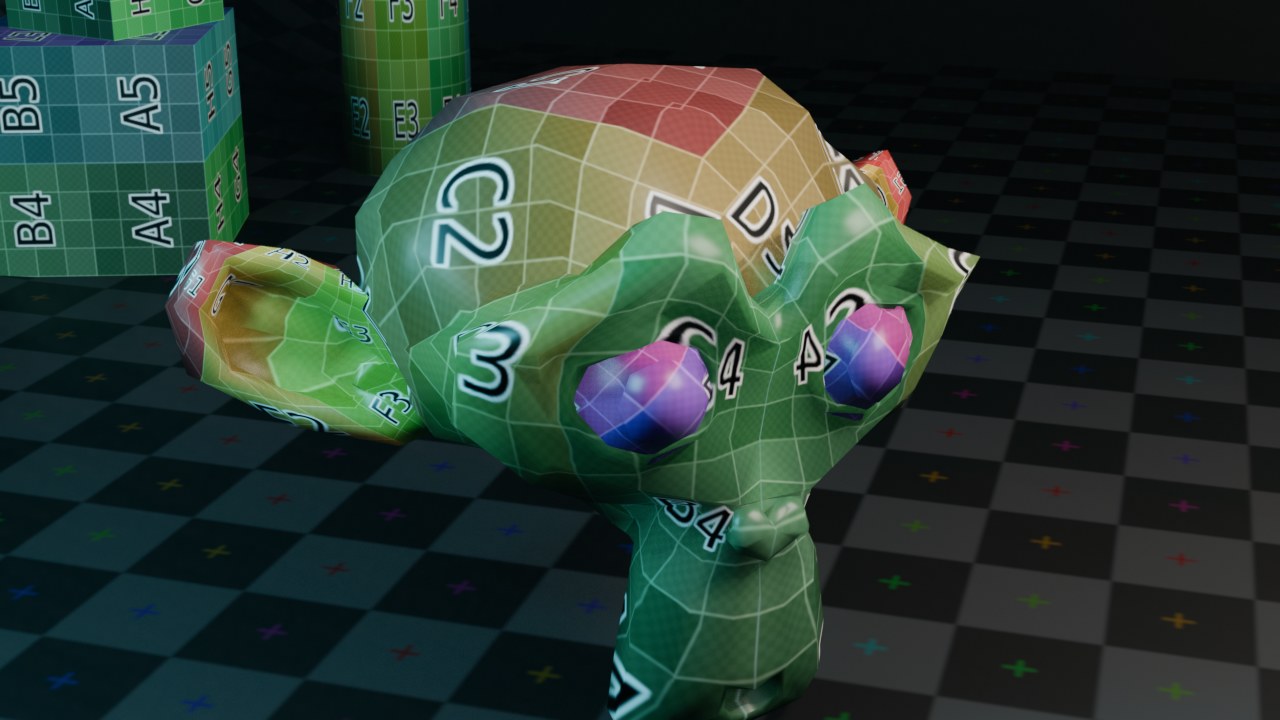
Render: Mirror.
 RECRENDER · EEVEE00:00:00:001280×720
Mirror — Spiegelt het mesh over een of meer assen van het object, live tijdens het modelleren. Zowat elk symmetrisch object (personages, voertuigen, meubels) wordt met een helft gemodelleerd en deze modifier erbij.
Wat gaat er mis — Zonder Clipping blijven vertices die je over het spiegelvlak heen sleept los van elkaar staan in plaats van samen te smelten tot een naad; dat geeft een zichtbare kier in het midden. Merge lost dubbele vertices op de naad zelf op, maar alleen binnen de ingestelde afstand.
| Instelling | Type | Standaard | Bereik | Wat hij doet (tooltip uit Blender) |
|---|---|---|---|---|
| Apply on Spline | BOOLEAN | uit | – | Apply this and all preceding deformation modifiers on splines' points rather than on filled curve/surface |
| Execution Time | FLOAT | 0 | -10000 – 10000 | Time in seconds that the modifier took to evaluate. This is only set on evaluated objects. If multiple modifiers run in parallel, execution time is not a reliable metric. |
| Persistent UID | INT | 0 | -10000 – 10000 | Uniquely identifies the modifier within the modifier stack that it is part of |
| Mirror Axis | BOOLEAN | uit | – | Enable axis mirror |
| Bisect Axis | BOOLEAN | uit | – | Cuts the mesh across the mirror plane |
| Bisect Flip Axis | BOOLEAN | uit | – | Flips the direction of the slice |
| Clip | BOOLEAN | uit | – | Prevent vertices from going through the mirror during transform |
| Mirror Vertex Groups | BOOLEAN | aan | – | Mirror vertex groups (e.g. .R->.L) |
| Merge Vertices | BOOLEAN | aan | – | Merge vertices within the merge threshold |
| Mirror U | BOOLEAN | uit | – | Mirror the U texture coordinate around the flip offset point |
| Mirror V | BOOLEAN | uit | – | Mirror the V texture coordinate around the flip offset point |
| Mirror UDIM | BOOLEAN | uit | – | Mirror the texture coordinate around each tile center |
| Flip U Offset | FLOAT | 0 | -1 – 1 | Amount to offset mirrored UVs flipping point from the 0.5 on the U axis |
| Flip V Offset | FLOAT | 0 | -1 – 1 | Amount to offset mirrored UVs flipping point from the 0.5 point on the V axis |
| U Offset | FLOAT | 0 | -1 – 1 | Mirrored UV offset on the U axis |
| V Offset | FLOAT | 0 | -1 – 1 | Mirrored UV offset on the V axis |
| Merge Distance | FLOAT | 0.001 | 0 – 1 | Distance within which mirrored vertices are merged |
| Bisect Distance | FLOAT | 0.001 | 0 – 1 | Distance from the bisect plane within which vertices are removed |
| Mirror Object | POINTER | – | – | Object to use as mirror |
Multiresolution — Bouwt meerdere resolutieniveaus boven op het basismesh, net als Subdivision Surface, maar elk niveau kan apart in Sculpt Mode beeldhouwd worden en blijft bewaard. De motor achter elk sculptwerk dat naderhand als normal- of displacement-map gebakken moet worden.
Wat gaat er mis — Multires-niveaus horen bij de topologie van het basismesh: verander je die achteraf, dan raken de hogere niveaus onherstelbaar beschadigd of moet je opnieuw beeldhouwen.
| Instelling | Type | Standaard | Bereik | Wat hij doet (tooltip uit Blender) |
|---|---|---|---|---|
| Apply on Spline | BOOLEAN | uit | – | Apply this and all preceding deformation modifiers on splines' points rather than on filled curve/surface |
| Execution Time | FLOAT | 0 | -10000 – 10000 | Time in seconds that the modifier took to evaluate. This is only set on evaluated objects. If multiple modifiers run in parallel, execution time is not a reliable metric. |
| Persistent UID | INT | 0 | -10000 – 10000 | Uniquely identifies the modifier within the modifier stack that it is part of |
| UV Smooth | ENUM | PRESERVE_BOUNDARIES | None, Keep Corners, Keep Corners, Junctions, Keep Corners, Junctions, Concave, Keep Boundaries, All | Controls how smoothing is applied to UVs |
| Quality | INT | 4 | 1 – 6 | Accuracy of vertex positions, lower value is faster but less precise |
| Boundary Smooth | ENUM | ALL | Keep Corners, All | Controls how open boundaries are smoothed |
| Levels | INT | 0 | 0 – 255 | Number of subdivisions to use in the viewport |
| Sculpt Levels | INT | 0 | 0 – 255 | Number of subdivisions to use in sculpt mode |
| Render Levels | INT | 0 | 0 – 255 | The subdivision level visible at render time |
| Total Levels | INT | 0 | 0 – 255 | Number of subdivisions for which displacements are stored |
| External | BOOLEAN | uit | – | Store multires displacements outside the .blend file, to save memory |
| File Path | STRING | – | – | Path to external displacements file |
| Optimal Display | BOOLEAN | aan | – | Skip drawing/rendering of interior subdivided edges |
| Use Creases | BOOLEAN | aan | – | Use mesh crease information to sharpen edges or corners |
| Use Custom Normals | BOOLEAN | uit | – | Interpolates existing custom normals to resulting mesh |
| Sculpt Base Mesh | BOOLEAN | uit | – | Make Sculpt Mode tools deform the base mesh while previewing the displacement of higher subdivision levels |
Remesh — Bouwt het hele mesh opnieuw op tot een uniform, vaak quad- of voxel-gebaseerd oppervlak, los van de originele topologie. Gebruikt na zwaar sculpten of booleans om weer een werkbaar, gelijkmatig mesh te krijgen.
Wat gaat er mis — Remesh in Voxel- of Blocks-modus negeert scherpe details en UV's volledig; kleine objecten of dunne onderdelen verdwijnen als de Voxel Size te grof staat.
| Instelling | Type | Standaard | Bereik | Wat hij doet (tooltip uit Blender) |
|---|---|---|---|---|
| Apply on Spline | BOOLEAN | uit | – | Apply this and all preceding deformation modifiers on splines' points rather than on filled curve/surface |
| Execution Time | FLOAT | 0 | -10000 – 10000 | Time in seconds that the modifier took to evaluate. This is only set on evaluated objects. If multiple modifiers run in parallel, execution time is not a reliable metric. |
| Persistent UID | INT | 0 | -10000 – 10000 | Uniquely identifies the modifier within the modifier stack that it is part of |
| Mode | ENUM | VOXEL | Blocks, Smooth, Sharp, Voxel | |
| Scale | FLOAT | 0.9 | 0 – 0.99 | The ratio of the largest dimension of the model over the size of the grid |
| Threshold | FLOAT | 1 | 0 – 1 | If removing disconnected pieces, minimum size of components to preserve as a ratio of the number of polygons in the largest component |
| Octree Depth | INT | 4 | 1 – 12 | Resolution of the octree; higher values give finer details |
| Sharpness | FLOAT | 1 | 0 – 2 | Tolerance for outliers; lower values filter noise while higher values will reproduce edges closer to the input |
| Voxel Size | FLOAT | 0.1 | 0.00010 – 2 | Size of the voxel in object space used for volume evaluation. Lower values preserve finer details. |
| Adaptivity | FLOAT | 0 | 0 – 1 | Reduces the final face count by simplifying geometry where detail is not needed, generating triangles. A value greater than 0 disables Fix Poles. |
| Remove Disconnected | BOOLEAN | aan | – | |
| Smooth Shading | BOOLEAN | uit | – | Output faces with smooth shading rather than flat shaded |
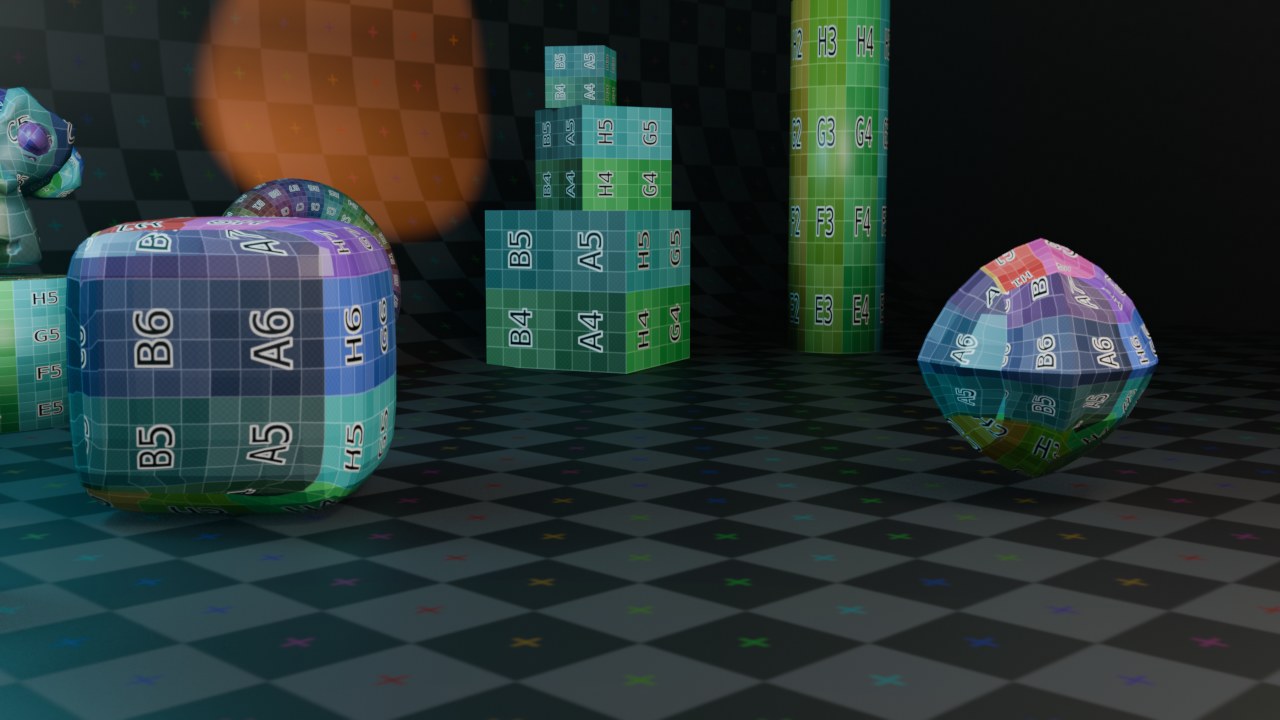
Stack-volgorde maakt het verschil
- 1Bevel → Subsurf
De afronding krijgt genoeg eigen geometrie mee om scherp te blijven na het gladstrijken.
- 2Subsurf → Bevel
Subdivision Surface heeft de rand al weggewerkt voor Bevel er iets mee kan doen.
Screw · Skin · Solidify
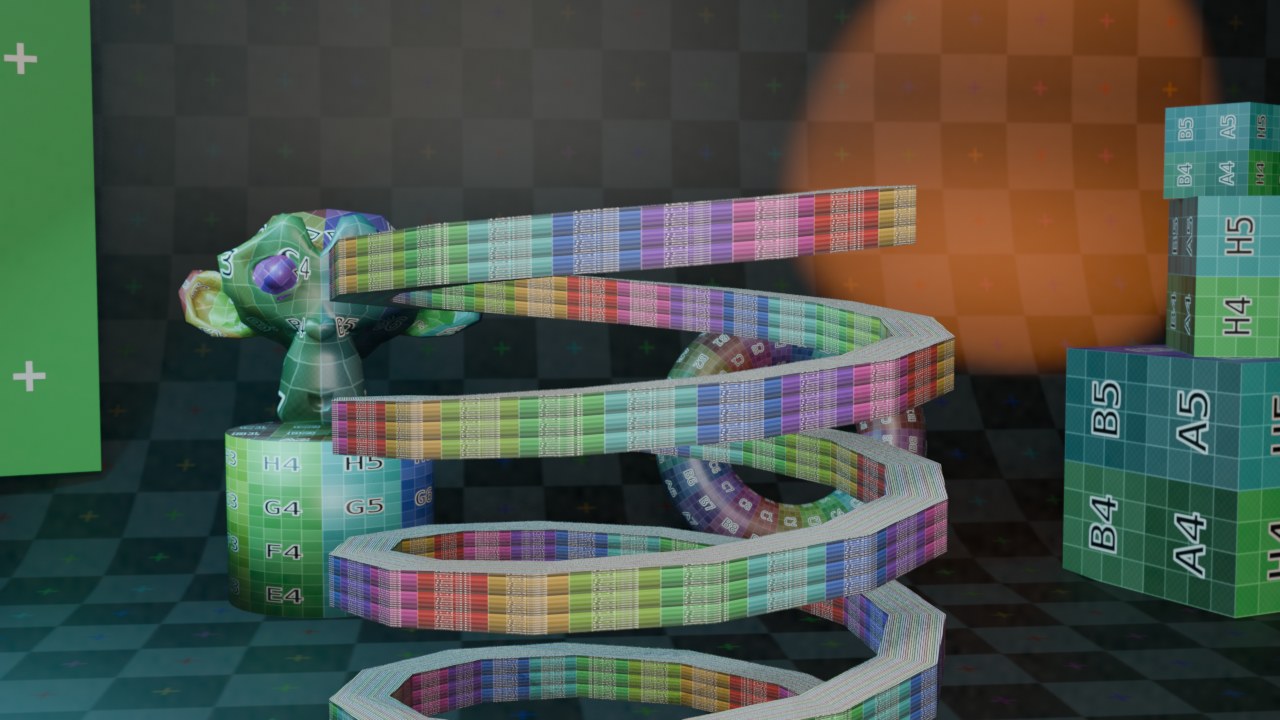
Render: Screw.
 RECRENDER · EEVEE00:00:00:001280×720
Screw — Draait een profiel om een as en trekt er in een beweging een schroefvormige of ronddraaiende vorm van, zoals een schroefdraad, een trap of een fles op de draaibank.
| Instelling | Type | Standaard | Bereik | Wat hij doet (tooltip uit Blender) |
|---|---|---|---|---|
| Apply on Spline | BOOLEAN | uit | – | Apply this and all preceding deformation modifiers on splines' points rather than on filled curve/surface |
| Execution Time | FLOAT | 0 | -10000 – 10000 | Time in seconds that the modifier took to evaluate. This is only set on evaluated objects. If multiple modifiers run in parallel, execution time is not a reliable metric. |
| Persistent UID | INT | 0 | -10000 – 10000 | Uniquely identifies the modifier within the modifier stack that it is part of |
| Object | POINTER | – | – | Object to define the screw axis |
| Steps | INT | 16 | 1 – 512 | Number of steps in the revolution |
| Render Steps | INT | 16 | 1 – 512 | Number of steps in the revolution |
| Iterations | INT | 1 | 1 – 100 | Number of times to apply the screw operation |
| Axis | ENUM | Z | X, Y, Z | Screw axis |
| Angle | FLOAT | 6.283 | – | Angle of revolution |
| Screw | FLOAT | 0 | -10000 – 10000 | Offset the revolution along its axis |
| Merge Distance | FLOAT | 0.01 | 0 – 1 | Limit below which to merge vertices |
| Flip | BOOLEAN | uit | – | Flip normals of lathed faces |
| Calculate Order | BOOLEAN | uit | – | Calculate the order of edges (needed for meshes, but not curves) |
| Object Screw | BOOLEAN | uit | – | Use the distance between the objects to make a screw |
| Merge Vertices | BOOLEAN | uit | – | Merge adjacent vertices (screw offset must be zero) |
| Smooth Shading | BOOLEAN | aan | – | Output faces with smooth shading rather than flat shaded |
| Stretch U | BOOLEAN | uit | – | Stretch the U coordinates between 0 and 1 when UVs are present |
| Stretch V | BOOLEAN | uit | – | Stretch the V coordinates between 0 and 1 when UVs are present |
Skin — Zet losse vertices en edges (een soort skelet) om in een volumineus buisvormig mesh, waarbij je per vertex de dikte instelt. Snelle manier om een grofweg humanoide of dierlijke vorm neer te zetten voordat je verder detailleert.
| Instelling | Type | Standaard | Bereik | Wat hij doet (tooltip uit Blender) |
|---|---|---|---|---|
| Apply on Spline | BOOLEAN | uit | – | Apply this and all preceding deformation modifiers on splines' points rather than on filled curve/surface |
| Execution Time | FLOAT | 0 | -10000 – 10000 | Time in seconds that the modifier took to evaluate. This is only set on evaluated objects. If multiple modifiers run in parallel, execution time is not a reliable metric. |
| Persistent UID | INT | 0 | -10000 – 10000 | Uniquely identifies the modifier within the modifier stack that it is part of |
| Branch Smoothing | FLOAT | 0 | 0 – 1 | Smooth complex geometry around branches |
| Smooth Shading | BOOLEAN | uit | – | Output faces with smooth shading rather than flat shaded |
| X | BOOLEAN | aan | – | Avoid making unsymmetrical quads across the X axis |
| Y | BOOLEAN | uit | – | Avoid making unsymmetrical quads across the Y axis |
| Z | BOOLEAN | uit | – | Avoid making unsymmetrical quads across the Z axis |
Solidify — Geeft een plat vlak (met slechts een laag faces) echte dikte door er een tweede laag aan te geven en de zijkanten te verbinden. Onmisbaar voor kleding, bladeren, metalen plaat: alles dat als los oppervlak begint maar dikte nodig heeft.
Wat gaat er mis — Bij omgekeerde normals dikt Solidify naar de verkeerde kant uit, zodat het object van binnenuit lijkt te groeien; controleer de normals eerst voor je Solidify toevoegt.
| Instelling | Type | Standaard | Bereik | Wat hij doet (tooltip uit Blender) |
|---|---|---|---|---|
| Apply on Spline | BOOLEAN | uit | – | Apply this and all preceding deformation modifiers on splines' points rather than on filled curve/surface |
| Execution Time | FLOAT | 0 | -10000 – 10000 | Time in seconds that the modifier took to evaluate. This is only set on evaluated objects. If multiple modifiers run in parallel, execution time is not a reliable metric. |
| Persistent UID | INT | 0 | -10000 – 10000 | Uniquely identifies the modifier within the modifier stack that it is part of |
| Mode | ENUM | EXTRUDE | Simple, Complex | Selects the used algorithm |
| Thickness | FLOAT | 0.01 | -10 – 10 | Thickness of the shell |
| Clamp | FLOAT | 0 | 0 – 2 | Offset clamp based on geometry scale |
| Angle Clamp | BOOLEAN | uit | – | Clamp thickness based on angles |
| Vertex Group Factor | FLOAT | 0 | 0 – 1 | Thickness factor to use for zero vertex group influence |
| Offset | FLOAT | -1 | -1 – 1 | Offset the thickness from the center |
| Inner Crease | FLOAT | 0 | 0 – 1 | Assign a crease to inner edges |
| Outer Crease | FLOAT | 0 | 0 – 1 | Assign a crease to outer edges |
| Rim Crease | FLOAT | 0 | 0 – 1 | Assign a crease to the edges making up the rim |
| Material Offset | INT | 0 | -32768 – 32767 | Offset material index of generated faces |
| Rim Material Offset | INT | 0 | -32768 – 32767 | Offset material index of generated rim faces |
| Vertex Group | STRING | – | – | Vertex group name |
| Shell Vertex Group | STRING | – | – | Vertex group that the generated shell geometry will be weighted to |
| Rim Vertex Group | STRING | – | – | Vertex group that the generated rim geometry will be weighted to |
| Fill Rim | BOOLEAN | aan | – | Create edge loops between the inner and outer surfaces on face edges (slow, disable when not needed) |
| Even Thickness | BOOLEAN | uit | – | Maintain thickness by adjusting for sharp corners (slow, disable when not needed) |
| High Quality Normals | BOOLEAN | uit | – | Calculate normals which result in more even thickness (slow, disable when not needed) |
| Vertex Group Invert | BOOLEAN | uit | – | Invert the vertex group influence |
| Flat Faces | BOOLEAN | uit | – | Make faces use the minimal vertex weight assigned to their vertices (ensures new faces remain parallel to their original ones, slow, disable when not needed) |
| Flip Normals | BOOLEAN | uit | – | Invert the face direction |
| Only Rim | BOOLEAN | uit | – | Only add the rim to the original data |
| Thickness Mode | ENUM | CONSTRAINTS | Fixed, Even, Constraints | Selects the used thickness algorithm |
| Boundary Shape | ENUM | NONE | None, Round, Flat | Selects the boundary adjustment algorithm |
| Merge Threshold | FLOAT | 0 | 0 – 1 | Distance within which degenerated geometry is merged |
| Bevel Convex | FLOAT | 0 | -1 – 1 | Edge bevel weight to be added to outside edges |
Subdivision Surface · Triangulate · Volume to Mesh
Render: Subdivision Surface.
RECRENDER · EEVEE00:00:00:001280×720Subdivision Surface — Verdeelt elke face herhaaldelijk in kleinere faces en trekt het resultaat glad volgens Catmull-Clark. De standaardmanier om van een low-poly kooi een organisch glad oppervlak te maken zonder die vorm zelf te modelleren.
Wat gaat er mis — Subdivision Surface verraadt slechte topologie meedogenloos: n-gons en poles op de verkeerde plek geven bobbels en pinching die pas zichtbaar worden zodra de modifier aan staat. Bekijk het resultaat dus voortdurend mee terwijl je in edit mode modelleert, niet pas op het einde.
| Instelling | Type | Standaard | Bereik | Wat hij doet (tooltip uit Blender) |
|---|---|---|---|---|
| Apply on Spline | BOOLEAN | uit | – | Apply this and all preceding deformation modifiers on splines' points rather than on filled curve/surface |
| Execution Time | FLOAT | 0 | -10000 – 10000 | Time in seconds that the modifier took to evaluate. This is only set on evaluated objects. If multiple modifiers run in parallel, execution time is not a reliable metric. |
| Persistent UID | INT | 0 | -10000 – 10000 | Uniquely identifies the modifier within the modifier stack that it is part of |
| UV Smooth | ENUM | PRESERVE_BOUNDARIES | None, Keep Corners, Keep Corners, Junctions, Keep Corners, Junctions, Concave, Keep Boundaries, All | Controls how smoothing is applied to UVs |
| Quality | INT | 3 | 1 – 6 | Accuracy of vertex positions, lower value is faster but less precise |
| Boundary Smooth | ENUM | ALL | Keep Corners, All | Controls how open boundaries are smoothed |
| Subdivision Type | ENUM | CATMULL_CLARK | Catmull-Clark, Simple | Select type of subdivision algorithm |
| Levels | INT | 1 | 0 – 6 | Number of subdivisions to perform in the 3D viewport |
| Render Levels | INT | 2 | 0 – 6 | Number of subdivisions to perform when rendering |
| Optimal Display | BOOLEAN | aan | – | Skip displaying interior subdivided edges |
| Use Creases | BOOLEAN | aan | – | Use mesh crease information to sharpen edges or corners |
| Use Custom Normals | BOOLEAN | uit | – | Interpolates existing custom normals to resulting mesh |
| Use Limit Surface | BOOLEAN | aan | – | Place vertices at the surface that would be produced with infinite levels of subdivision (smoothest possible shape) |
| Use Adaptive Subdivision | BOOLEAN | uit | – | Adaptively subdivide mesh based on camera distance |
| Adaptive Space | ENUM | PIXEL | Pixel, Object | How to adaptively subdivide the mesh |
| Pixel Size | FLOAT | 1 | 0.5 – 1000 | Target polygon pixel size for adaptive subdivision |
| Edge Length | FLOAT | 0.01 | 0.001 – 1000 | Target object space edge length for adaptive subdivision |
| open_adaptive_subdivision_panel | BOOLEAN | uit | – | |
| open_advanced_panel | BOOLEAN | uit | – |
Triangulate — Zet alle faces om in driehoeken volgens een gekozen methode (Beauty, Fixed, Shortest Diagonal...). Sommige exportformaten en engines verwachten enkel driehoeken; deze modifier voorkomt dat je het basismesh zelf al in quads-onvriendelijke driehoeken moet opdelen.
| Instelling | Type | Standaard | Bereik | Wat hij doet (tooltip uit Blender) |
|---|---|---|---|---|
| Apply on Spline | BOOLEAN | uit | – | Apply this and all preceding deformation modifiers on splines' points rather than on filled curve/surface |
| Execution Time | FLOAT | 0 | -10000 – 10000 | Time in seconds that the modifier took to evaluate. This is only set on evaluated objects. If multiple modifiers run in parallel, execution time is not a reliable metric. |
| Persistent UID | INT | 0 | -10000 – 10000 | Uniquely identifies the modifier within the modifier stack that it is part of |
| Quad Method | ENUM | SHORTEST_DIAGONAL | Beauty, Fixed, Fixed Alternate, Shortest Diagonal, Longest Diagonal | Method for splitting the quads into triangles |
| N-gon Method | ENUM | BEAUTY | Beauty, Clip | Method for splitting the n-gons into triangles |
| Minimum Vertices | INT | 4 | 4 – onbegrensd | Triangulate only polygons with vertex count greater than or equal to this number |
| Keep Normals | BOOLEAN | uit | – | Try to preserve custom normals. Warning: Depending on chosen triangulation method, shading may not be fully preserved, "Fixed" method usually gives the best result here |
Volume to Mesh — Het omgekeerde van Mesh to Volume: zet een volume-datablock (bijvoorbeeld een geimporteerde VDB, of een fluid-simulatie) om in een polygonaal oppervlak, met een instelbare drempelwaarde en gladheid.
| Instelling | Type | Standaard | Bereik | Wat hij doet (tooltip uit Blender) |
|---|---|---|---|---|
| Apply on Spline | BOOLEAN | uit | – | Apply this and all preceding deformation modifiers on splines' points rather than on filled curve/surface |
| Execution Time | FLOAT | 0 | -10000 – 10000 | Time in seconds that the modifier took to evaluate. This is only set on evaluated objects. If multiple modifiers run in parallel, execution time is not a reliable metric. |
| Persistent UID | INT | 0 | -10000 – 10000 | Uniquely identifies the modifier within the modifier stack that it is part of |
| Object | POINTER | – | – | Object |
| Threshold | FLOAT | 0 | 0.001 – 1 | Voxels with a larger value are inside the generated mesh |
| Adaptivity | FLOAT | 0 | 0 – 1 | Reduces the final face count by simplifying geometry where detail is not needed |
| Smooth Shading | BOOLEAN | uit | – | Output faces with smooth shading rather than flat shaded |
| Grid Name | STRING | – | – | Grid in the volume object that is converted to a mesh |
| Resolution Mode | ENUM | GRID | Grid, Voxel Amount, Voxel Size | Mode for how the desired voxel size is specified |
| Voxel Size | FLOAT | 0 | 0 – onbegrensd | Smaller values result in a higher resolution output |
| Voxel Amount | INT | 0 | 0 – onbegrensd | Approximate number of voxels along one axis |
Wat gaat er mis — Remesh-achtige modifiers
Remesh, Multires en Decimate delen één valkuil: ze bouwen de topologie grotendeels zelf, los van wat je zelf tekende. Dat is precies hun kracht bij sculpten, maar betekent ook dat UV's, materiaalindexen en scherpe randen verloren gaan of onvoorspelbaar verspringen zodra je Voxel Size of het resolutieniveau wijzigt. Bak dus pas texturen of UV's nadat de remesh-instellingen definitief vaststaan.
RECRENDER · EEVEE00:00:00:001280×720Weld · Wireframe
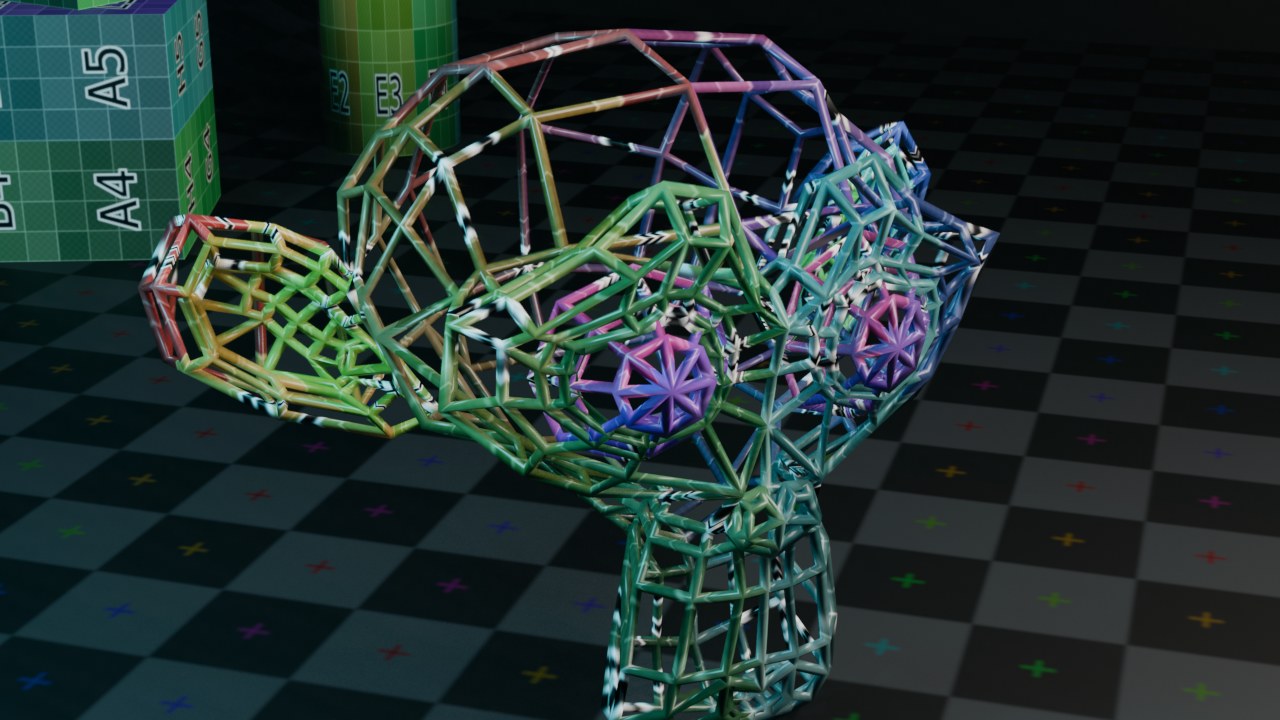
Render: Wireframe.
 RECRENDER · EEVEE00:00:00:001280×720
Weld — Smelt vertices die dicht genoeg bij elkaar liggen samen tot een vertex, op basis van een afstand of van een vertex group. De opvolger van het oude Remove Doubles, nu als herhaalbare, niet-destructieve modifier; nuttig na Booleans of Mirror-naden die niet helemaal sluiten.
| Instelling | Type | Standaard | Bereik | Wat hij doet (tooltip uit Blender) |
|---|---|---|---|---|
| Apply on Spline | BOOLEAN | uit | – | Apply this and all preceding deformation modifiers on splines' points rather than on filled curve/surface |
| Execution Time | FLOAT | 0 | -10000 – 10000 | Time in seconds that the modifier took to evaluate. This is only set on evaluated objects. If multiple modifiers run in parallel, execution time is not a reliable metric. |
| Persistent UID | INT | 0 | -10000 – 10000 | Uniquely identifies the modifier within the modifier stack that it is part of |
| Mode | ENUM | ALL | All, Connected | Mode defines the merge rule |
| Merge Distance | FLOAT | 0.001 | 0 – 1 | Limit below which to merge vertices |
| Vertex Group | STRING | – | – | Vertex group name for selecting the affected areas |
| Invert | BOOLEAN | uit | – | Invert vertex group influence |
| Only Loose Edges | BOOLEAN | uit | – | Collapse edges without faces, cloth sewing edges |
Wireframe — Vervangt elke edge van het mesh door een klein buisje, zodat het hele mesh er als draadframe-model uitziet, met dikte en dus renderbaar. Gebruikt voor technische visualisaties of stilering, en als snelle manier om een kooi zichtbaar te maken.
| Instelling | Type | Standaard | Bereik | Wat hij doet (tooltip uit Blender) |
|---|---|---|---|---|
| Apply on Spline | BOOLEAN | uit | – | Apply this and all preceding deformation modifiers on splines' points rather than on filled curve/surface |
| Execution Time | FLOAT | 0 | -10000 – 10000 | Time in seconds that the modifier took to evaluate. This is only set on evaluated objects. If multiple modifiers run in parallel, execution time is not a reliable metric. |
| Persistent UID | INT | 0 | -10000 – 10000 | Uniquely identifies the modifier within the modifier stack that it is part of |
| Thickness | FLOAT | 0.02 | 0 – 1 | Thickness factor |
| Vertex Group Factor | FLOAT | 0 | 0 – 1 | Thickness factor to use for zero vertex group influence |
| Offset | FLOAT | 0 | -1 – 1 | Offset the thickness from the center |
| Replace | BOOLEAN | aan | – | Remove original geometry |
| Boundary | BOOLEAN | uit | – | Support face boundaries |
| Offset Even | BOOLEAN | aan | – | Scale the offset to give more even thickness |
| Offset Relative | BOOLEAN | uit | – | Scale the offset by surrounding geometry |
| Offset Relative | BOOLEAN | uit | – | Crease hub edges for improved subdivision surface |
| Weight | FLOAT | 1 | 0 – 1 | Crease weight (if active) |
| Material Offset | INT | 0 | -32768 – 32767 | Offset material index of generated faces |
| Vertex Group | STRING | – | – | Vertex group name for selecting the affected areas |
| Invert | BOOLEAN | uit | – | Invert vertex group influence |
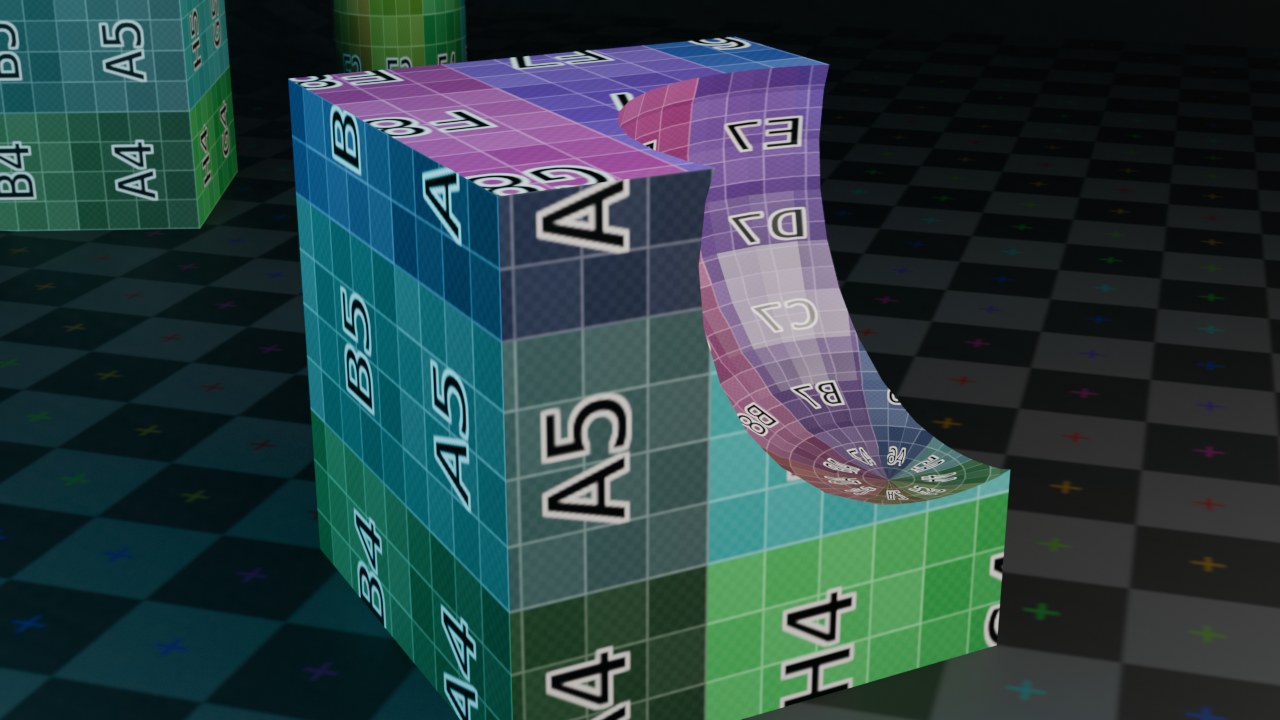
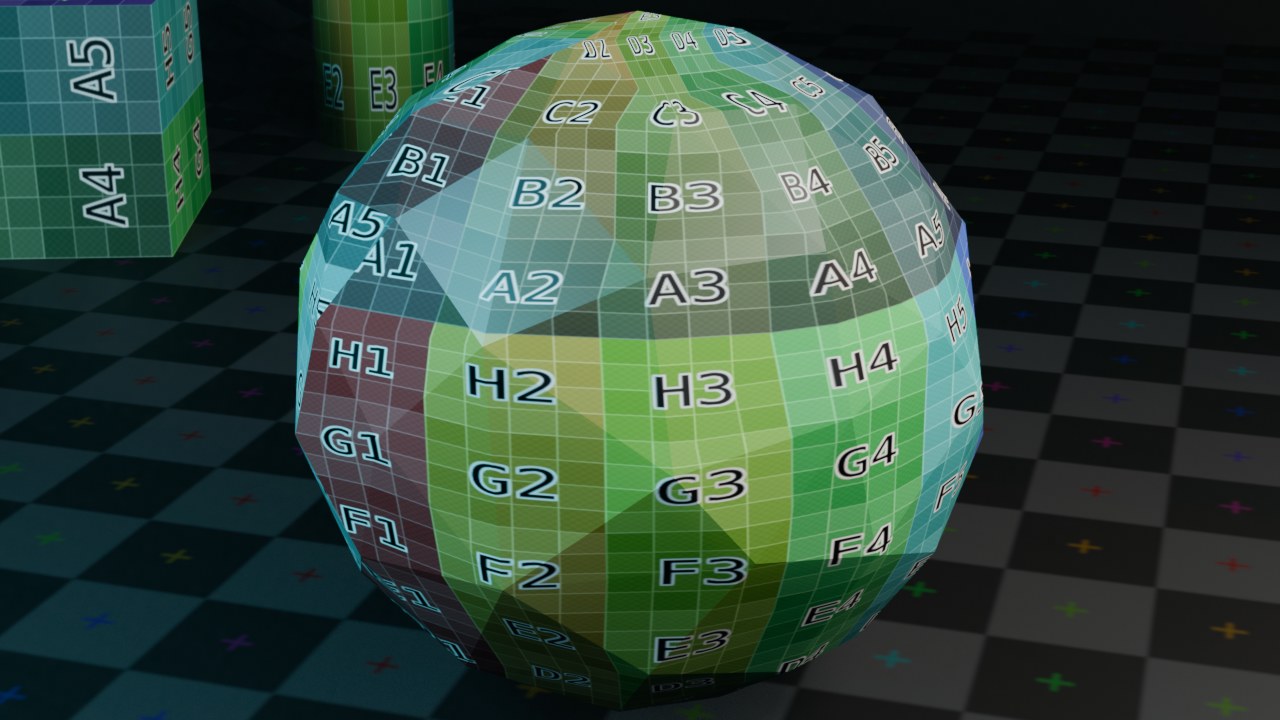
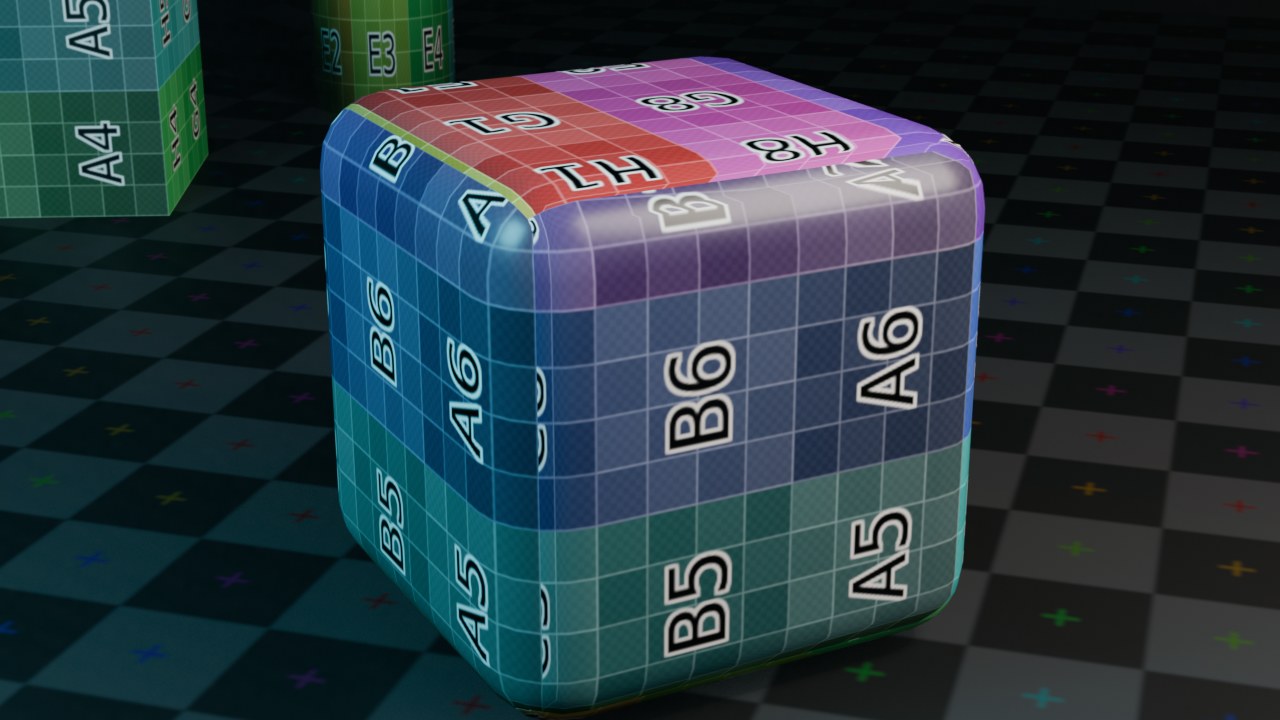
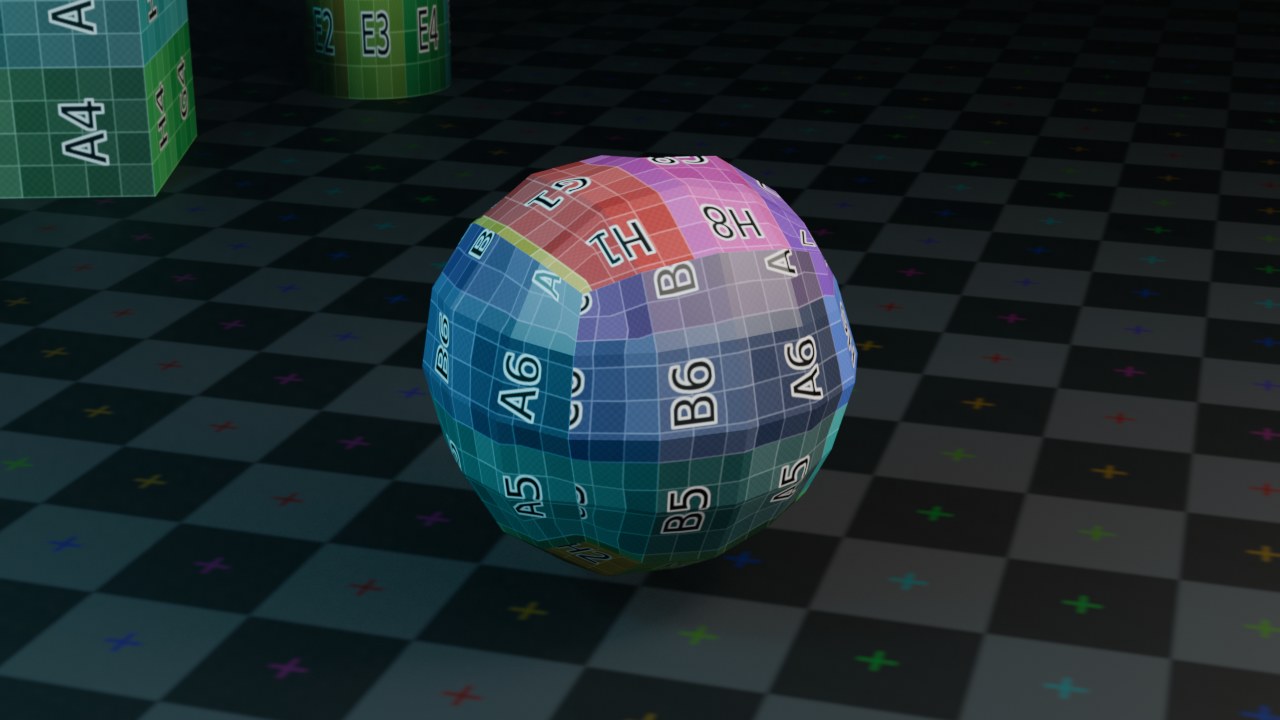
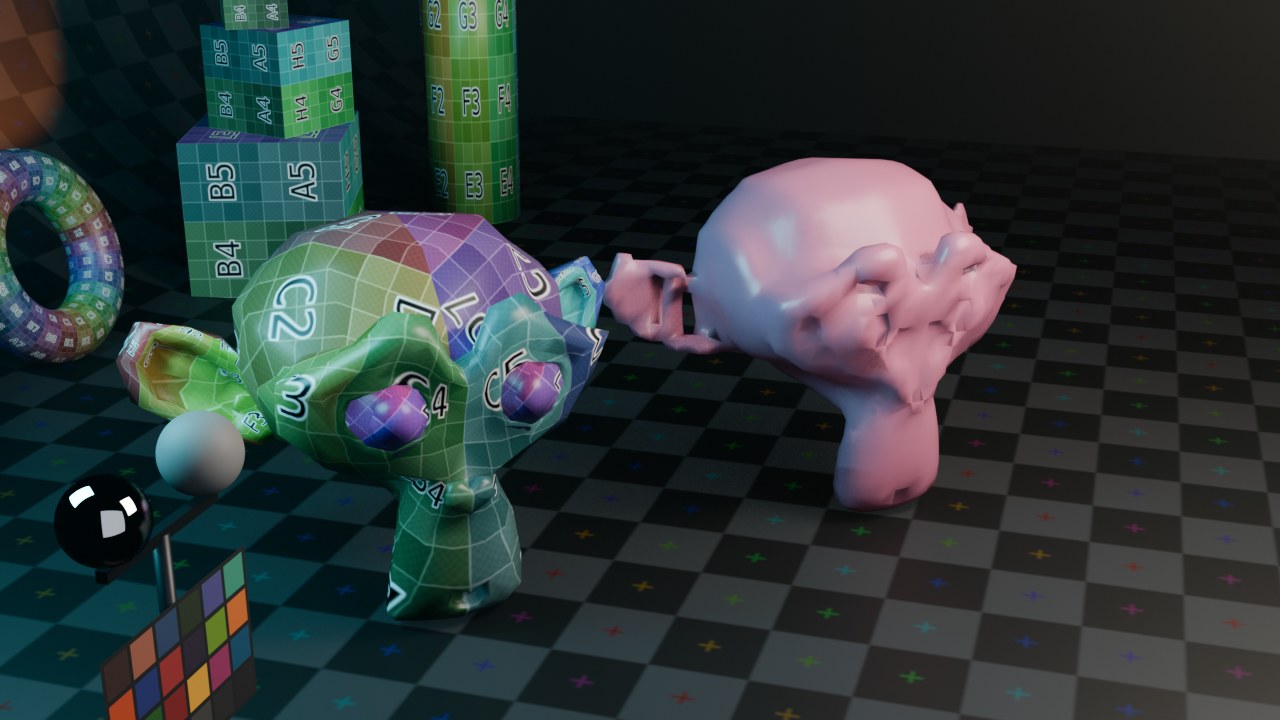
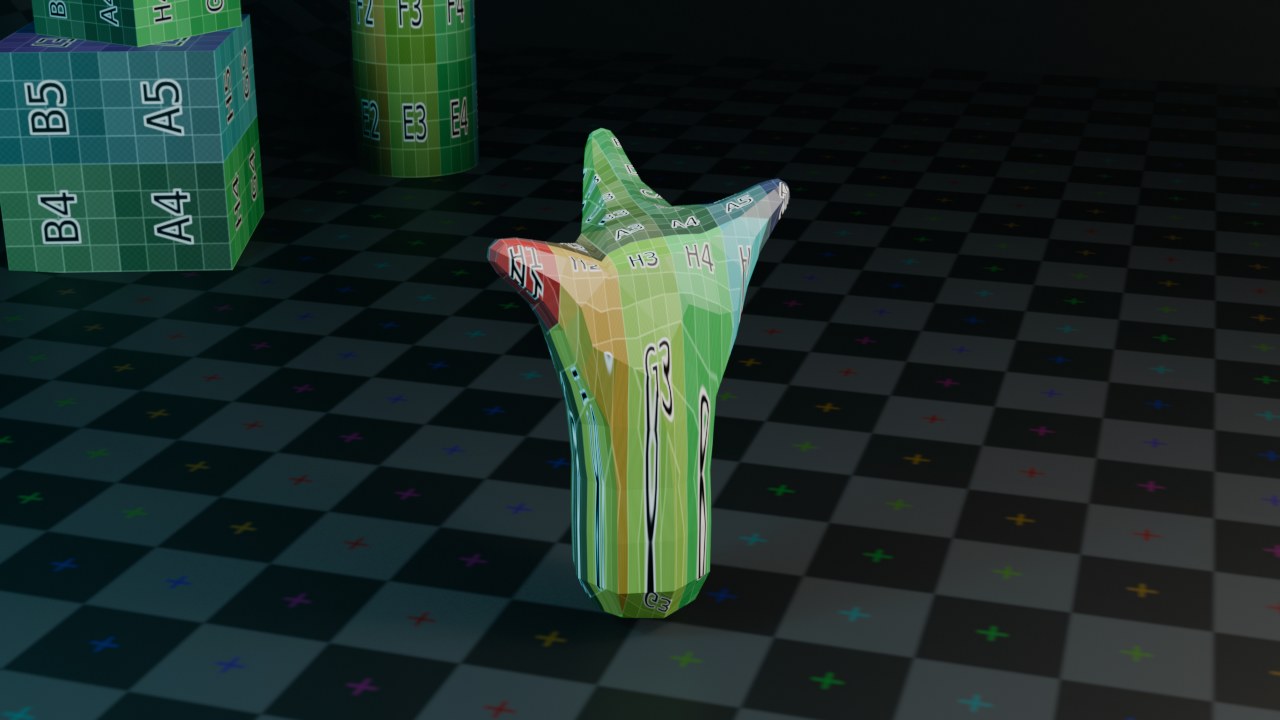
Alle Generate-modifiers op dezelfde rasterkubus of -monkey
Zestien van de twintig Generate-modifiers als render — Geometry Nodes (eigen hoofdstuk in Deel I), Mesh to Volume, Volume to Mesh en Weld niet.
RECRENDER · EEVEE00:00:00:001280×720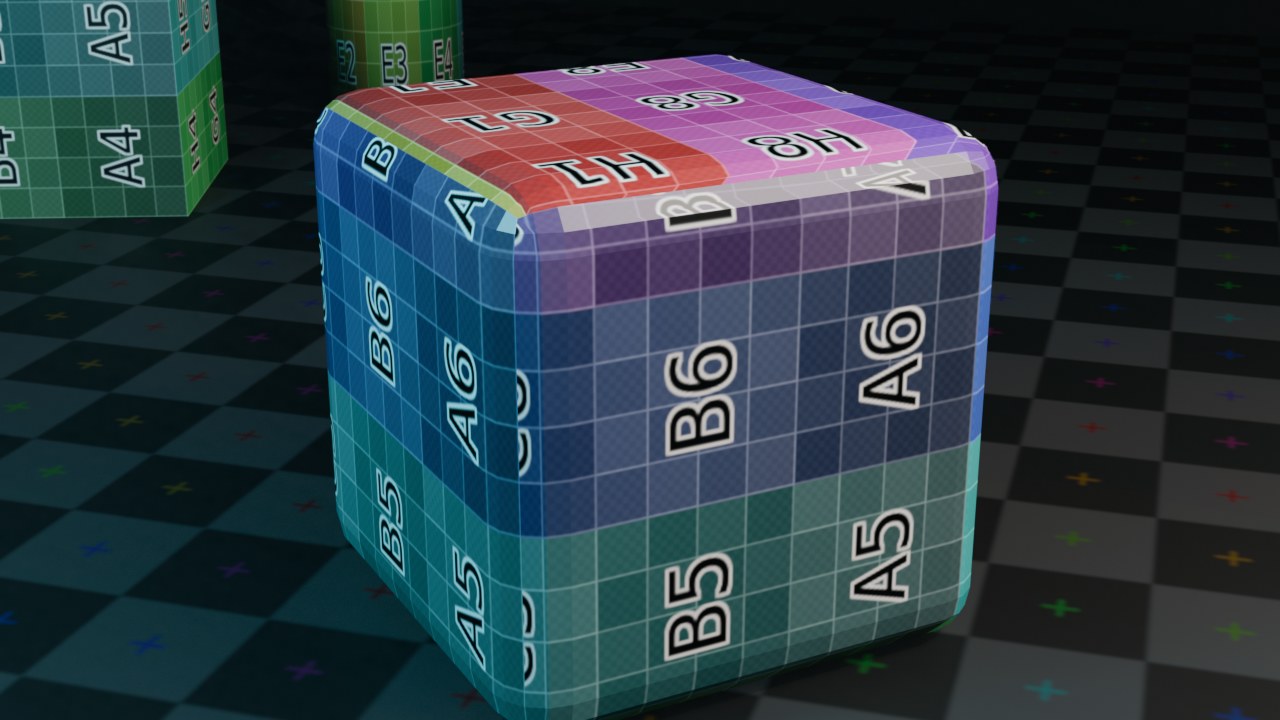 RECRENDER · EEVEE00:00:00:001280×720
 RECRENDER · EEVEE00:00:00:001280×720RECRENDER · EEVEE00:00:00:001280×720
 RECRENDER · EEVEE00:00:00:001280×720
 RECRENDER · EEVEE00:00:00:001280×720RECRENDER · EEVEE00:00:00:001280×720RECRENDER · EEVEE00:00:00:001280×720
 RECRENDER · EEVEE00:00:00:001280×720
 RECRENDER · EEVEE00:00:00:001280×720RECRENDER · EEVEE00:00:00:001280×720
 RECRENDER · EEVEE00:00:00:001280×720
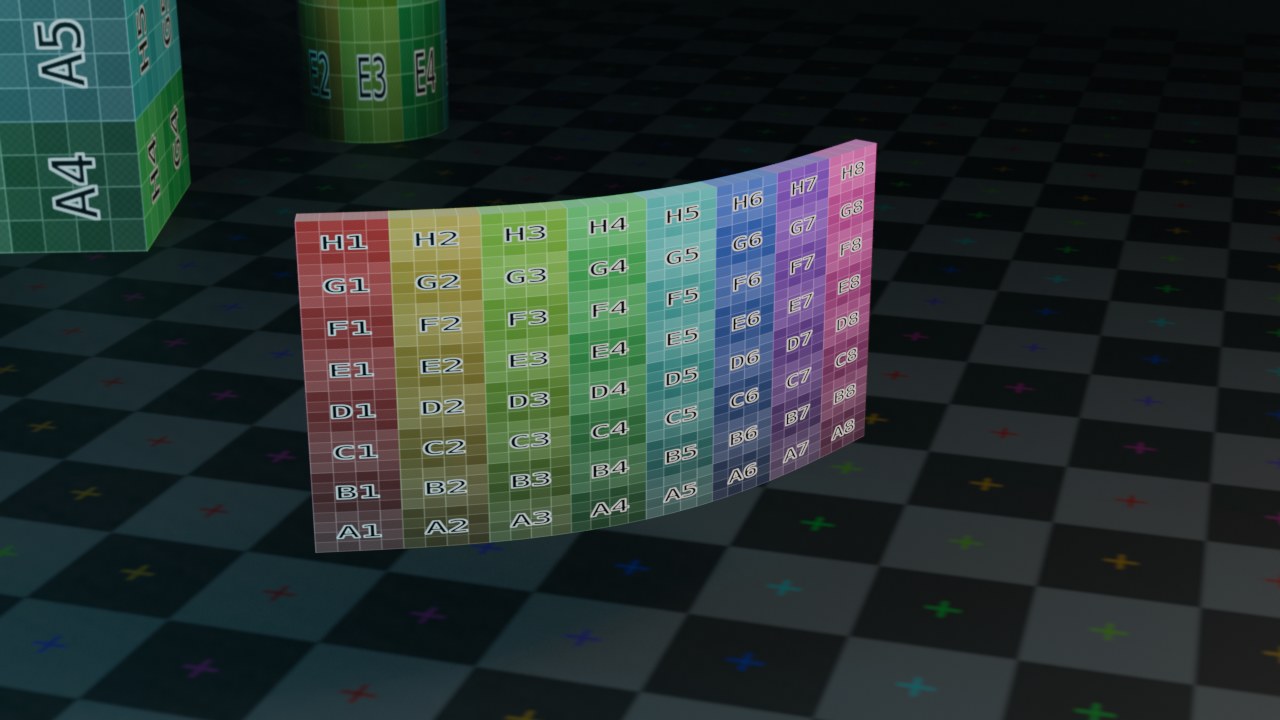 RECRENDER · EEVEE00:00:00:001280×720RECRENDER · EEVEE00:00:00:001280×720
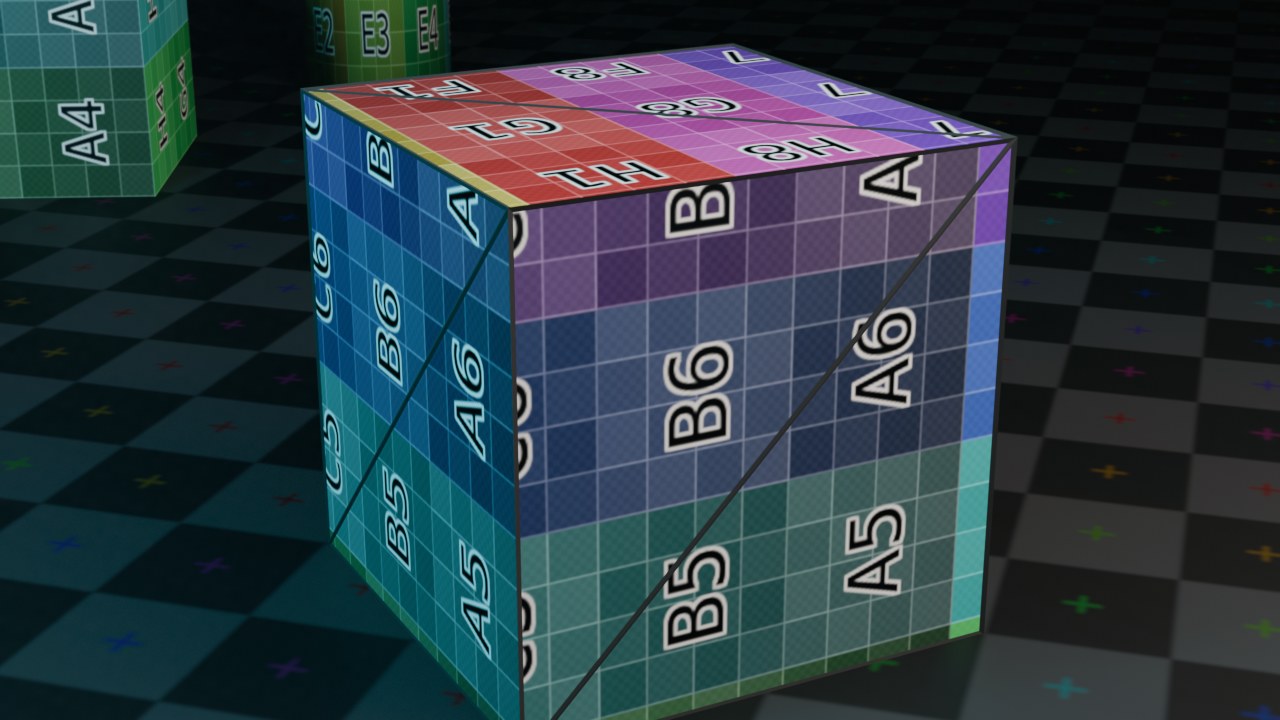 RECRENDER · EEVEE00:00:00:001280×720RECRENDER · EEVEE00:00:00:001280×720
Deform — bestaande vertices verplaatsen
De zeventien Deform-modifiers voegen geen geometrie toe of weg; ze verplaatsen enkel de bestaande vertices, meestal aangestuurd door een hulpobject (Armature, Lattice, Empty, een doelmesh) of door een textuur (Displace, Wave). Dit is de categorie die riggen, kleding-fitting en organische, niet-destructieve vervorming mogelijk maakt.
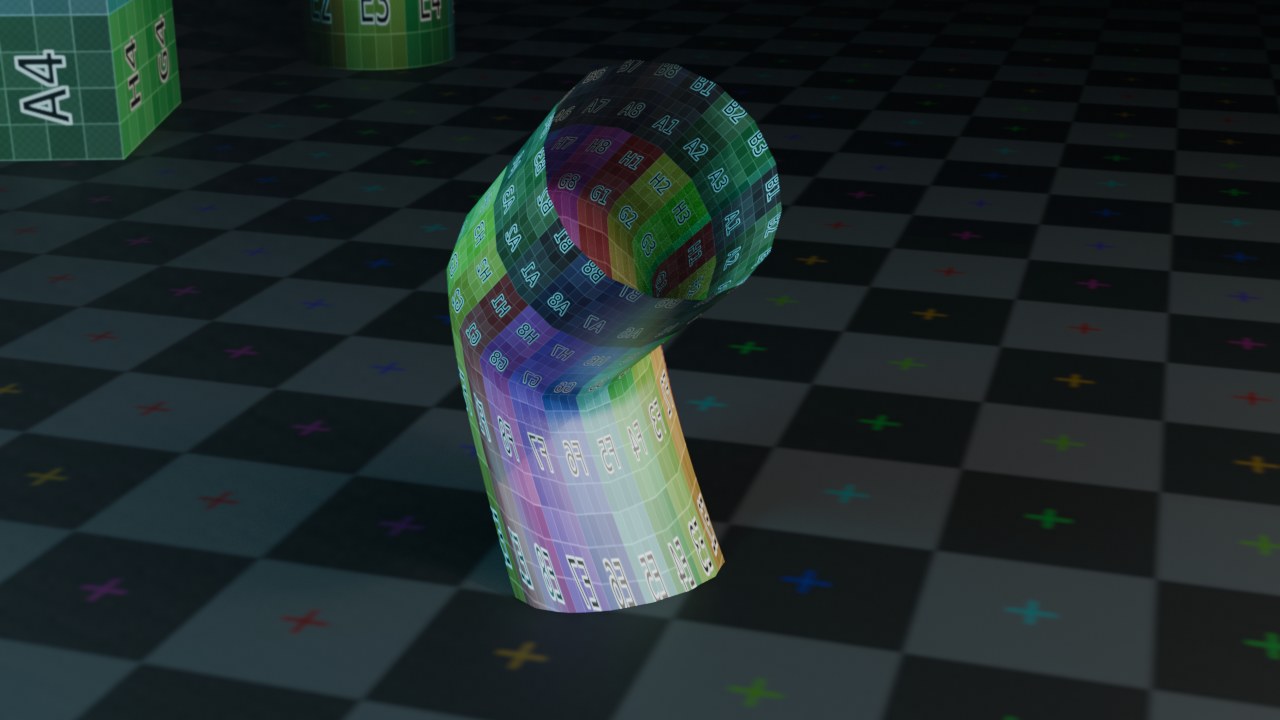 RECRENDER · EEVEE00:00:00:001280×720
Armature · Cast · Curve
Render: Armature.
RECRENDER · EEVEE00:00:00:001280×720Armature — Vervormt het mesh volgens de bones van een armature en de vertex-groepsgewichten die aan elke bone gekoppeld zijn. De kernmodifier van elk geriggd personage; zonder deze modifier beweegt een skelet wel, maar het mesh niet mee.
Wat gaat er mis — Onvoldoende of foutief genormaliseerde gewichten (de som per vertex moet ongeveer 1 zijn) geven scheurende of dubbel-vervormende huid bij extreme poses; controleer met Weight Paint of het N-panel Item-tabblad voor je verder animeert.
| Instelling | Type | Standaard | Bereik | Wat hij doet (tooltip uit Blender) |
|---|---|---|---|---|
| Apply on Spline | BOOLEAN | uit | – | Apply this and all preceding deformation modifiers on splines' points rather than on filled curve/surface |
| Execution Time | FLOAT | 0 | -10000 – 10000 | Time in seconds that the modifier took to evaluate. This is only set on evaluated objects. If multiple modifiers run in parallel, execution time is not a reliable metric. |
| Persistent UID | INT | 0 | -10000 – 10000 | Uniquely identifies the modifier within the modifier stack that it is part of |
| Object | POINTER | – | – | Armature object to deform with |
| Use Bone Envelopes | BOOLEAN | uit | – | Bind Bone envelopes to armature modifier |
| Use Vertex Groups | BOOLEAN | aan | – | Bind vertex groups to armature modifier |
| Preserve Volume | BOOLEAN | uit | – | Deform rotation interpolation with quaternions |
| Multi Modifier | BOOLEAN | uit | – | Use same input as previous modifier, and mix results using overall vgroup |
| Vertex Group | STRING | – | – | Name of Vertex Group which determines influence of modifier per point |
| Invert | BOOLEAN | uit | – | Invert vertex group influence |
Cast — Trekt het mesh naar een eenvoudige vorm toe (bol, cilinder of kubus), met een instelbare factor tussen 0 en 1. Snelle manier om een kubus organisch af te ronden of om een silhouet grover te maken.
| Instelling | Type | Standaard | Bereik | Wat hij doet (tooltip uit Blender) |
|---|---|---|---|---|
| Apply on Spline | BOOLEAN | uit | – | Apply this and all preceding deformation modifiers on splines' points rather than on filled curve/surface |
| Execution Time | FLOAT | 0 | -10000 – 10000 | Time in seconds that the modifier took to evaluate. This is only set on evaluated objects. If multiple modifiers run in parallel, execution time is not a reliable metric. |
| Persistent UID | INT | 0 | -10000 – 10000 | Uniquely identifies the modifier within the modifier stack that it is part of |
| Shape | ENUM | SPHERE | Sphere, Cylinder, Cuboid | Target object shape |
| Object | POINTER | – | – | Control object: if available, its location determines the center of the effect |
| Invert | BOOLEAN | uit | – | Invert vertex group influence |
| X | BOOLEAN | aan | – | |
| Y | BOOLEAN | aan | – | |
| Z | BOOLEAN | aan | – | |
| Size from Radius | BOOLEAN | aan | – | Use radius as size of projection shape (0 = auto) |
| Use Transform | BOOLEAN | uit | – | Use object transform to control projection shape |
| Factor | FLOAT | 0.5 | -10 – 10 | |
| Radius | FLOAT | 0 | 0 – 100 | Only deform vertices within this distance from the center of the effect (leave as 0 for infinite.) |
| Size | FLOAT | 0 | 0 – 100 | Size of projection shape (leave as 0 for auto) |
| Vertex Group | STRING | – | – | Vertex group name |
Curve — Buigt het mesh langs een curve-object, zoals een lint langs een pad gelegd. Gebruikt voor slangen, kabels, tekst die een pad volgt, of elk object dat een niet-rechte baan moet volgen zonder dat je het zelf punt voor punt buigt.
| Instelling | Type | Standaard | Bereik | Wat hij doet (tooltip uit Blender) |
|---|---|---|---|---|
| Apply on Spline | BOOLEAN | uit | – | Apply this and all preceding deformation modifiers on splines' points rather than on filled curve/surface |
| Execution Time | FLOAT | 0 | -10000 – 10000 | Time in seconds that the modifier took to evaluate. This is only set on evaluated objects. If multiple modifiers run in parallel, execution time is not a reliable metric. |
| Persistent UID | INT | 0 | -10000 – 10000 | Uniquely identifies the modifier within the modifier stack that it is part of |
| Object | POINTER | – | – | Curve object to deform with |
| Vertex Group | STRING | – | – | Name of Vertex Group which determines influence of modifier per point |
| Invert | BOOLEAN | uit | – | Invert vertex group influence |
| Deform Axis | ENUM | POS_X | X, Y, Z, -X, -Y, -Z | The axis that the curve deforms along |
Displace · Hook · Laplacian Deform
Render: Displace.
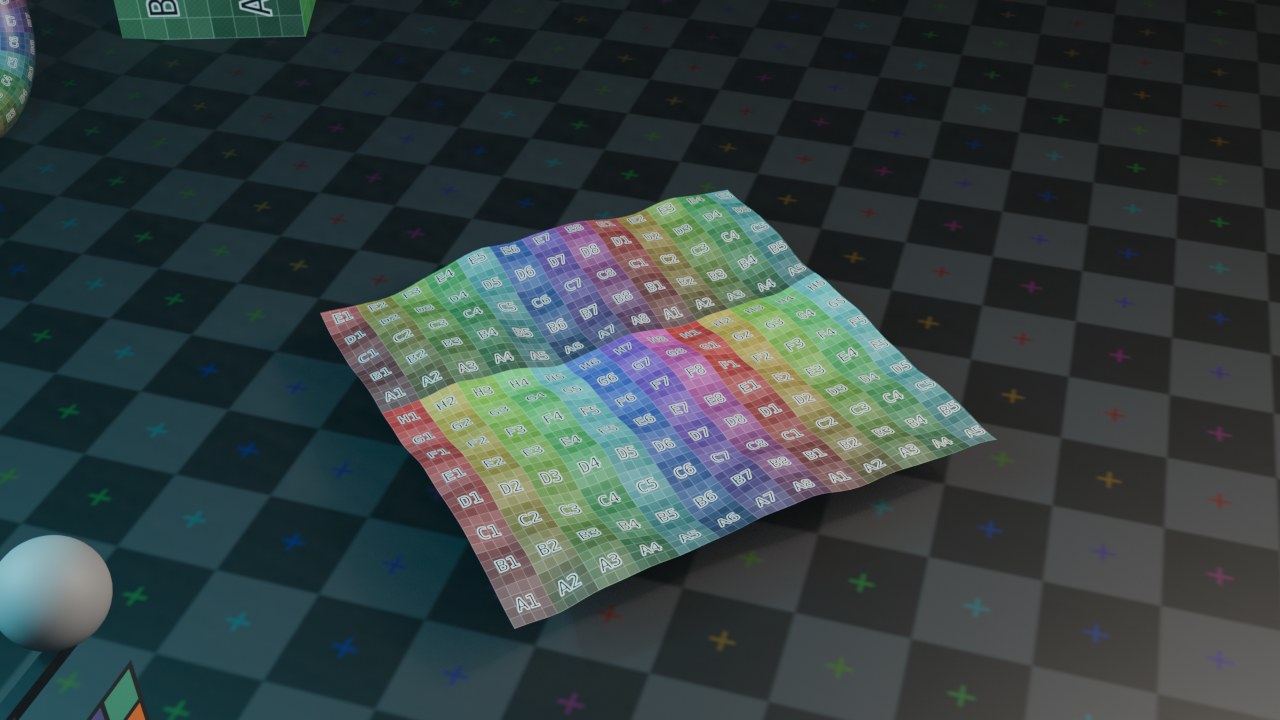 RECRENDER · EEVEE00:00:00:001280×720
Displace — Verplaatst elke vertex langs zijn normal, met een sterkte die uit een textuur wordt gelezen (een height map, procedureel of een afbeelding). De snelste manier om ruw relief op een dicht mesh te krijgen, bijvoorbeeld terrein of een verweerd oppervlak.
| Instelling | Type | Standaard | Bereik | Wat hij doet (tooltip uit Blender) |
|---|---|---|---|---|
| Apply on Spline | BOOLEAN | uit | – | Apply this and all preceding deformation modifiers on splines' points rather than on filled curve/surface |
| Execution Time | FLOAT | 0 | -10000 – 10000 | Time in seconds that the modifier took to evaluate. This is only set on evaluated objects. If multiple modifiers run in parallel, execution time is not a reliable metric. |
| Persistent UID | INT | 0 | -10000 – 10000 | Uniquely identifies the modifier within the modifier stack that it is part of |
| Vertex Group | STRING | – | – | Name of Vertex Group which determines influence of modifier per point |
| Midlevel | FLOAT | 0.5 | 0 – 1 | Material value that gives no displacement |
| Strength | FLOAT | 1 | -100 – 100 | Amount to displace geometry |
| Direction | ENUM | NORMAL | X, Y, Z, Normal, Custom Normal, RGB to XYZ | |
| Space | ENUM | LOCAL | Local, Global | |
| Invert | BOOLEAN | uit | – | Invert vertex group influence |
| Texture | POINTER | – | – | |
| Texture Coordinates | ENUM | LOCAL | Local, Global, Object, UV | |
| UV Map | STRING | – | – | UV map name |
| Texture Coordinate Object | POINTER | – | – | Object to set the texture coordinates |
| Texture Coordinate Bone | STRING | – | – | Bone to set the texture coordinates |
Hook — Koppelt een groep vertices aan een los controle-object (meestal een Empty), zodat het verplaatsen van dat object de vertices meetrekt, met een instelbare invloedsradius. Klassiek voor handmatige, procedureel-vrije vervormingen zoals het buigen van een vinger of het optrekken van een mondhoek.
| Instelling | Type | Standaard | Bereik | Wat hij doet (tooltip uit Blender) |
|---|---|---|---|---|
| Apply on Spline | BOOLEAN | uit | – | Apply this and all preceding deformation modifiers on splines' points rather than on filled curve/surface |
| Execution Time | FLOAT | 0 | -10000 – 10000 | Time in seconds that the modifier took to evaluate. This is only set on evaluated objects. If multiple modifiers run in parallel, execution time is not a reliable metric. |
| Persistent UID | INT | 0 | -10000 – 10000 | Uniquely identifies the modifier within the modifier stack that it is part of |
| Strength | FLOAT | 1 | 0 – 1 | Relative force of the hook |
| Falloff Type | ENUM | SMOOTH | No Falloff, Curve, Smooth, Sphere, Root, Inverse Square, Sharp, Linear, Constant | |
| Radius | FLOAT | 0 | 0 – 100 | If not zero, the distance from the hook where influence ends |
| Falloff Curve | POINTER | – | – | Custom falloff curve |
| Hook Center | FLOAT | 0 | -10000 – 10000 | Center of the hook, used for falloff and display |
| Matrix | FLOAT | 0 | -10000 – 10000 | Reverse the transformation between this object and its target |
| Object | POINTER | – | – | Parent Object for hook, also recalculates and clears offset |
| Sub-Target | STRING | – | – | Name of Parent Bone for hook (if applicable), also recalculates and clears offset |
| Uniform Falloff | BOOLEAN | uit | – | Compensate for non-uniform object scale |
| Vertex Group | STRING | – | – | Name of Vertex Group which determines influence of modifier per point |
| Vertex Indices | INT | 0 | 0 – 10000 | Indices of vertices bound to the modifier. For Bézier curves, handles count as additional vertices. |
| Invert | BOOLEAN | uit | – | Invert vertex group influence |
Laplacian Deform — Vervormt het mesh zo dat het lokale oppervlakte-detail behouden blijft terwijl enkele ankerpunten verplaatst worden; het mesh vloeit mee in plaats van star te blijven. Gebruikt voor organische vervorming zonder een volledige rig op te zetten.
| Instelling | Type | Standaard | Bereik | Wat hij doet (tooltip uit Blender) |
|---|---|---|---|---|
| Apply on Spline | BOOLEAN | uit | – | Apply this and all preceding deformation modifiers on splines' points rather than on filled curve/surface |
| Execution Time | FLOAT | 0 | -10000 – 10000 | Time in seconds that the modifier took to evaluate. This is only set on evaluated objects. If multiple modifiers run in parallel, execution time is not a reliable metric. |
| Persistent UID | INT | 0 | -10000 – 10000 | Uniquely identifies the modifier within the modifier stack that it is part of |
| Anchor Weights | STRING | – | – | Name of Vertex Group which determines Anchors |
| Repeat | INT | 1 | 1 – 50 | |
| Bound | BOOLEAN | uit | – | Whether geometry has been bound to anchors |
| Invert | BOOLEAN | uit | – | Invert vertex group influence |
Een riggewicht dat misgaat
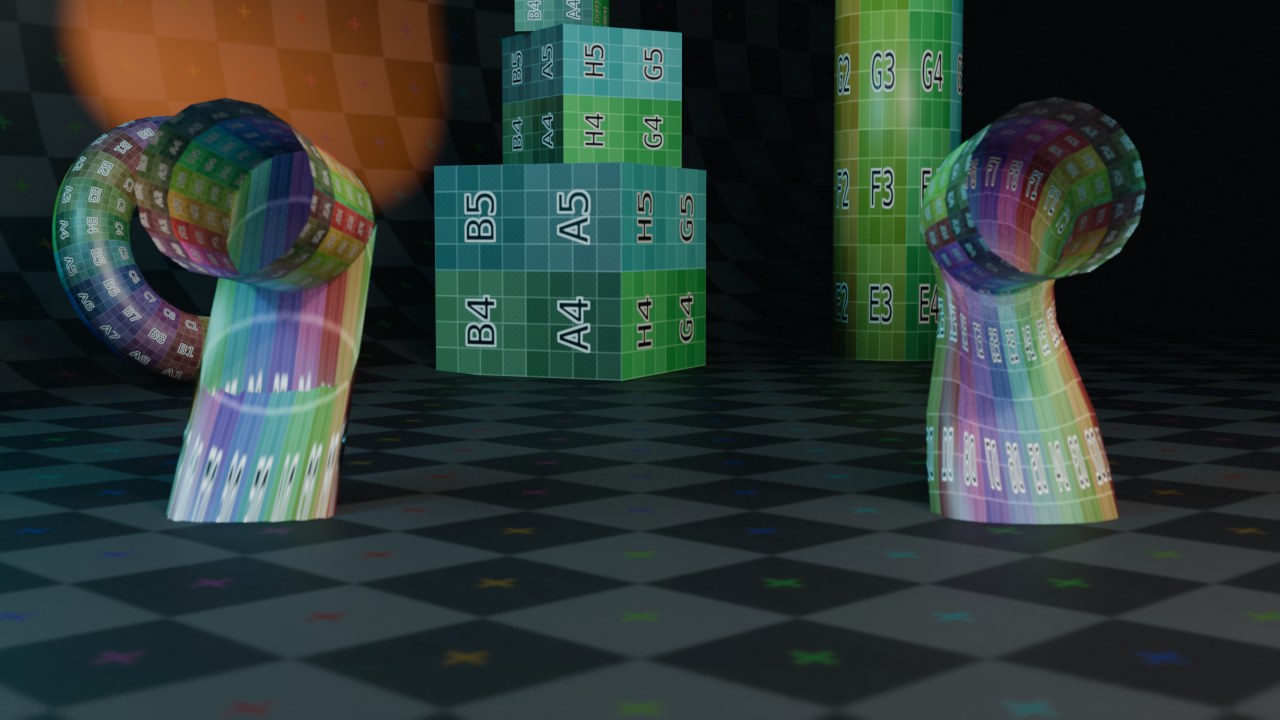
- 1Voor
Harde overgang in de vertex-gewichten geeft een geknikte, ingezakte elleboog.
- 2Na
Een Corrective Smooth-modifier na Armature herstelt het volume in de bocht.
Lattice · Mesh Deform · Shrinkwrap
Render: Lattice.
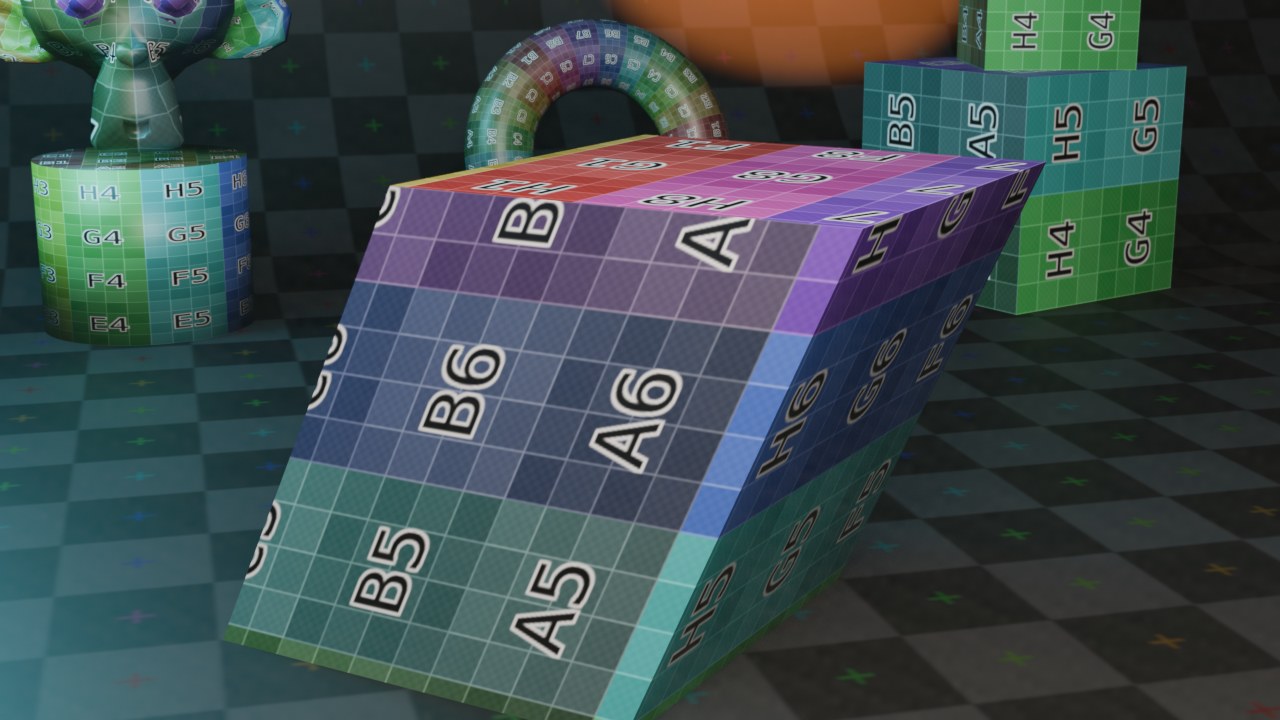 RECRENDER · EEVEE00:00:00:001280×720
Lattice — Vervormt het mesh volgens de vorm van een Lattice-object dat eromheen staat, zoals klei in een flexibel kader. Handig om de globale vorm van een complex, al gedetailleerd object te finetunen zonder aan de onderliggende geometrie te raken.
| Instelling | Type | Standaard | Bereik | Wat hij doet (tooltip uit Blender) |
|---|---|---|---|---|
| Apply on Spline | BOOLEAN | uit | – | Apply this and all preceding deformation modifiers on splines' points rather than on filled curve/surface |
| Execution Time | FLOAT | 0 | -10000 – 10000 | Time in seconds that the modifier took to evaluate. This is only set on evaluated objects. If multiple modifiers run in parallel, execution time is not a reliable metric. |
| Persistent UID | INT | 0 | -10000 – 10000 | Uniquely identifies the modifier within the modifier stack that it is part of |
| Object | POINTER | – | – | Lattice object to deform with |
| Vertex Group | STRING | – | – | Name of Vertex Group which determines influence of modifier per point |
| Invert | BOOLEAN | uit | – | Invert vertex group influence |
| Strength | FLOAT | 1 | 0 – 1 | Strength of modifier effect |
Mesh Deform — Vervormt het mesh via een omhullend kooi-mesh (cage), waarbij elke vertex een gewogen combinatie is van de kooi-vertices. Krachtiger en vloeiender dan Lattice voor complexe vormen, maar vereist een Bind-stap voordat hij werkt.
Wat gaat er mis — Vergeet je te binden na het aanmaken, of verander je de kooi-topologie achteraf, dan doet de modifier niets of vervormt hij verkeerd; bind opnieuw na elke structurele wijziging aan de kooi.
| Instelling | Type | Standaard | Bereik | Wat hij doet (tooltip uit Blender) |
|---|---|---|---|---|
| Apply on Spline | BOOLEAN | uit | – | Apply this and all preceding deformation modifiers on splines' points rather than on filled curve/surface |
| Execution Time | FLOAT | 0 | -10000 – 10000 | Time in seconds that the modifier took to evaluate. This is only set on evaluated objects. If multiple modifiers run in parallel, execution time is not a reliable metric. |
| Persistent UID | INT | 0 | -10000 – 10000 | Uniquely identifies the modifier within the modifier stack that it is part of |
| Object | POINTER | – | – | Mesh object to deform with |
| Bound | BOOLEAN | uit | – | Whether geometry has been bound to control cage |
| Invert | BOOLEAN | uit | – | Invert vertex group influence |
| Vertex Group | STRING | – | – | Vertex group name |
| Precision | INT | 5 | 2 – 10 | The grid size for binding |
| Dynamic | BOOLEAN | uit | – | Recompute binding dynamically on top of other deformers (slower and more memory consuming) |
Shrinkwrap — Trekt vertices naar het oppervlak van een doelmesh toe, volgens verschillende projectiemethodes (Nearest Surface Point, Project langs een as, Nearest Vertex). Gebruikt voor kleding die om een lichaam sluit, voor een low-poly kooi die de vorm van een sculpt overneemt, of voor decals die een oppervlak moeten volgen.
Wat gaat er mis — Zonder een Offset blijft het gewrapte mesh exact op het doeloppervlak liggen en ontstaat er z-fighting bij het renderen; een kleine positieve Offset houdt de lagen uit elkaar.
| Instelling | Type | Standaard | Bereik | Wat hij doet (tooltip uit Blender) |
|---|---|---|---|---|
| Apply on Spline | BOOLEAN | uit | – | Apply this and all preceding deformation modifiers on splines' points rather than on filled curve/surface |
| Execution Time | FLOAT | 0 | -10000 – 10000 | Time in seconds that the modifier took to evaluate. This is only set on evaluated objects. If multiple modifiers run in parallel, execution time is not a reliable metric. |
| Persistent UID | INT | 0 | -10000 – 10000 | Uniquely identifies the modifier within the modifier stack that it is part of |
| Wrap Method | ENUM | NEAREST_SURFACEPOINT | Nearest Surface Point, Project, Nearest Vertex, Target Normal Project | |
| Snap Mode | ENUM | ON_SURFACE | On Surface, Inside, Outside, Outside Surface, Above Surface | Select how vertices are constrained to the target surface |
| Face Cull | ENUM | OFF | Off, Front, Back | Stop vertices from projecting to a face on the target when facing towards/away |
| Target | POINTER | – | – | Mesh target to shrink to |
| Auxiliary Target | POINTER | – | – | Additional mesh target to shrink to |
| Vertex Group | STRING | – | – | Vertex group name |
| Offset | FLOAT | 0 | -100 – 100 | Distance to keep from the target |
| Project Limit | FLOAT | 0 | 0 – 100 | Limit the distance used for projection (zero disables) |
| X | BOOLEAN | uit | – | |
| Y | BOOLEAN | uit | – | |
| Z | BOOLEAN | uit | – | |
| Subdivision Levels | INT | 0 | 0 – 6 | Number of subdivisions that must be performed before extracting vertices' positions and normals |
| Negative | BOOLEAN | uit | – | Allow vertices to move in the negative direction of axis |
| Positive | BOOLEAN | aan | – | Allow vertices to move in the positive direction of axis |
| Invert Cull | BOOLEAN | uit | – | When projecting in the negative direction invert the face cull mode |
| Invert | BOOLEAN | uit | – | Invert vertex group influence |
Simple Deform · Smooth · Smooth Corrective
Render: Simple Deform.
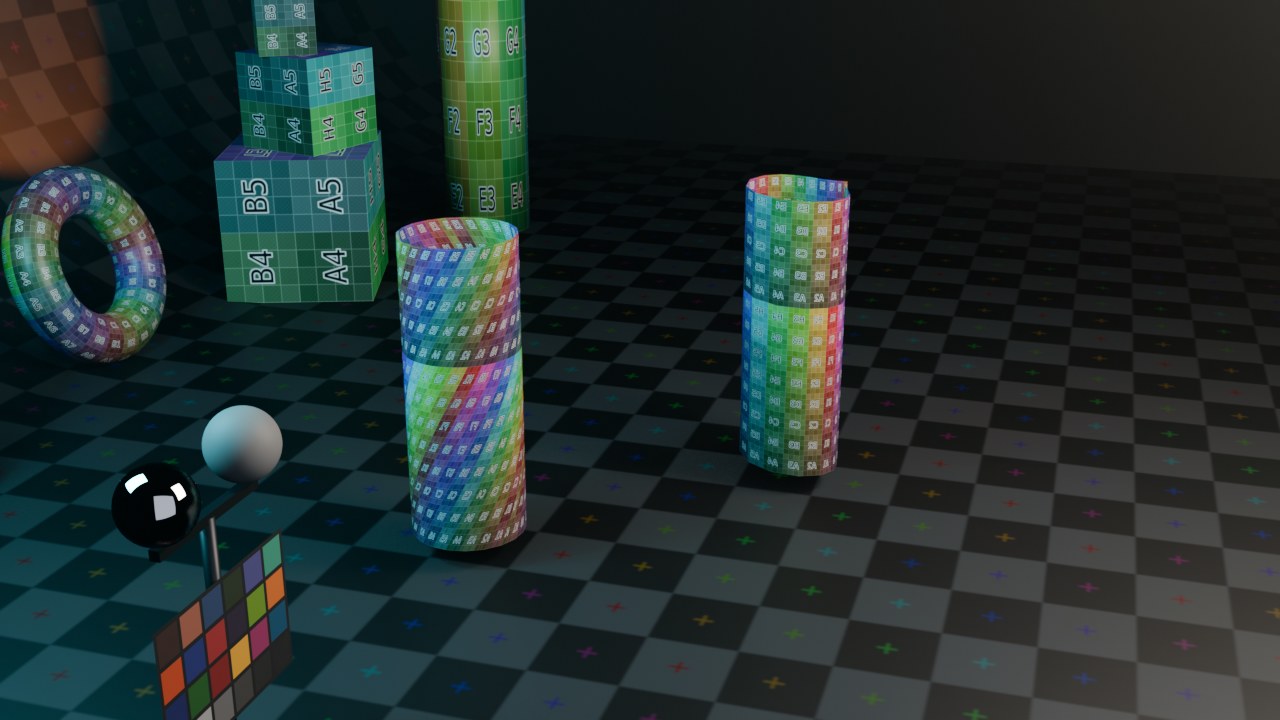 RECRENDER · EEVEE00:00:00:001280×720
Simple Deform — Vier eenvoudige vervormingen in een modifier: Twist, Bend, Taper en Stretch, elk rond een gekozen as. Snel een rechte cilinder ombuigen tot een boog, of een vorm laten uitlopen naar een punt.
| Instelling | Type | Standaard | Bereik | Wat hij doet (tooltip uit Blender) |
|---|---|---|---|---|
| Apply on Spline | BOOLEAN | uit | – | Apply this and all preceding deformation modifiers on splines' points rather than on filled curve/surface |
| Execution Time | FLOAT | 0 | -10000 – 10000 | Time in seconds that the modifier took to evaluate. This is only set on evaluated objects. If multiple modifiers run in parallel, execution time is not a reliable metric. |
| Persistent UID | INT | 0 | -10000 – 10000 | Uniquely identifies the modifier within the modifier stack that it is part of |
| Mode | ENUM | TWIST | Twist, Bend, Taper, Stretch | |
| Vertex Group | STRING | – | – | Vertex group name |
| Axis | ENUM | X | X, Y, Z | Deform around local axis |
| Origin | POINTER | – | – | Offset the origin and orientation of the deformation |
| Factor | FLOAT | 0.785 | -10 – 10 | Amount to deform object |
| Angle | FLOAT | 0.785 | -6.2832 – 6.2832 | Angle of deformation |
| Limits | FLOAT | 0 | 0 – 1 | Lower/Upper limits for deform |
| X | BOOLEAN | uit | – | Do not allow deformation along the X axis |
| Y | BOOLEAN | uit | – | Do not allow deformation along the Y axis |
| Z | BOOLEAN | uit | – | Do not allow deformation along the Z axis |
| Invert | BOOLEAN | uit | – | Invert vertex group influence |
Smooth — Middelt de positie van elke vertex met zijn buren, waardoor scherpe ruis en high-frequency detail wegvalt. De klassieke, snelle vlakmaker; minder krachtig dan Corrective Smooth maar veel goedkoper om te berekenen.
| Instelling | Type | Standaard | Bereik | Wat hij doet (tooltip uit Blender) |
|---|---|---|---|---|
| Apply on Spline | BOOLEAN | uit | – | Apply this and all preceding deformation modifiers on splines' points rather than on filled curve/surface |
| Execution Time | FLOAT | 0 | -10000 – 10000 | Time in seconds that the modifier took to evaluate. This is only set on evaluated objects. If multiple modifiers run in parallel, execution time is not a reliable metric. |
| Persistent UID | INT | 0 | -10000 – 10000 | Uniquely identifies the modifier within the modifier stack that it is part of |
| X | BOOLEAN | aan | – | Smooth object along X axis |
| Y | BOOLEAN | aan | – | Smooth object along Y axis |
| Z | BOOLEAN | aan | – | Smooth object along Z axis |
| Factor | FLOAT | 0.5 | -10 – 10 | Strength of modifier effect |
| Repeat | INT | 1 | 0 – 30 | |
| Vertex Group | STRING | – | – | Name of Vertex Group which determines influence of modifier per point |
| Invert | BOOLEAN | uit | – | Invert vertex group influence |
Smooth Corrective — Vlakt het mesh net als Smooth, maar berekent eerst een rustpositie zodat vorm-vervormende bijwerkingen van andere modifiers of van skinning gecorrigeerd worden in plaats van simpelweg vervaagd. Het standaardmiddel tegen bewegingsartefacten (het candy-wrapper-effect) bij gerigde ellebogen en knieen.
| Instelling | Type | Standaard | Bereik | Wat hij doet (tooltip uit Blender) |
|---|---|---|---|---|
| Apply on Spline | BOOLEAN | uit | – | Apply this and all preceding deformation modifiers on splines' points rather than on filled curve/surface |
| Execution Time | FLOAT | 0 | -10000 – 10000 | Time in seconds that the modifier took to evaluate. This is only set on evaluated objects. If multiple modifiers run in parallel, execution time is not a reliable metric. |
| Persistent UID | INT | 0 | -10000 – 10000 | Uniquely identifies the modifier within the modifier stack that it is part of |
| Lambda Factor | FLOAT | 0.5 | 0 – 1 | Smooth effect factor |
| Repeat | INT | 5 | 0 – 200 | |
| Scale | FLOAT | 1 | 0 – 10 | Compensate for scale applied by other modifiers |
| Rest Source | ENUM | ORCO | Original Coords, Bind Coords | Select the source of rest positions |
| Smooth Type | ENUM | SIMPLE | Simple, Length Weight | Method used for smoothing |
| Invert | BOOLEAN | uit | – | Invert vertex group influence |
| Vertex Group | STRING | – | – | Name of Vertex Group which determines influence of modifier per point |
| Bind current shape | BOOLEAN | uit | – | |
| Only Smooth | BOOLEAN | uit | – | Apply smoothing without reconstructing the surface |
| Pin Boundaries | BOOLEAN | uit | – | Excludes boundary vertices from being smoothed |
Wat gaat er mis — Deform-modifiers
Deform-modifiers rekenen bijna allemaal op een hulpobject: een Empty voor Hook en Warp, een Lattice-object, een doelmesh voor Shrinkwrap of Surface Deform. Verwijder of verplaats je dat hulpobject buiten de modifier om, dan breekt de vervorming zonder duidelijke foutmelding — check bij onverwacht gedrag dus eerst of het gekoppelde object nog bestaat en op de juiste plek staat.
RECRENDER · EEVEE00:00:00:001280×720Smooth Laplacian · Surface Deform · Volume Displace
Render: Smooth Laplacian.
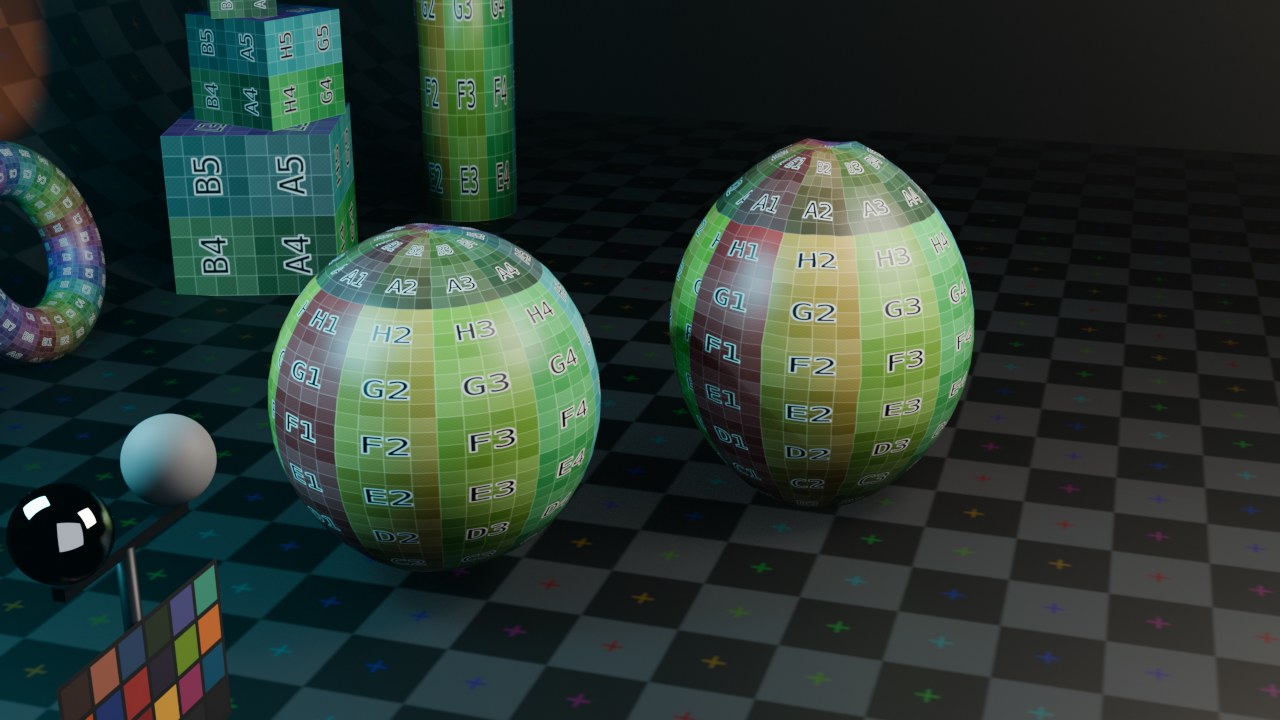 RECRENDER · EEVEE00:00:00:001280×720
Smooth Laplacian — Een geavanceerdere vlakmaker die het volume van het mesh probeert te behouden terwijl hij ruis wegneemt, in tegenstelling tot gewone Smooth die het volume laat krimpen. Beter geschikt voor het opschonen van scans en sculpts.
| Instelling | Type | Standaard | Bereik | Wat hij doet (tooltip uit Blender) |
|---|---|---|---|---|
| Apply on Spline | BOOLEAN | uit | – | Apply this and all preceding deformation modifiers on splines' points rather than on filled curve/surface |
| Execution Time | FLOAT | 0 | -10000 – 10000 | Time in seconds that the modifier took to evaluate. This is only set on evaluated objects. If multiple modifiers run in parallel, execution time is not a reliable metric. |
| Persistent UID | INT | 0 | -10000 – 10000 | Uniquely identifies the modifier within the modifier stack that it is part of |
| X | BOOLEAN | aan | – | Smooth object along X axis |
| Y | BOOLEAN | aan | – | Smooth object along Y axis |
| Z | BOOLEAN | aan | – | Smooth object along Z axis |
| Preserve Volume | BOOLEAN | aan | – | Apply volume preservation after smooth |
| Normalized | BOOLEAN | aan | – | Improve and stabilize the enhanced shape |
| Lambda Factor | FLOAT | 0.01 | -1000 – 1000 | Smooth effect factor |
| Lambda Border | FLOAT | 0.01 | -1000 – 1000 | Lambda factor in border |
| Repeat | INT | 1 | 0 – 200 | |
| Vertex Group | STRING | – | – | Name of Vertex Group which determines influence of modifier per point |
| Invert | BOOLEAN | uit | – | Invert vertex group influence |
Surface Deform — Bindt het mesh aan een ander doelmesh zodat het meebeweegt met elke vervorming van dat doel, alsof het eraan vastgenaaid is. Gebruikt om bijvoorbeeld accessoires of een low-poly proxy exact de animatie van een high-poly of gesimuleerd mesh te laten volgen.
| Instelling | Type | Standaard | Bereik | Wat hij doet (tooltip uit Blender) |
|---|---|---|---|---|
| Apply on Spline | BOOLEAN | uit | – | Apply this and all preceding deformation modifiers on splines' points rather than on filled curve/surface |
| Execution Time | FLOAT | 0 | -10000 – 10000 | Time in seconds that the modifier took to evaluate. This is only set on evaluated objects. If multiple modifiers run in parallel, execution time is not a reliable metric. |
| Persistent UID | INT | 0 | -10000 – 10000 | Uniquely identifies the modifier within the modifier stack that it is part of |
| Target | POINTER | – | – | Mesh object to deform with |
| Interpolation Falloff | FLOAT | 4 | 2 – 16 | Controls how much nearby polygons influence deformation |
| Bound | BOOLEAN | uit | – | Whether geometry has been bound to target mesh |
| Vertex Group | STRING | – | – | Vertex group name for selecting/weighting the affected areas |
| Invert | BOOLEAN | uit | – | Invert vertex group influence |
| Sparse Bind | BOOLEAN | uit | – | Only record binding data for vertices matching the vertex group at the time of bind |
| Strength | FLOAT | 1 | -100 – 100 | Strength of modifier deformations |
Volume Displace — Vervormt een volume-datablock met een textuur, analoog aan Displace maar dan voor volumes in plaats van meshes; bijvoorbeeld om een rookvolume een procedurele turbulentie te geven.
| Instelling | Type | Standaard | Bereik | Wat hij doet (tooltip uit Blender) |
|---|---|---|---|---|
| Apply on Spline | BOOLEAN | uit | – | Apply this and all preceding deformation modifiers on splines' points rather than on filled curve/surface |
| Execution Time | FLOAT | 0 | -10000 – 10000 | Time in seconds that the modifier took to evaluate. This is only set on evaluated objects. If multiple modifiers run in parallel, execution time is not a reliable metric. |
| Persistent UID | INT | 0 | -10000 – 10000 | Uniquely identifies the modifier within the modifier stack that it is part of |
| Strength | FLOAT | 0 | – | Strength of the displacement |
| Texture | POINTER | – | – | |
| Texture Mapping Mode | ENUM | LOCAL | Local, Global, Object | |
| Object | POINTER | – | – | Object to use for texture mapping |
| Texture Mid Level | FLOAT | 0 | 0 – 1 | Subtracted from the texture color to get a displacement vector |
| Texture Sample Radius | FLOAT | 0 | 0 – 1 | Smaller values result in better performance but might cut off the volume |
Warp · Wave
Render: Wave.
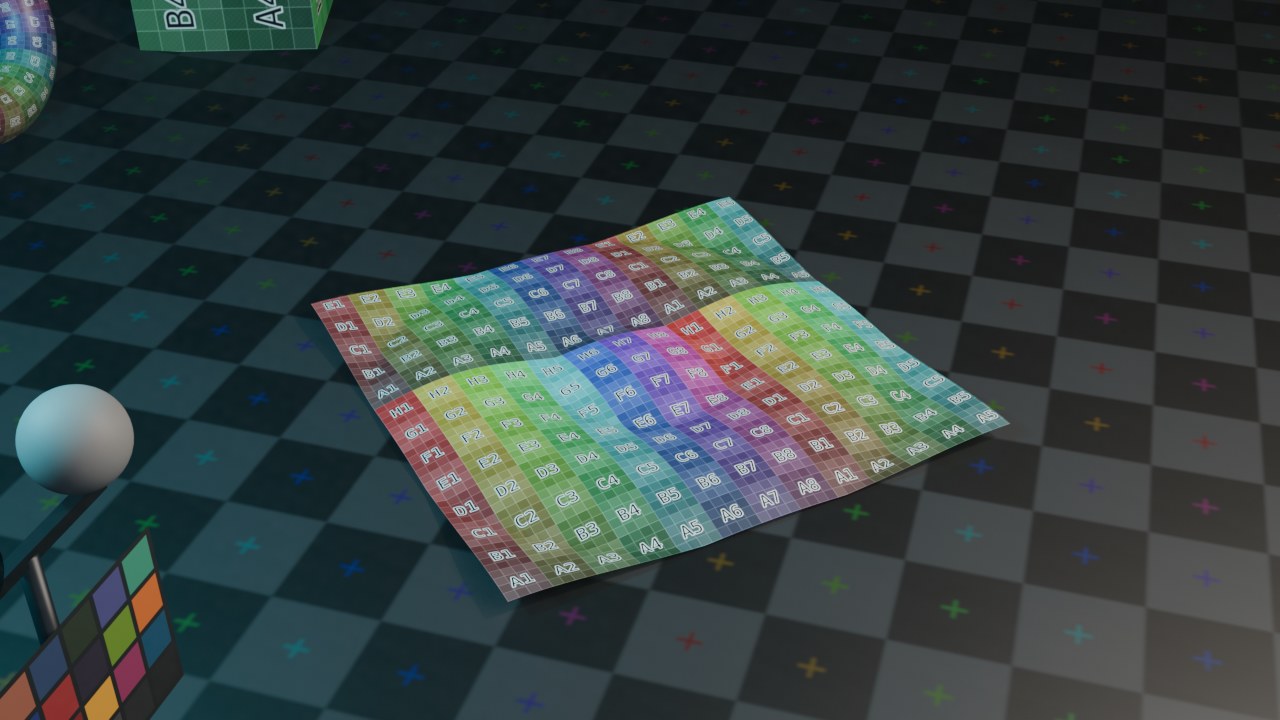 RECRENDER · EEVEE00:00:00:001280×720
Warp — Vervormt vertices tussen twee referentieobjecten: de positie van elke vertex ten opzichte van het van-object wordt herberekend ten opzichte van het naar-object. Gebruikt voor procedurele, animeerbare vervormingen die met twee simpele Empty's bestuurd worden.
| Instelling | Type | Standaard | Bereik | Wat hij doet (tooltip uit Blender) |
|---|---|---|---|---|
| Apply on Spline | BOOLEAN | uit | – | Apply this and all preceding deformation modifiers on splines' points rather than on filled curve/surface |
| Execution Time | FLOAT | 0 | -10000 – 10000 | Time in seconds that the modifier took to evaluate. This is only set on evaluated objects. If multiple modifiers run in parallel, execution time is not a reliable metric. |
| Persistent UID | INT | 0 | -10000 – 10000 | Uniquely identifies the modifier within the modifier stack that it is part of |
| Object From | POINTER | – | – | Object to transform from |
| Bone From | STRING | – | – | Bone to transform from |
| Object To | POINTER | – | – | Object to transform to |
| Bone To | STRING | – | – | Bone defining offset |
| Strength | FLOAT | 1 | -100 – 100 | |
| Falloff Type | ENUM | SMOOTH | No Falloff, Curve, Smooth, Sphere, Root, Inverse Square, Sharp, Linear, Constant | |
| Radius | FLOAT | 1 | -10000 – 10000 | Radius to apply |
| Falloff Curve | POINTER | – | – | Custom falloff curve |
| Preserve Volume | BOOLEAN | uit | – | Preserve volume when rotations are used |
| Vertex Group | STRING | – | – | Vertex group name for modulating the deform |
| Invert | BOOLEAN | uit | – | Invert vertex group influence |
| Texture | POINTER | – | – | |
| Texture Coordinates | ENUM | LOCAL | Local, Global, Object, UV | |
| UV Map | STRING | – | – | UV map name |
| Texture Coordinate Object | POINTER | – | – | Object to set the texture coordinates |
| Texture Coordinate Bone | STRING | – | – | Bone to set the texture coordinates |
Wave — Genereert een animerende golfbeweging die vanaf een startpunt over het mesh uitwaaiert, met instelbare snelheid, hoogte en demping. Snel water, een vlag of een trillend oppervlak zonder een volledige simulatie op te zetten.
| Instelling | Type | Standaard | Bereik | Wat hij doet (tooltip uit Blender) |
|---|---|---|---|---|
| Apply on Spline | BOOLEAN | uit | – | Apply this and all preceding deformation modifiers on splines' points rather than on filled curve/surface |
| Execution Time | FLOAT | 0 | -10000 – 10000 | Time in seconds that the modifier took to evaluate. This is only set on evaluated objects. If multiple modifiers run in parallel, execution time is not a reliable metric. |
| Persistent UID | INT | 0 | -10000 – 10000 | Uniquely identifies the modifier within the modifier stack that it is part of |
| X | BOOLEAN | aan | – | X axis motion |
| Y | BOOLEAN | aan | – | Y axis motion |
| Cyclic | BOOLEAN | aan | – | Cyclic wave effect |
| Normals | BOOLEAN | uit | – | Displace along normals |
| X Normal | BOOLEAN | aan | – | Enable displacement along the X normal |
| Y Normal | BOOLEAN | aan | – | Enable displacement along the Y normal |
| Z Normal | BOOLEAN | aan | – | Enable displacement along the Z normal |
| Time Offset | FLOAT | 0 | -1048574 – 1048574 | Either the starting frame (for positive speed) or ending frame (for negative speed) |
| Lifetime | FLOAT | 0 | -1048574 – 1048574 | Lifetime of the wave in frames, zero means infinite |
| Damping Time | FLOAT | 10 | -1048574 – 1048574 | Number of frames in which the wave damps out after it dies |
| Falloff Radius | FLOAT | 0 | 0 – 100 | Distance after which it fades out |
| Start Position X | FLOAT | 0 | -100 – 100 | X coordinate of the start position |
| Start Position Y | FLOAT | 0 | -100 – 100 | Y coordinate of the start position |
| Start Position Object | POINTER | – | – | Object which defines the wave center |
| Vertex Group | STRING | – | – | Vertex group name for modulating the wave |
| Invert | BOOLEAN | uit | – | Invert vertex group influence |
| Speed | FLOAT | 0.25 | -1 – 1 | Speed of the wave, towards the starting point when negative |
| Height | FLOAT | 0.5 | -2 – 2 | Height of the wave |
| Width | FLOAT | 1.5 | 0 – 5 | Distance between the waves |
| Narrowness | FLOAT | 1.5 | 0 – 10 | Distance between the top and the base of a wave, the higher the value, the more narrow the wave |
| Texture | POINTER | – | – | |
| Texture Coordinates | ENUM | LOCAL | Local, Global, Object, UV | |
| UV Map | STRING | – | – | UV map name |
| Texture Coordinate Object | POINTER | – | – | Object to set the texture coordinates |
| Texture Coordinate Bone | STRING | – | – | Bone to set the texture coordinates |
Alle Deform-modifiers op een buis, vlak of kubus
Twaalf van de zeventien Deform-modifiers als render — Laplacian Deform, Mesh Deform, Surface Deform, Warp en Volume Displace vereisen een bind-stap of een tweede object dat buiten deze reeks valt.
RECRENDER · EEVEE00:00:00:001280×720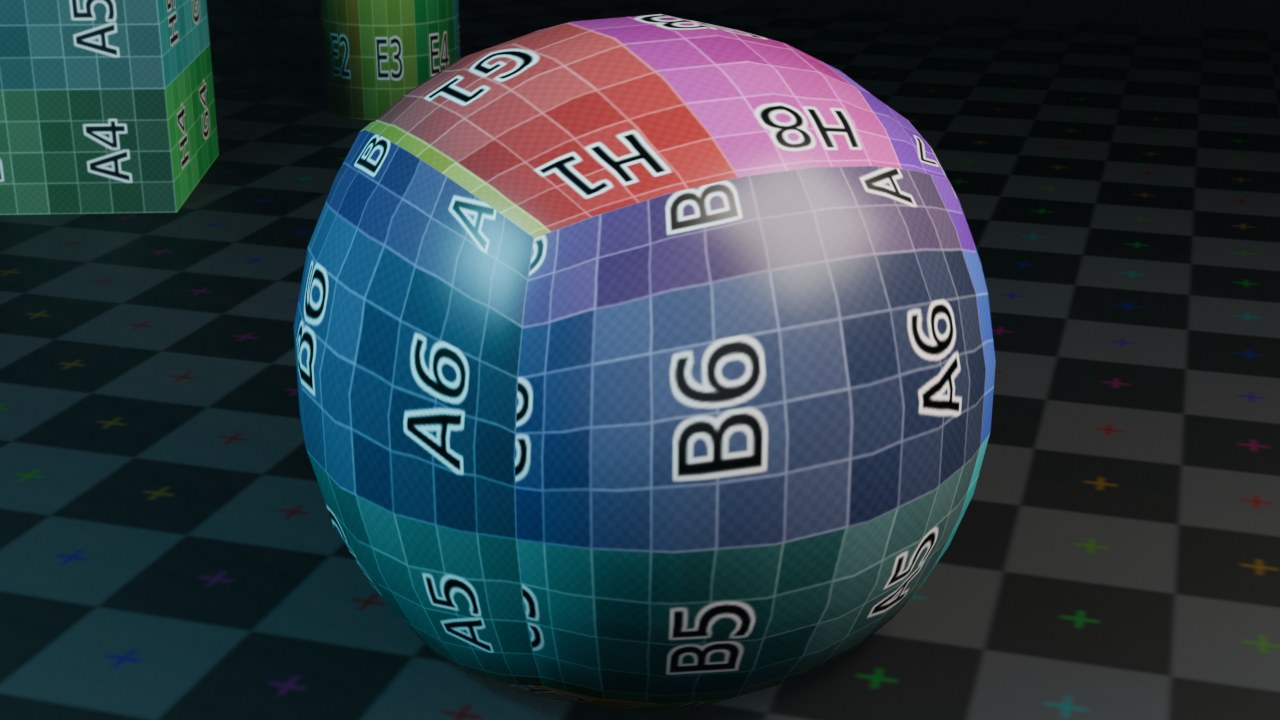 RECRENDER · EEVEE00:00:00:001280×720
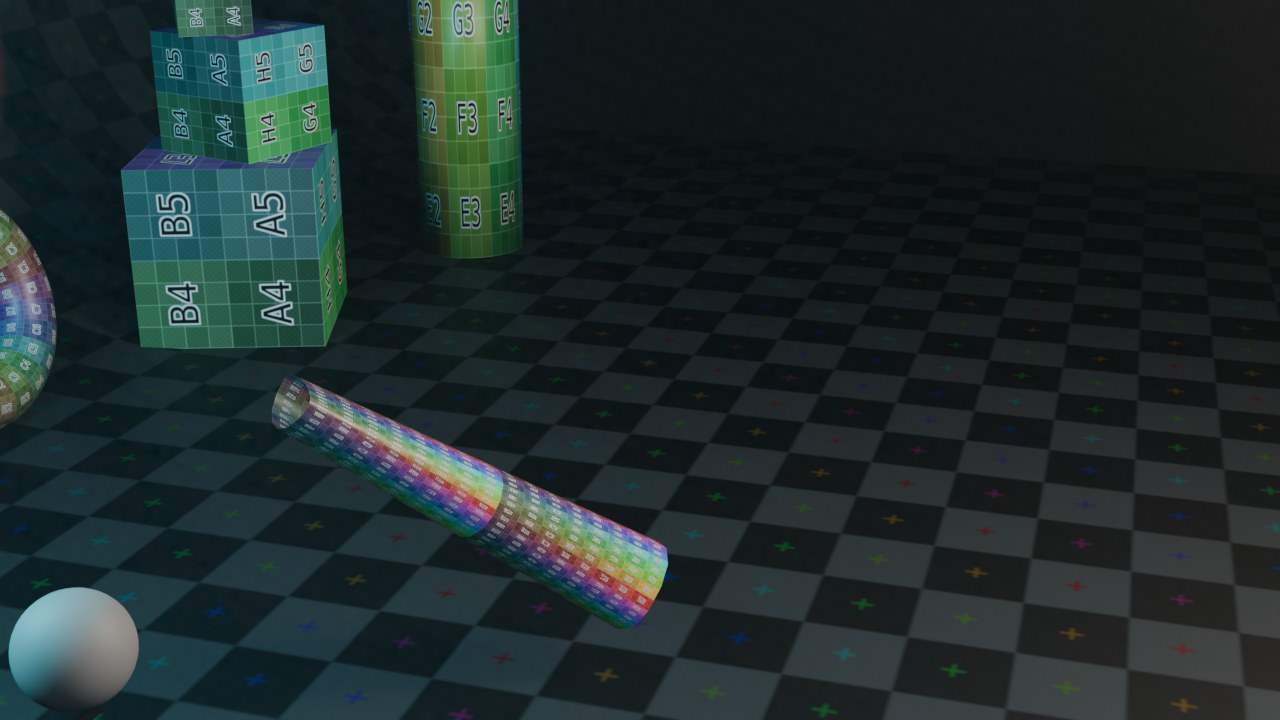 RECRENDER · EEVEE00:00:00:001280×720RECRENDER · EEVEE00:00:00:001280×720
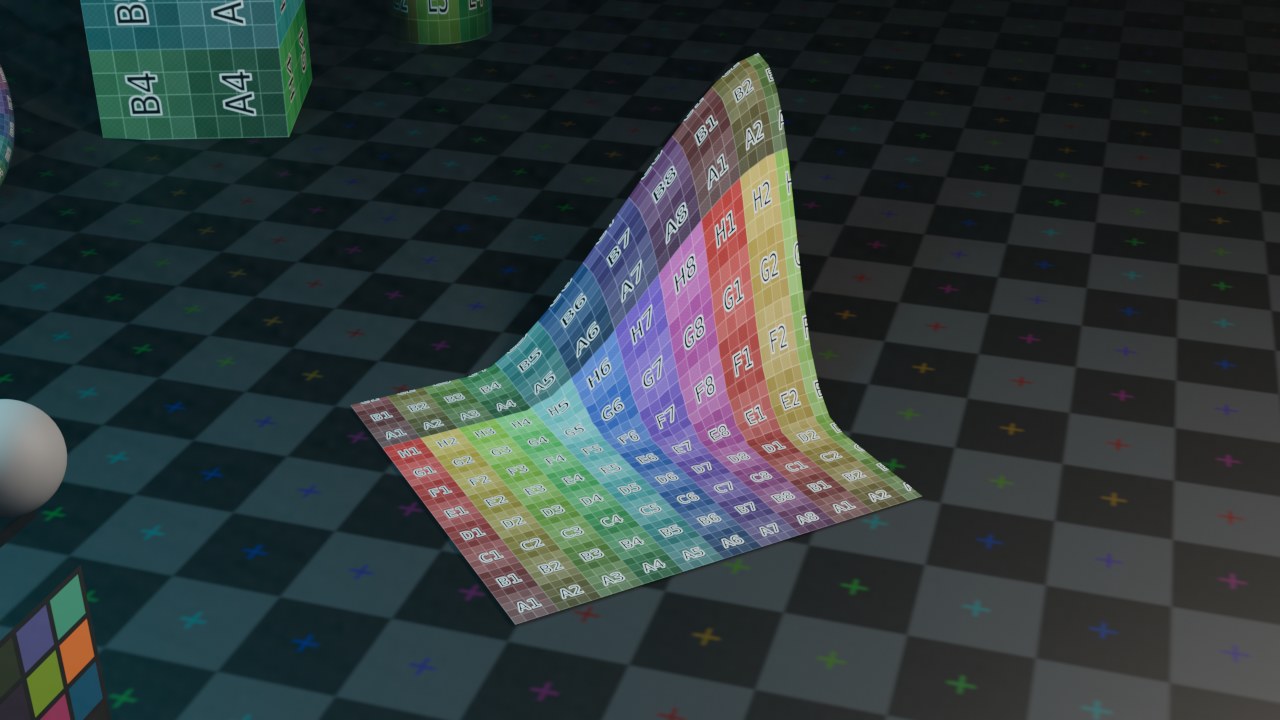 RECRENDER · EEVEE00:00:00:001280×720RECRENDER · EEVEE00:00:00:001280×720
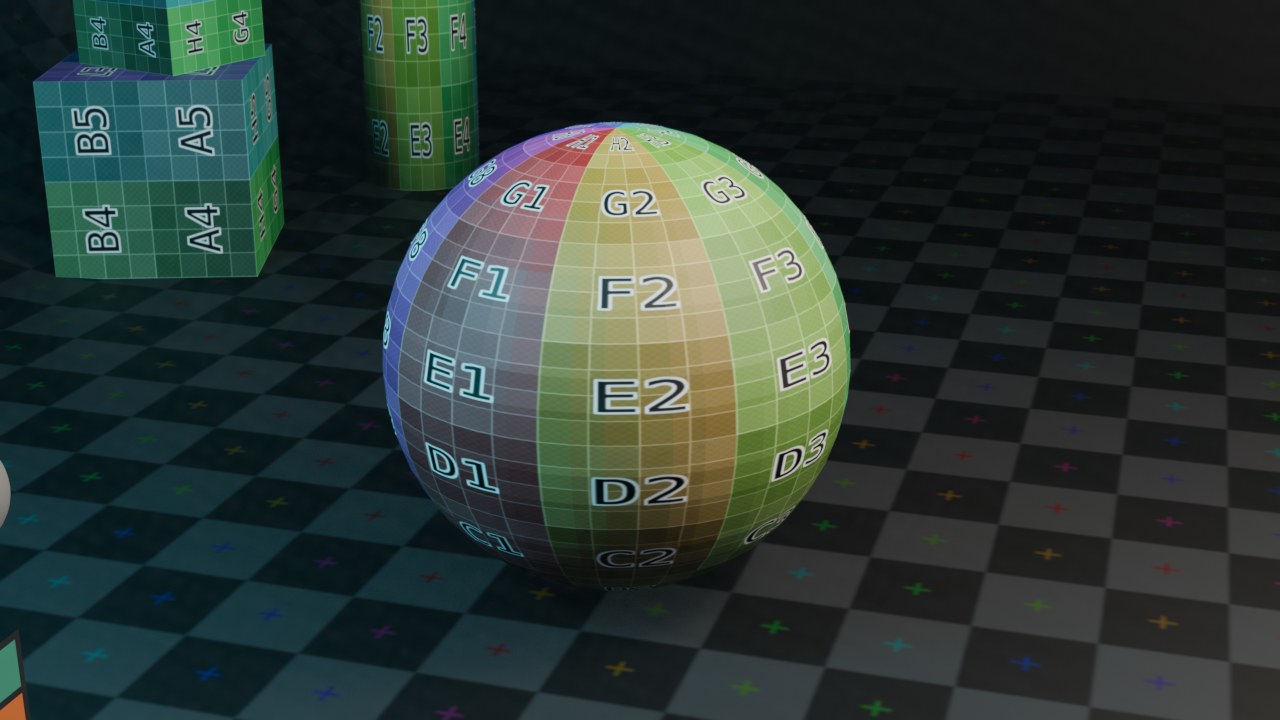 RECRENDER · EEVEE00:00:00:001280×720RECRENDER · EEVEE00:00:00:001280×720
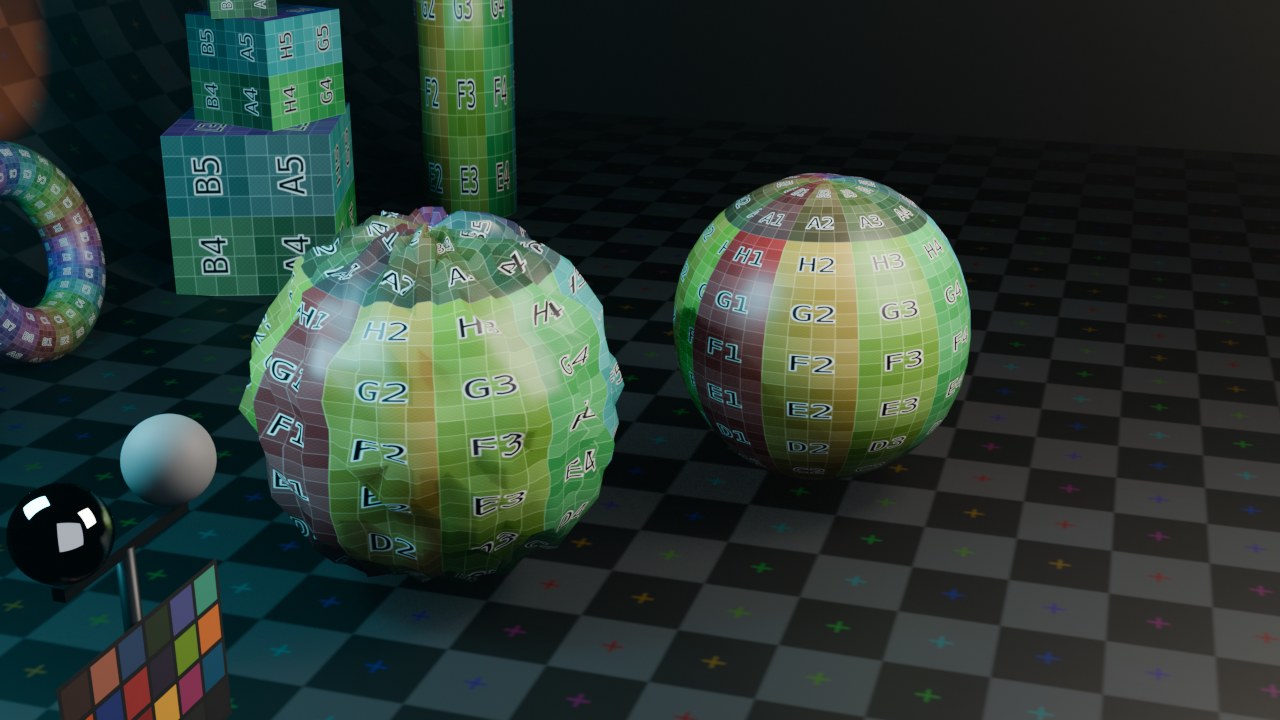 RECRENDER · EEVEE00:00:00:001280×720
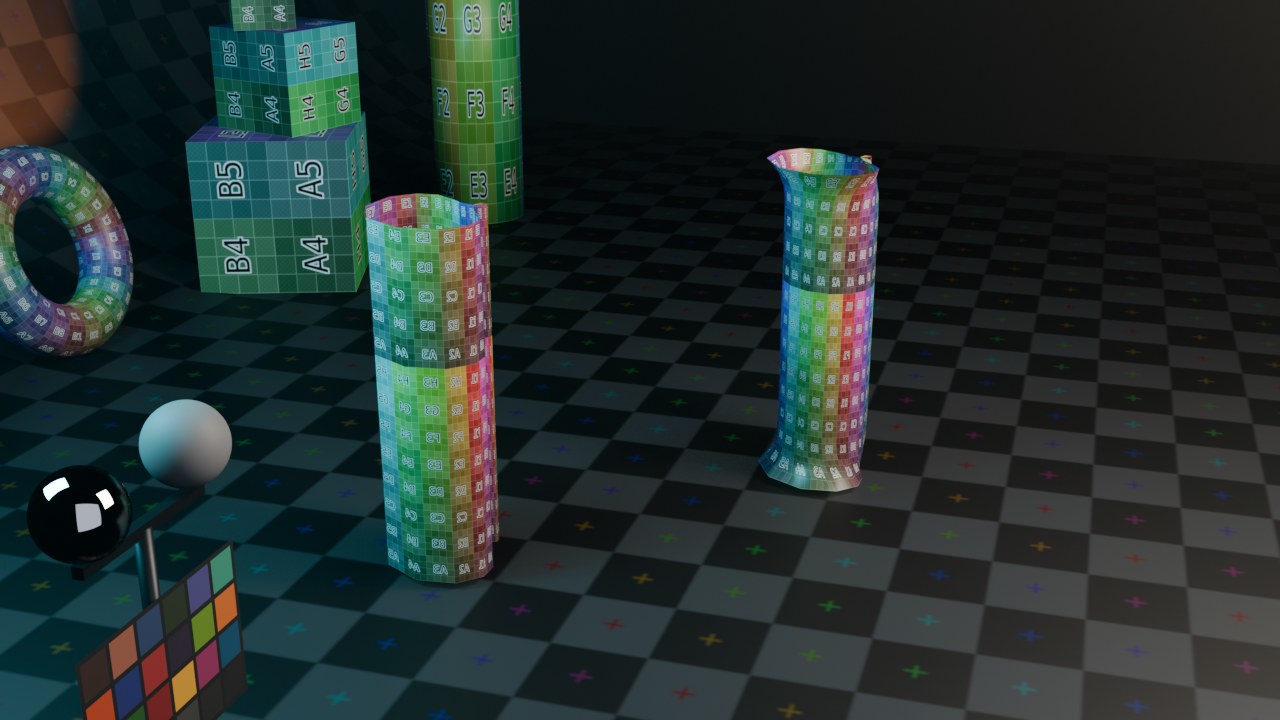 RECRENDER · EEVEE00:00:00:001280×720RECRENDER · EEVEE00:00:00:001280×720RECRENDER · EEVEE00:00:00:001280×720
Physics — simulaties als modifier
De tien Physics-modifiers verschijnen automatisch zodra je een Physics-type (Cloth, Soft Body, Fluid...) aan een object toekent via de Physics Properties-tab (Deel E, hoofdstuk 61); je voegt ze zelden rechtstreeks via Add Modifier toe. Ze staan bewust onderaan de stack-volgorde die Blender aanraadt, na alle vorm-gevende Generate- en Deform-modifiers, zodat de simulatie op de uiteindelijke vorm rekent.
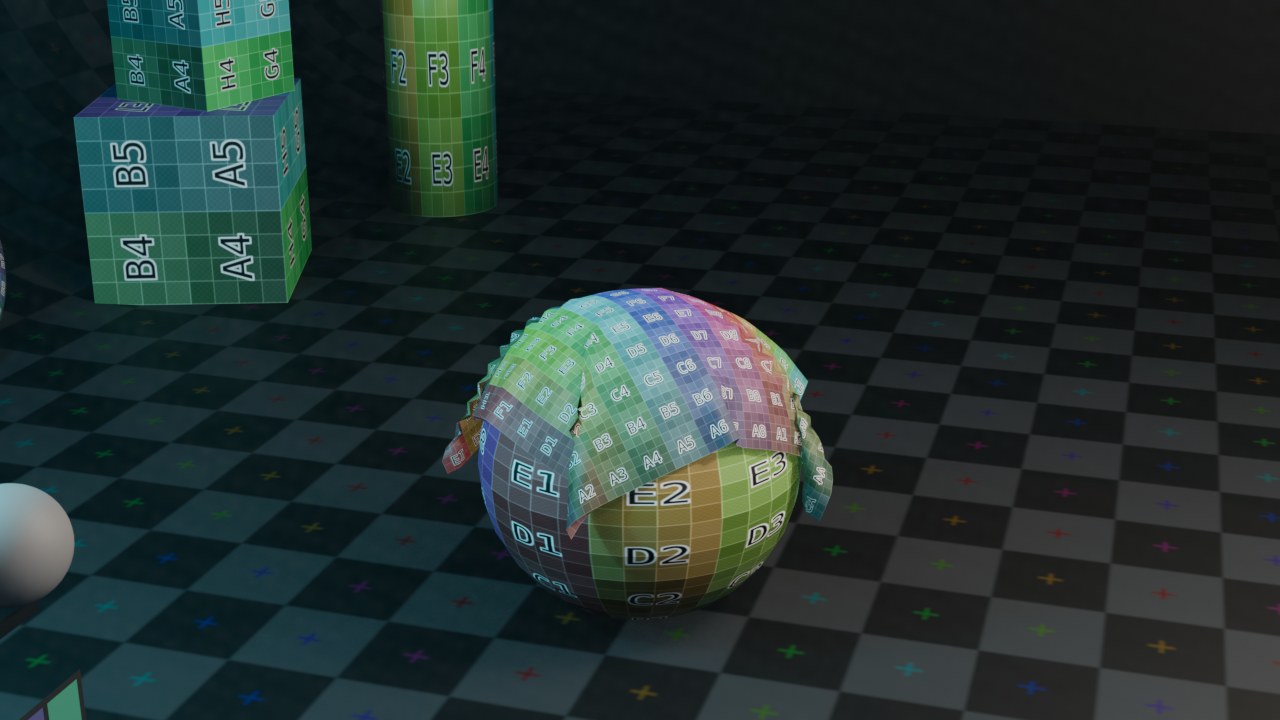 RECRENDER · EEVEE00:00:00:001280×720
Cloth · Collision · Dynamic Paint
Render: Cloth.
RECRENDER · EEVEE00:00:00:001280×720Cloth — Simuleert het mesh als stof: zwaartekracht, wind, botsingen met andere objecten en interne stijfheid (structural, bending, shear) samen. De motor achter elke vallende, wapperende of draperende stof: kleding, vlaggen, gordijnen.
Wat gaat er mis — Cloth heeft dunne, manifold topologie nodig; dikke Solidify-lagen of niet-manifold randen geven doorzakkende of exploderende simulaties. Zet Collision op het botsende object, niet op het stof zelf, en cache de simulatie voor je verder gaat renderen.
| Instelling | Type | Standaard | Bereik | Wat hij doet (tooltip uit Blender) |
|---|---|---|---|---|
| Apply on Spline | BOOLEAN | uit | – | Apply this and all preceding deformation modifiers on splines' points rather than on filled curve/surface |
| Execution Time | FLOAT | 0 | -10000 – 10000 | Time in seconds that the modifier took to evaluate. This is only set on evaluated objects. If multiple modifiers run in parallel, execution time is not a reliable metric. |
| Persistent UID | INT | 0 | -10000 – 10000 | Uniquely identifies the modifier within the modifier stack that it is part of |
| Cloth Settings | POINTER | – | – | |
| Cloth Collision Settings | POINTER | – | – | |
| Solver Result | POINTER | – | – | |
| Point Cache | POINTER | – | – | |
| Hair Grid Minimum | FLOAT | 0 | -10000 – 10000 | |
| Hair Grid Maximum | FLOAT | 0 | -10000 – 10000 | |
| Hair Grid Resolution | INT | 0 | -10000 – 10000 |
Collision — Maakt een object botsbaar voor andere simulaties (Cloth, Soft Body, deeltjes): het levert zelf geen beweging, maar vertelt andere simulaties waar ze niet doorheen mogen. Elk lichaam of meubel waar stof of deeltjes tegenaan moeten botsen krijgt deze modifier.
| Instelling | Type | Standaard | Bereik | Wat hij doet (tooltip uit Blender) |
|---|---|---|---|---|
| Apply on Spline | BOOLEAN | uit | – | Apply this and all preceding deformation modifiers on splines' points rather than on filled curve/surface |
| Execution Time | FLOAT | 0 | -10000 – 10000 | Time in seconds that the modifier took to evaluate. This is only set on evaluated objects. If multiple modifiers run in parallel, execution time is not a reliable metric. |
| Persistent UID | INT | 0 | -10000 – 10000 | Uniquely identifies the modifier within the modifier stack that it is part of |
| Settings | POINTER | – | – |
Dynamic Paint — Laat een object verf, hoogte of golven schilderen op een ander (Canvas-)object bij aanraking, en slaat dat op als textuur die je weer kan gebruiken in materialen of als vertex-gewicht. Gebruikt voor voetstappen in sneeuw, natte afdrukken, of golven rond een boot.
| Instelling | Type | Standaard | Bereik | Wat hij doet (tooltip uit Blender) |
|---|---|---|---|---|
| Apply on Spline | BOOLEAN | uit | – | Apply this and all preceding deformation modifiers on splines' points rather than on filled curve/surface |
| Execution Time | FLOAT | 0 | -10000 – 10000 | Time in seconds that the modifier took to evaluate. This is only set on evaluated objects. If multiple modifiers run in parallel, execution time is not a reliable metric. |
| Persistent UID | INT | 0 | -10000 – 10000 | Uniquely identifies the modifier within the modifier stack that it is part of |
| Canvas Settings | POINTER | – | – | |
| Brush Settings | POINTER | – | – | |
| Type | ENUM | CANVAS | Canvas, Brush |
Explode · Fluid · Ocean
Render: Explode.
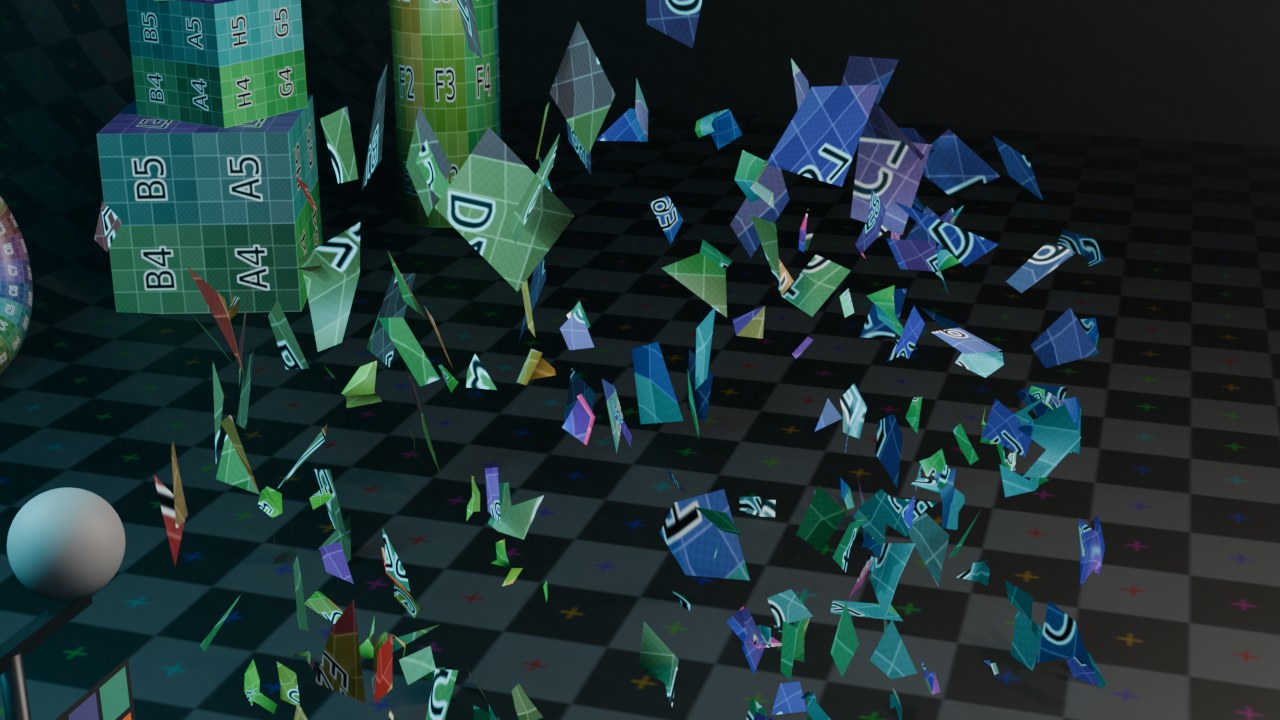 RECRENDER · EEVEE00:00:00:001280×720
Explode — Breekt het mesh op in losse faces of eilandjes en laat ze uiteenvliegen, aangestuurd door een deeltjessysteem dat de timing en snelheid van elk stuk bepaalt. Snelle, stilistische destructie zonder een volledige rigid-body-fractuur.
| Instelling | Type | Standaard | Bereik | Wat hij doet (tooltip uit Blender) |
|---|---|---|---|---|
| Apply on Spline | BOOLEAN | uit | – | Apply this and all preceding deformation modifiers on splines' points rather than on filled curve/surface |
| Execution Time | FLOAT | 0 | -10000 – 10000 | Time in seconds that the modifier took to evaluate. This is only set on evaluated objects. If multiple modifiers run in parallel, execution time is not a reliable metric. |
| Persistent UID | INT | 0 | -10000 – 10000 | Uniquely identifies the modifier within the modifier stack that it is part of |
| Vertex Group | STRING | – | – | |
| Protect | FLOAT | 0 | 0 – 1 | Clean vertex group edges |
| Cut Edges | BOOLEAN | uit | – | Cut face edges for nicer shrapnel |
| Unborn | BOOLEAN | aan | – | Show mesh when particles are unborn |
| Alive | BOOLEAN | aan | – | Show mesh when particles are alive |
| Dead | BOOLEAN | aan | – | Show mesh when particles are dead |
| Size | BOOLEAN | uit | – | Use particle size for the shrapnel |
| Particle UV | STRING | – | – | UV map to change with particle age |
| Invert | BOOLEAN | uit | – | Invert vertex group influence |
Fluid — De vloeistof- en rooksimulatie: dit object is ofwel de Domain (het rekenvolume) ofwel een Flow- of Effector-object daarbinnen. Water, rook, vuur en vergelijkbare vloeistofachtige effecten lopen allemaal via deze ene modifier.
Wat gaat er mis — De hele simulatie speelt zich af binnen de Domain-bounding box; een te krappe Resolution Divisions of een domein dat de vloeistof niet volledig omvat geeft afgesneden, onnauwkeurige resultaten. Cache altijd naar schijf voor je aan het renderen begint.
| Instelling | Type | Standaard | Bereik | Wat hij doet (tooltip uit Blender) |
|---|---|---|---|---|
| Apply on Spline | BOOLEAN | uit | – | Apply this and all preceding deformation modifiers on splines' points rather than on filled curve/surface |
| Execution Time | FLOAT | 0 | -10000 – 10000 | Time in seconds that the modifier took to evaluate. This is only set on evaluated objects. If multiple modifiers run in parallel, execution time is not a reliable metric. |
| Persistent UID | INT | 0 | -10000 – 10000 | Uniquely identifies the modifier within the modifier stack that it is part of |
| Domain Settings | POINTER | – | – | |
| Flow Settings | POINTER | – | – | |
| Effector Settings | POINTER | – | – | |
| Type | ENUM | NONE | None, Domain, Flow, Effector |
Ocean — Genereert een procedureel oceaanoppervlak op basis van een Phillips-spectrum (golfhoogte, windrichting, schaal) en kan optioneel een schuim-map bakken. Sneller en beter controleerbaar dan een volledige vloeistofsimulatie voor open zeeen.
| Instelling | Type | Standaard | Bereik | Wat hij doet (tooltip uit Blender) |
|---|---|---|---|---|
| Apply on Spline | BOOLEAN | uit | – | Apply this and all preceding deformation modifiers on splines' points rather than on filled curve/surface |
| Execution Time | FLOAT | 0 | -10000 – 10000 | Time in seconds that the modifier took to evaluate. This is only set on evaluated objects. If multiple modifiers run in parallel, execution time is not a reliable metric. |
| Persistent UID | INT | 0 | -10000 – 10000 | Uniquely identifies the modifier within the modifier stack that it is part of |
| Geometry | ENUM | GENERATE | Generate, Displace | Method of modifying geometry |
| Size | FLOAT | 1 | – | Surface scale factor (does not affect the height of the waves) |
| Repeat X | INT | 1 | 1 – 100 | Repetitions of the generated surface in X |
| Repeat Y | INT | 1 | 1 – 100 | Repetitions of the generated surface in Y |
| Generate Normals | BOOLEAN | uit | – | Output normals for bump mapping - disabling can speed up performance if it's not needed |
| Generate Foam | BOOLEAN | uit | – | Generate foam mask as a vertex color channel |
| Generate Spray Map | BOOLEAN | uit | – | Generate map of spray direction as a vertex color channel |
| Invert Spray | BOOLEAN | uit | – | Invert the spray direction map |
| Spray Map | STRING | – | – | Name of the vertex color layer used for the spray direction map |
| Render Resolution | INT | 7 | 1 – 32 | Resolution of the generated surface for rendering and baking |
| Viewport Resolution | INT | 7 | 1 – 32 | Viewport resolution of the generated surface |
| Spatial Size | INT | 50 | 1 – 512 | Size of the simulation domain (in meters), and of the generated geometry (in BU) |
| Wind Velocity | FLOAT | 30 | -10000 – 10000 | Wind speed |
| Damping | FLOAT | 0.5 | 0 – 1 | Damp reflected waves going in opposite direction to the wind |
| Smallest Wave | FLOAT | 0.01 | 0 – onbegrensd | Shortest allowed wavelength |
| Wave Alignment | FLOAT | 0 | 0 – 1 | How much the waves are aligned to each other |
| Wave Direction | FLOAT | 0 | -10000 – 10000 | Main direction of the waves when they are (partially) aligned |
| Wave Scale | FLOAT | 1 | 0 – 10000 | Scale of the displacement effect |
| Depth | FLOAT | 200 | 0 – 250 | Depth of the solid ground below the water surface |
| Foam Coverage | FLOAT | 0 | -10000 – 10000 | Amount of generated foam |
| Foam Fade | FLOAT | 0.98 | 0 – 10 | How much foam accumulates over time (baked ocean only) |
| Foam Layer Name | STRING | – | – | Name of the vertex color layer used for foam |
| Choppiness | FLOAT | 1 | 0 – 4 | Choppiness of the wave's crest (adds some horizontal component to the displacement) |
| Time | FLOAT | 1 | – | Current time of the simulation |
| Spectrum | ENUM | PHILLIPS | Turbulent Ocean, Established Ocean, Established Ocean (Sharp Peaks), Shallow Water | Spectrum to use |
| Fetch | FLOAT | 120 | 0 – onbegrensd | This is the distance from a lee shore, called the fetch, or the distance over which the wind blows with constant velocity. Used by 'JONSWAP' and 'TMA' models. |
| Sharpen Peak | FLOAT | 0 | 0 – 1 | Peak sharpening for 'JONSWAP' and 'TMA' models |
| Random Seed | INT | 0 | 0 – 10000 | Seed of the random generator |
| Bake Start | INT | 1 | -10000 – 10000 | Start frame of the ocean baking |
| Bake End | INT | 250 | -10000 – 10000 | End frame of the ocean baking |
| Ocean is Cached | BOOLEAN | uit | – | Whether the ocean is using cached data or simulating |
| Cache Path | STRING | – | – | Path to a folder to store external baked images |
Wat gaat er mis — Physics-modifiers
Elke Physics-modifier hangt af van de Scene-framerange en van een cache: verander je de simulatie-instellingen nadat er al gebaked is, dan zie je vaak nog het oude resultaat totdat je de cache expliciet leegmaakt (Physics Properties > Cache > Free All Bakes). Batenbeperkingen (Collision Margin, Quality Steps) zijn typisch de eerste plek om te kijken als een simulatie door een ander object heen zakt in plaats van erop te botsen.
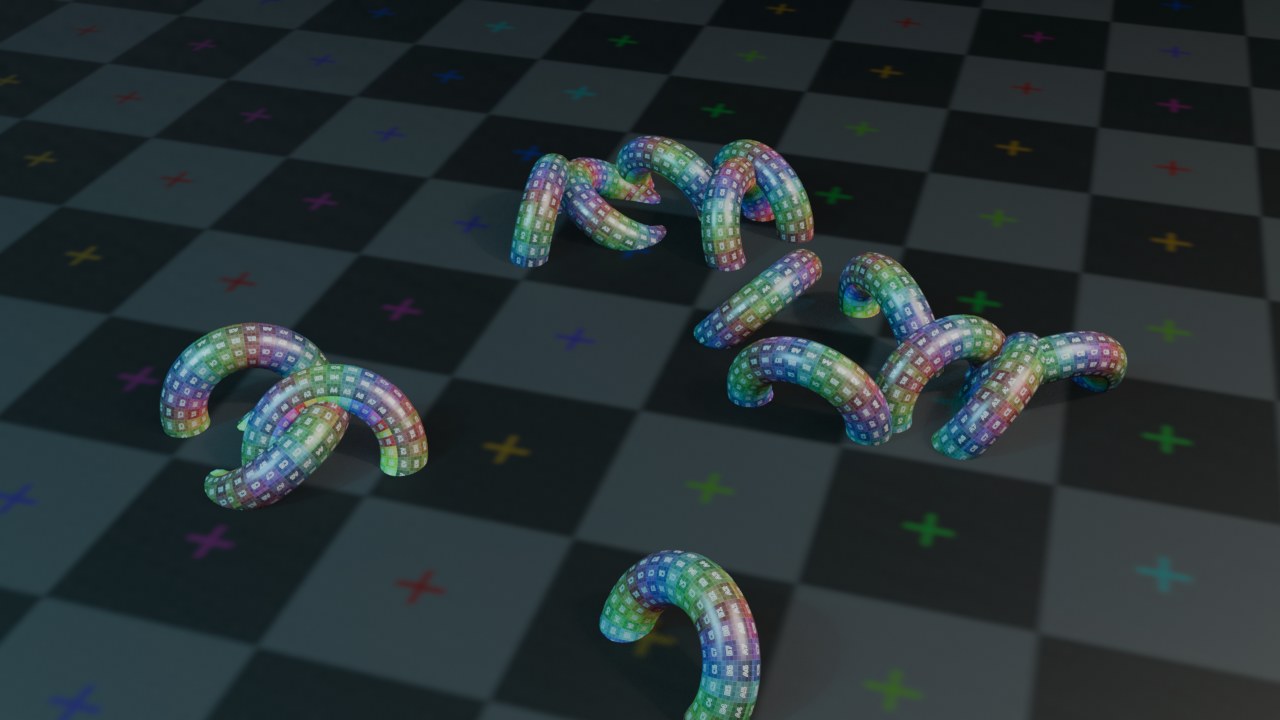 RECRENDER · EEVEE00:00:00:001280×720
Particle Instance · Particle System · Soft Body
Render: Particle Instance.
RECRENDER · EEVEE00:00:00:001280×720Particle Instance — Plaatst kopieen van dit mesh op elk deeltje van een deeltjessysteem van een ander object, met controle over welke deeltjes en hoe ze uitgelijnd worden. De brug tussen een deeltjessysteem en een echt zichtbaar object zoals gras, bladeren of een zwerm.
| Instelling | Type | Standaard | Bereik | Wat hij doet (tooltip uit Blender) |
|---|---|---|---|---|
| Apply on Spline | BOOLEAN | uit | – | Apply this and all preceding deformation modifiers on splines' points rather than on filled curve/surface |
| Execution Time | FLOAT | 0 | -10000 – 10000 | Time in seconds that the modifier took to evaluate. This is only set on evaluated objects. If multiple modifiers run in parallel, execution time is not a reliable metric. |
| Persistent UID | INT | 0 | -10000 – 10000 | Uniquely identifies the modifier within the modifier stack that it is part of |
| Object | POINTER | – | – | Object that has the particle system |
| Particle System Number | INT | 1 | 1 – 32767 | |
| Particle System | POINTER | – | – | |
| Axis | ENUM | Z | X, Y, Z | Pole axis for rotation |
| Space | ENUM | WORLD | Local, World | Space to use for copying mesh data |
| Regular | BOOLEAN | aan | – | Create instances from normal particles |
| Children | BOOLEAN | uit | – | Create instances from child particles |
| Path | BOOLEAN | uit | – | Create instances along particle paths |
| Unborn | BOOLEAN | aan | – | Show instances when particles are unborn |
| Alive | BOOLEAN | aan | – | Show instances when particles are alive |
| Dead | BOOLEAN | aan | – | Show instances when particles are dead |
| Keep Shape | BOOLEAN | uit | – | Don't stretch the object |
| Size | BOOLEAN | uit | – | Use particle size to scale the instances |
| Position | FLOAT | 1 | 0 – 1 | Position along path |
| Random Position | FLOAT | 0 | 0 – 1 | Randomize position along path |
| Rotation | FLOAT | 0 | 0 – 1 | Rotation around path |
| Random Rotation | FLOAT | 0 | 0 – 1 | Randomize rotation around path |
| Particle Amount | FLOAT | 1 | 0 – 1 | Amount of particles to use for instancing |
| Particle Offset | FLOAT | 0 | 0 – 1 | Relative offset of particles to use for instancing, to avoid overlap of multiple instances |
| Index Layer Name | STRING | – | – | Custom data layer name for the index |
| Value Layer Name | STRING | – | – | Custom data layer name for the randomized value |
Particle System — Toont hier het resultaat van een deeltjessysteem dat op dit object staat: haar, gras, of gesimuleerde deeltjes. De modifier zelf heeft weinig instellingen; de echte parameters staan in de Particle Properties-tab (Deel E, hoofdstuk 60).
| Instelling | Type | Standaard | Bereik | Wat hij doet (tooltip uit Blender) |
|---|---|---|---|---|
| Apply on Spline | BOOLEAN | uit | – | Apply this and all preceding deformation modifiers on splines' points rather than on filled curve/surface |
| Execution Time | FLOAT | 0 | -10000 – 10000 | Time in seconds that the modifier took to evaluate. This is only set on evaluated objects. If multiple modifiers run in parallel, execution time is not a reliable metric. |
| Persistent UID | INT | 0 | -10000 – 10000 | Uniquely identifies the modifier within the modifier stack that it is part of |
| Particle System | POINTER | – | – | Particle System that this modifier controls |
Soft Body — Simuleert het hele mesh als een zacht, vervormbaar lichaam met massa, veerkracht en demping, inclusief eigen zwaartekracht en botsingen. Gebruikt voor puddingachtige, wiebelende vervorming: een stuiterende bal, hangende stof, een zacht kussen.
| Instelling | Type | Standaard | Bereik | Wat hij doet (tooltip uit Blender) |
|---|---|---|---|---|
| Apply on Spline | BOOLEAN | uit | – | Apply this and all preceding deformation modifiers on splines' points rather than on filled curve/surface |
| Execution Time | FLOAT | 0 | -10000 – 10000 | Time in seconds that the modifier took to evaluate. This is only set on evaluated objects. If multiple modifiers run in parallel, execution time is not a reliable metric. |
| Persistent UID | INT | 0 | -10000 – 10000 | Uniquely identifies the modifier within the modifier stack that it is part of |
| Soft Body Settings | POINTER | – | – | |
| Soft Body Point Cache | POINTER | – | – |
Surface
Surface — Maakt van dit mesh een oppervlak waar deeltjes hun snelheid van kunnen overnemen (Surface Velocity), bijvoorbeeld een lopende band. Wordt zelden los gebruikt, bijna altijd samen met een deeltjessysteem dat er bovenop leeft.
| Instelling | Type | Standaard | Bereik | Wat hij doet (tooltip uit Blender) |
|---|---|---|---|---|
| Apply on Spline | BOOLEAN | uit | – | Apply this and all preceding deformation modifiers on splines' points rather than on filled curve/surface |
| Execution Time | FLOAT | 0 | -10000 – 10000 | Time in seconds that the modifier took to evaluate. This is only set on evaluated objects. If multiple modifiers run in parallel, execution time is not a reliable metric. |
| Persistent UID | INT | 0 | -10000 – 10000 | Uniquely identifies the modifier within the modifier stack that it is part of |
Alle Physics-modifiers die een stilstaand beeld iets tonen
Zes van de tien Physics-modifiers als render (Cloth en Collision delen er een: ze spelen zich in dezelfde opstelling af) — Dynamic Paint, Fluid en Surface vereisen een canvas- of domain-bake die buiten deze reeks valt.
RECRENDER · EEVEE00:00:00:001280×720RECRENDER · EEVEE00:00:00:001280×720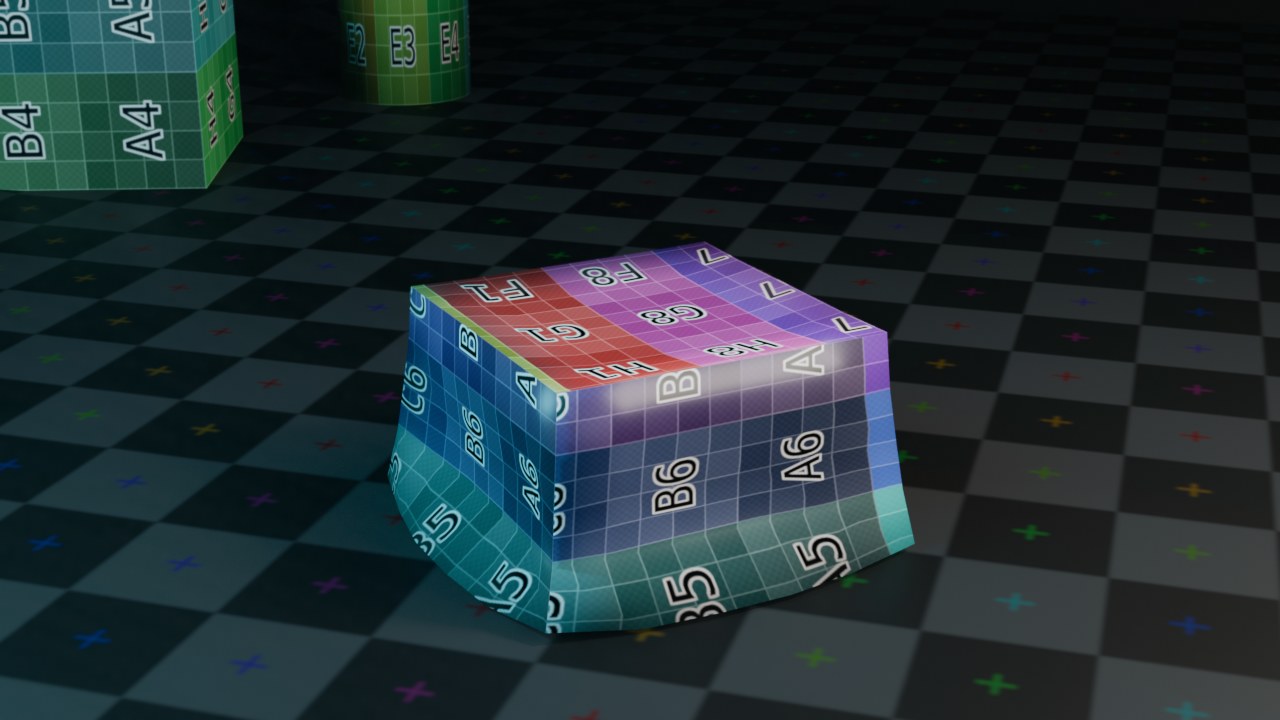 RECRENDER · EEVEE00:00:00:001280×720RECRENDER · EEVEE00:00:00:001280×720
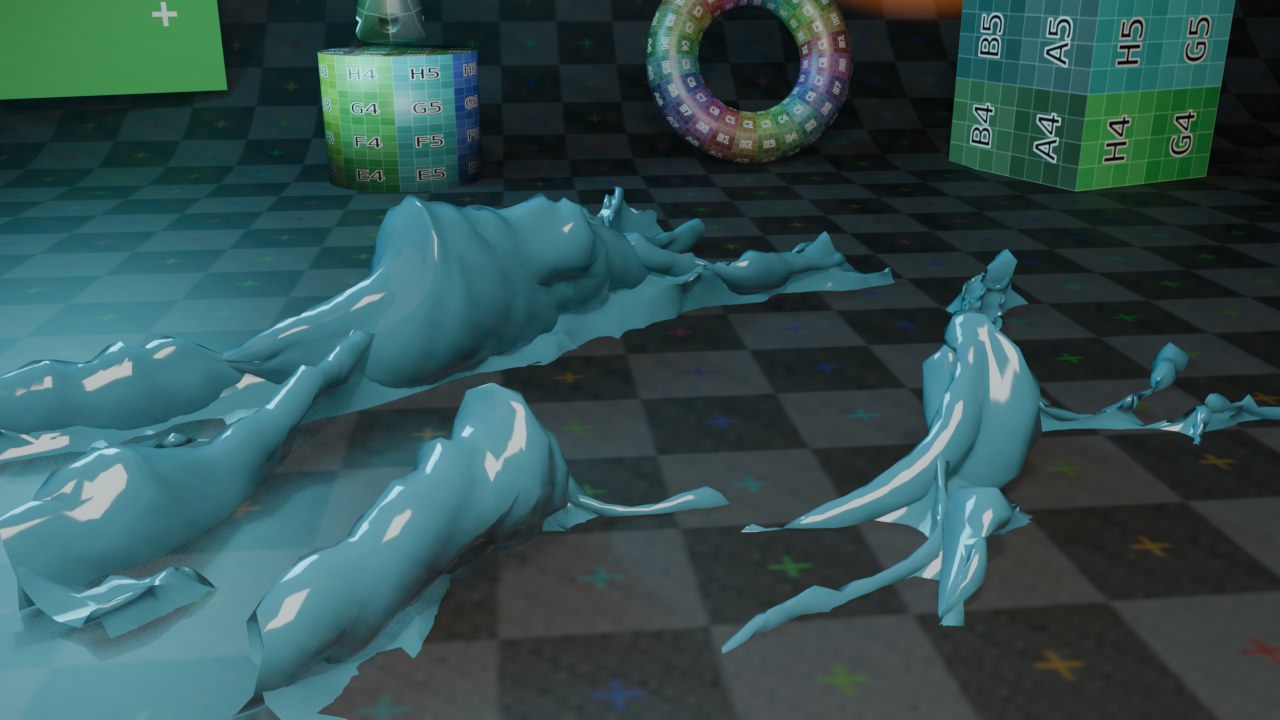 RECRENDER · EEVEE00:00:00:001280×720
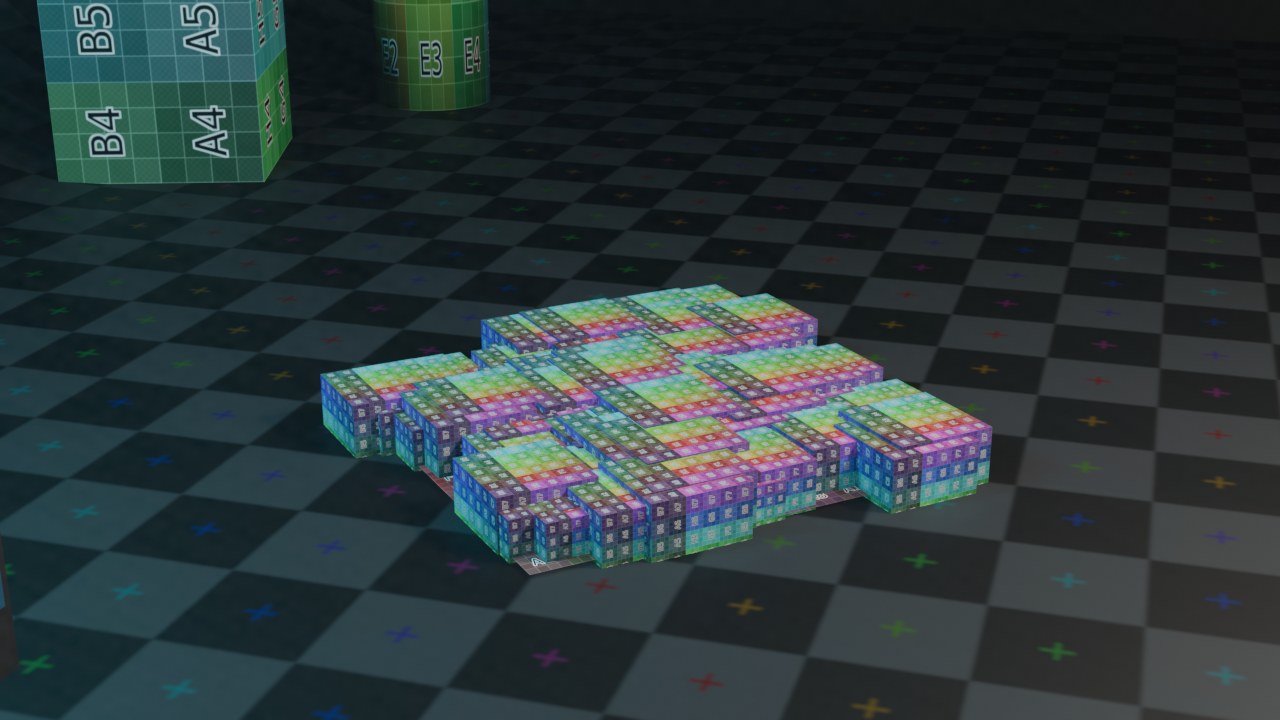 RECRENDER · EEVEE00:00:00:001280×720RECRENDER · EEVEE00:00:00:001280×720
Zelf proberen: een stapel van vier modifiers
Open start_modifiers.blend: een eenvoudige kubus staat klaar. Bouw een correcte modifier-stack op voor een afgeronde, gespiegelde vorm.
- 1Voeg Mirror toe en zet Clipping aan zodat de naad in het midden sluit.
- 2Voeg daarna Bevel toe met Limit Method op Angle, en bekijk het effect op de scherpe randen.
- 3Voeg Subdivision Surface toe ná Bevel — niet ervoor — en vergelijk het verschil als je de volgorde omdraait.
- 4Sleep Solidify onderaan de stack om het hele object dikte te geven.
- 5Gebruik Apply op Mirror zodra je tevreden bent, maar laat Bevel en Subdivision Surface niet-toegepast staan.
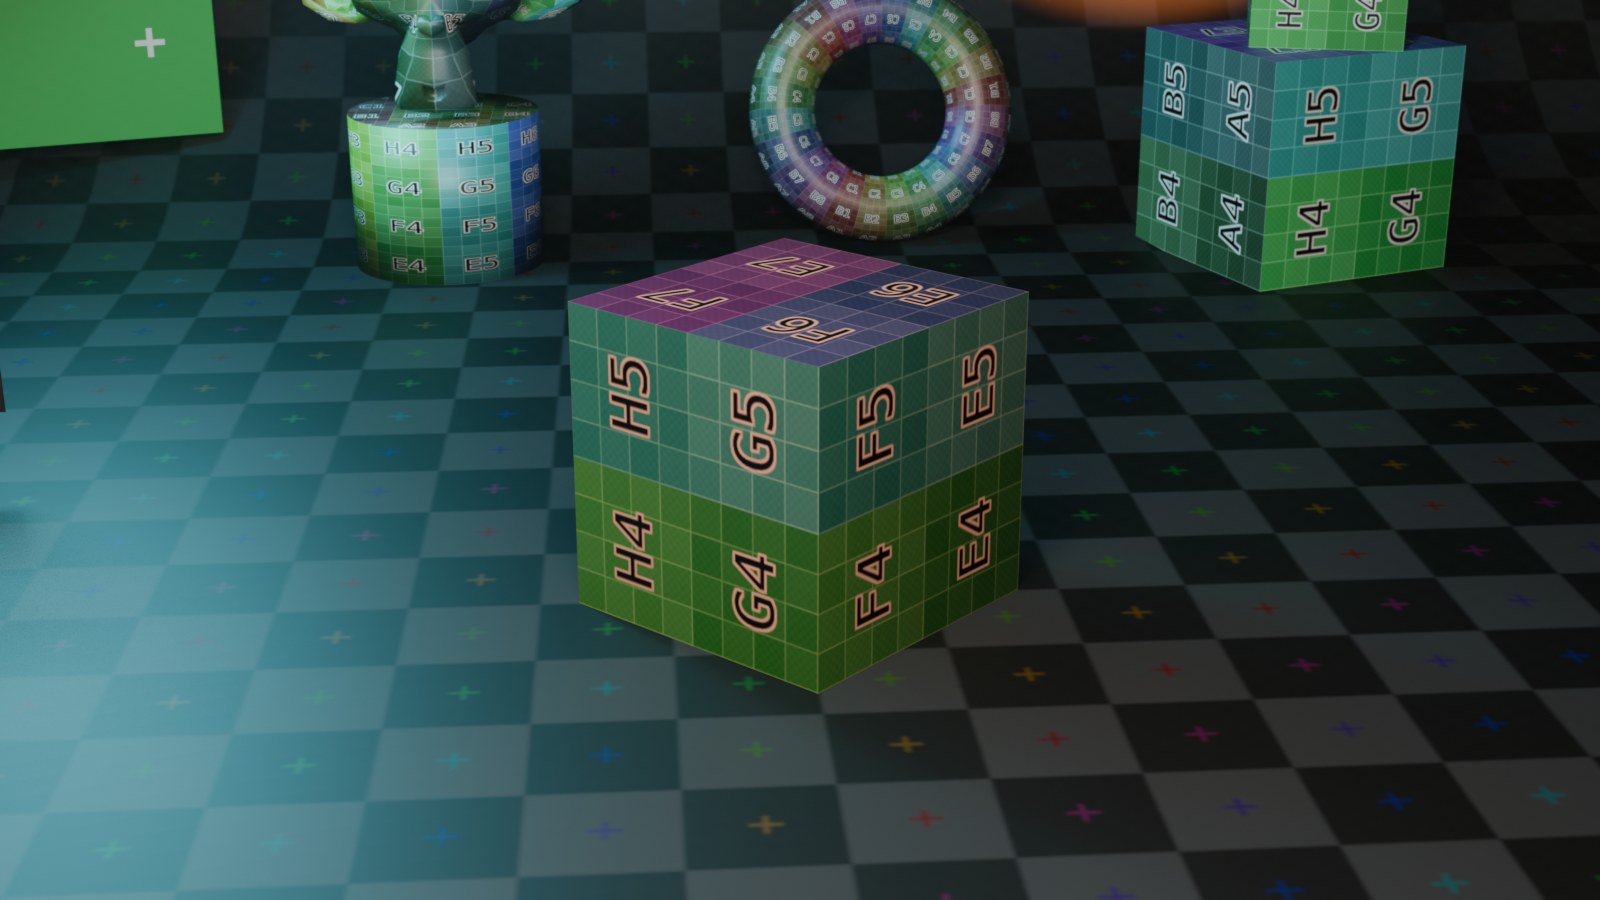
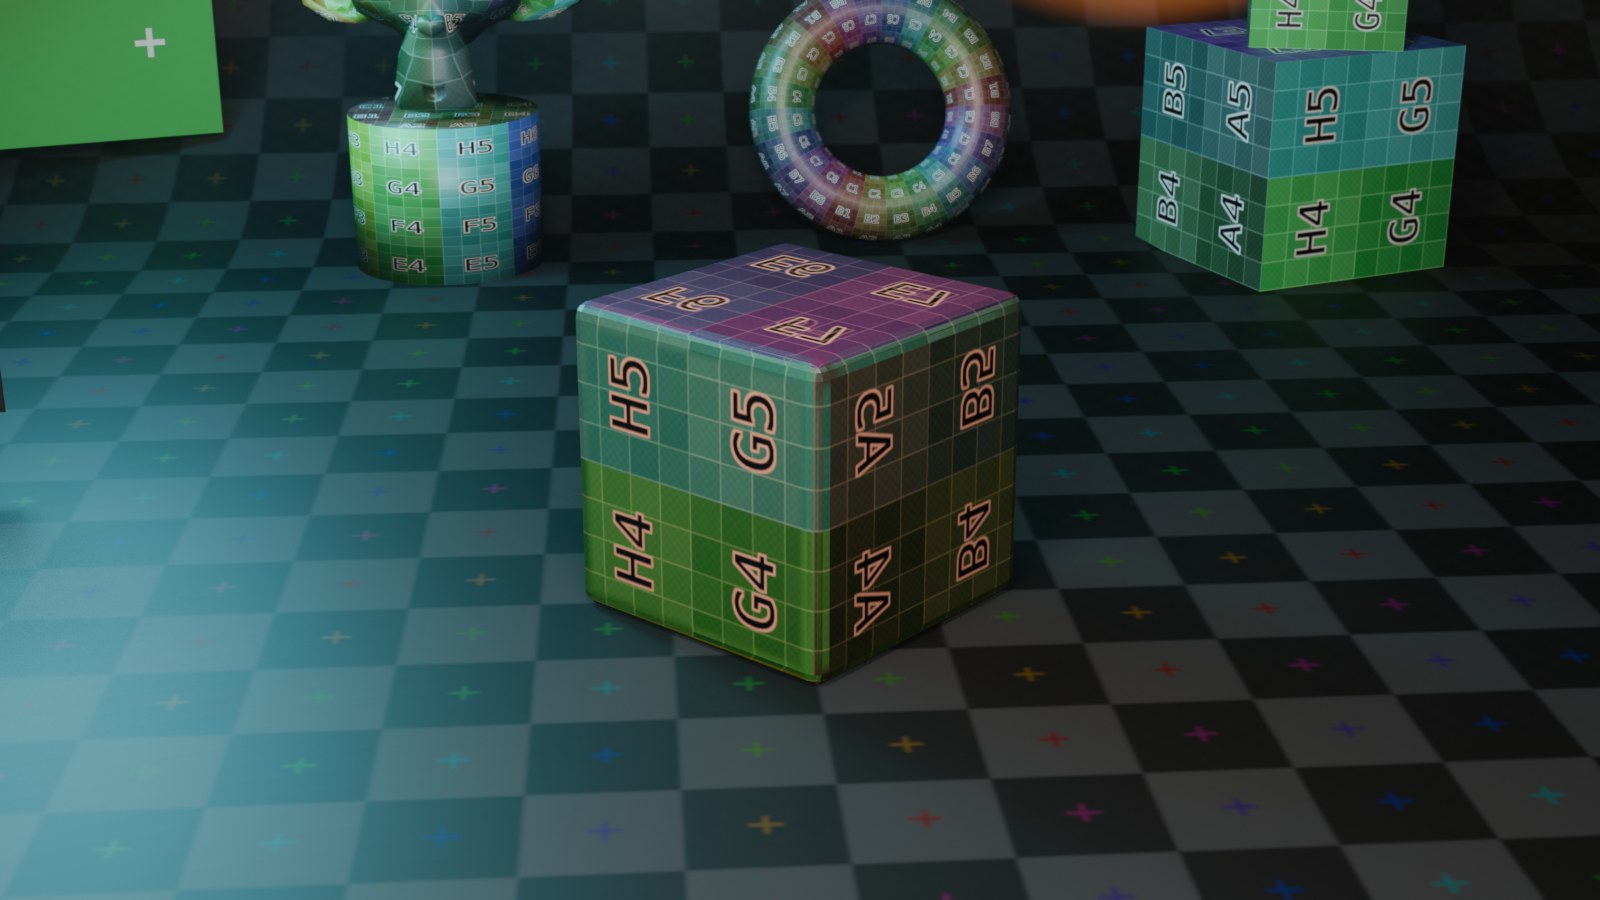 StartKlaar